• Tech
    • Tech Category
      • Engine
      • Bottom End
      • Rods and Pistons
      • Head and Headwork
      • Cams and Valvetrain
      • Cooling and Heat Management
      • Intake
      • Headers and Exhaust
      • Rotary
      • Engine Management and Tuning
      • Drivetrain
      • Transmission
      • Clutch and Flywheel
      • Differential and Final Drive
      • Driveshaft and Axle
      • Axles
    • Tech Category
      • Suspension
      • Shocks and Coilovers
      • Springs
      • Swaybars
      • Arms and Links
      • Bushings
      • Steering
      • Geometry Correction
      • Suspension Setup and Tuning
      • Brakes
      • Wheels and Tires
      • Fueling
      • Forced Induction and NOS
      • Aerodynamics
    • Tech Cat
      • Electrical
      • Battery and Power Distribution
      • Electronics
      • Wiring
      • Electrical System Education and Troubleshooting
      • Lubrication
      • Interior and Controls
      • Exterior
      • Paint and Bodywork
      • Wraps and Film Protection
      • Exterior Care and Maintenance
      • Data Acquisition and Tuning
      • Fabrication and Safety
      • Tips and How-To
  • Projects
    • Make A-D
      • Acura
      • Integra (DC2)
      • NSX
      • CSF RSX (DC5)
      • BMW
      • E30 (SR20 Powered)
      • E36 323is
      • E36 M3 (Black)
      • E36 M3 (Silver)
      • E39 M5
      • E46 M3
      • E90 M3
      • E46 Racecar
      • Yost Auto E92 M3
      • Yost Auto F82 M4
      • Chevrolet
      • Camaro Gen5
      • Corvette Stingray (C7 Z51)
      • Corvette Stingray (C8 Z51)
      • GMC Canyon
      • Dodge
      • Viper GTS
    • Make E-I
      • Ford
      • E350 Tow Rig
      • F150 EcoBoost
      • Fiesta ST
      • Focus ST
      • Mustang 5.0 (Grey)
      • Mustang 5.0 (White)
      • Mustang S197 (Budget Track Car)
      • Mustang S550 GT
      • Honda
      • Civic EF Racecar
      • Civic Si (Coupe)
      • Civic Si (EP3)
      • Civic Si (Saloon)
      • EJ Civic
      • Polystrand CRX
      • S2000 (AP1)
      • S2000 (AP2)
      • Infiniti
      • G20 Racecar
      • G20 (P10 AWD Turbo)
      • G35
      • G37S
    • Make J-M
      • Isuzu
      • Vehicross
      • Lexus
      • ISF
      • SC300
      • Mazda
      • V8 RX7 (3rd Gen)
      • RX-7 (3rd Gen)
      • RX-7 Restomod (3rd Gen)
      • Skyactiv 3
      • Frankenmiata
      • Miatabusa
      • My Girlfriend’s Miata
      • Mitsubishi
      • EVO VIII
      • EVO IX
      • EVO X
      • CSF EVO X Racecar
      • Professional Awesome EVO VIII
    • Make N-P
      • Nissan
      • 200SX
      • 200SX SE-R
      • 240SX Land Speed Racer
      • 300ZXTT
      • 350Z
      • 350Z Drift Car
      • 370Z
      • GT-R (R33)
      • GT-R (R35)
      • GT-R (Team America BNR32)
      • LS S13
      • NX GTi-R
      • Pathfinder
      • S13 Drift/Grip Do-it-All Mega 240
      • Sentra SE-R
      • Sentra Spec V
      • Silvia
      • STurdteen Drift Car
      • Porsche
      • 991 GT3RS
      • Cayman (987)
      • Cayman T
      • Cayman GTS 4.0
    • Make S-Z
      • Scion
      • FR-S
      • Scion Tuner Challenge FR-S
      • TC
      • Subaru
      • Autocross BRZ
      • Legacy GT
      • STI (gen 2)
      • STI (gen 3)
      • WRX (GD)
      • WRX (VA)
      • Toyota
      • 4Runner
      • AE86 Corolla
      • GR Corolla
      • Starletabusa
      • Supra Mark IV
      • Tacoma
      • Tundra
      • Volkswagen
      • MKIV Jetta TDI
      • MKVI Golf TDI
      • MKVII Golf R
      • Sipster (Rabbit)
    • Other Projects
      • Powersports
      • Aprilia RS50
      • Aprilia SR50
      • Doodlebug
      • Ducati 998
      • Ducati Hypermotard
      • Honda Ruckus
      • Husqvarna TE610
      • Go Karts
      • Other
      • Sim Racer
      • Aurora Cobra
      • Garage
      • NP01 Prototype
  • Features
    • Features
      • Feature Cars
      • Drag Race Cars
      • Drift Cars
      • Land Speed Cars
      • Open-Wheel Cars
      • Rally Cars
      • Road Race Cars
      • Street Cars
      • Time Attack Cars
      • Drag Racing
    • Features
      • Events
      • Drifting
      • Land Speed Racing
      • Open-Wheel Racing
      • Time Attack Racing
      • Rally Racing
      • Road Racing
      • Car Shows
      • Columns
      • SlipAngle Podcast
  • Video
  • Shop *NEW*
  • MotoIQ Garage Services
  • About
  • Shop *NEW*
  • MotoIQ Garage Services
  • About
MotoIQ
MotoIQ
  • Tech
    • Tech Category
      • Engine
      • Bottom End
      • Rods and Pistons
      • Head and Headwork
      • Cams and Valvetrain
      • Cooling and Heat Management
      • Intake
      • Headers and Exhaust
      • Rotary
      • Engine Management and Tuning
      • Drivetrain
      • Transmission
      • Clutch and Flywheel
      • Differential and Final Drive
      • Driveshaft and Axle
      • Axles
    • Tech Category
      • Suspension
      • Shocks and Coilovers
      • Springs
      • Swaybars
      • Arms and Links
      • Bushings
      • Steering
      • Geometry Correction
      • Suspension Setup and Tuning
      • Brakes
      • Wheels and Tires
      • Fueling
      • Forced Induction and NOS
      • Aerodynamics
    • Tech Cat
      • Electrical
      • Battery and Power Distribution
      • Electronics
      • Wiring
      • Electrical System Education and Troubleshooting
      • Lubrication
      • Interior and Controls
      • Exterior
      • Paint and Bodywork
      • Wraps and Film Protection
      • Exterior Care and Maintenance
      • Data Acquisition and Tuning
      • Fabrication and Safety
      • Tips and How-To
  • Projects
    • Make A-D
      • Acura
      • Integra (DC2)
      • NSX
      • CSF RSX (DC5)
      • BMW
      • E30 (SR20 Powered)
      • E36 323is
      • E36 M3 (Black)
      • E36 M3 (Silver)
      • E39 M5
      • E46 M3
      • E90 M3
      • E46 Racecar
      • Yost Auto E92 M3
      • Yost Auto F82 M4
      • Chevrolet
      • Camaro Gen5
      • Corvette Stingray (C7 Z51)
      • Corvette Stingray (C8 Z51)
      • GMC Canyon
      • Dodge
      • Viper GTS
    • Make E-I
      • Ford
      • E350 Tow Rig
      • F150 EcoBoost
      • Fiesta ST
      • Focus ST
      • Mustang 5.0 (Grey)
      • Mustang 5.0 (White)
      • Mustang S197 (Budget Track Car)
      • Mustang S550 GT
      • Honda
      • Civic EF Racecar
      • Civic Si (Coupe)
      • Civic Si (EP3)
      • Civic Si (Saloon)
      • EJ Civic
      • Polystrand CRX
      • S2000 (AP1)
      • S2000 (AP2)
      • Infiniti
      • G20 Racecar
      • G20 (P10 AWD Turbo)
      • G35
      • G37S
    • Make J-M
      • Isuzu
      • Vehicross
      • Lexus
      • ISF
      • SC300
      • Mazda
      • V8 RX7 (3rd Gen)
      • RX-7 (3rd Gen)
      • RX-7 Restomod (3rd Gen)
      • Skyactiv 3
      • Frankenmiata
      • Miatabusa
      • My Girlfriend’s Miata
      • Mitsubishi
      • EVO VIII
      • EVO IX
      • EVO X
      • CSF EVO X Racecar
      • Professional Awesome EVO VIII
    • Make N-P
      • Nissan
      • 200SX
      • 200SX SE-R
      • 240SX Land Speed Racer
      • 300ZXTT
      • 350Z
      • 350Z Drift Car
      • 370Z
      • GT-R (R33)
      • GT-R (R35)
      • GT-R (Team America BNR32)
      • LS S13
      • NX GTi-R
      • Pathfinder
      • S13 Drift/Grip Do-it-All Mega 240
      • Sentra SE-R
      • Sentra Spec V
      • Silvia
      • STurdteen Drift Car
      • Porsche
      • 991 GT3RS
      • Cayman (987)
      • Cayman T
      • Cayman GTS 4.0
    • Make S-Z
      • Scion
      • FR-S
      • Scion Tuner Challenge FR-S
      • TC
      • Subaru
      • Autocross BRZ
      • Legacy GT
      • STI (gen 2)
      • STI (gen 3)
      • WRX (GD)
      • WRX (VA)
      • Toyota
      • 4Runner
      • AE86 Corolla
      • GR Corolla
      • Starletabusa
      • Supra Mark IV
      • Tacoma
      • Tundra
      • Volkswagen
      • MKIV Jetta TDI
      • MKVI Golf TDI
      • MKVII Golf R
      • Sipster (Rabbit)
    • Other Projects
      • Powersports
      • Aprilia RS50
      • Aprilia SR50
      • Doodlebug
      • Ducati 998
      • Ducati Hypermotard
      • Honda Ruckus
      • Husqvarna TE610
      • Go Karts
      • Other
      • Sim Racer
      • Aurora Cobra
      • Garage
      • NP01 Prototype
  • Features
    • Features
      • Feature Cars
      • Drag Race Cars
      • Drift Cars
      • Land Speed Cars
      • Open-Wheel Cars
      • Rally Cars
      • Road Race Cars
      • Street Cars
      • Time Attack Cars
      • Drag Racing
    • Features
      • Events
      • Drifting
      • Land Speed Racing
      • Open-Wheel Racing
      • Time Attack Racing
      • Rally Racing
      • Road Racing
      • Car Shows
      • Columns
      • SlipAngle Podcast
  • Video
  • 200SX
  • Tech
  • Projects
  • Nissan

Project 200SX: Time Trial Bound – Part 1

  • WesDumalski

,

H.P.D.E. 2 – This group shares the track with H.P.D.E. 1 with the main difference being that an instructor is no longer required to ride with you. Keep in mind that in car instruction is available if you ask, and we recommend you take advantage of the vast amount of knowledge the instructors can offer. In 2 you will learn some more advanced techniques and begin exploring the limits of the car. Passing rules are the same as H.P.D.E. 1 as the focus is on learning proper driving technique not wheel to wheel racing with others. 


Apparently they forgot “is not a track day hero” under the group 2 milestones…


H.P.D.E. 3 – The jump up to group 3 is not a small one. Group 3 shares the track with H.P.D.E. 4 in some N.A.S.A. regions and as such you are on track with much faster drivers with more liberal passing rules. The focus here is learning advanced driving techniques such as double clutching and heel toe down shifting as well as threshold and trail braking. Essentially this is the real start of prepping for being on track with other cars at speed with no passing rules. 


H.P.D.E. 4 – The most advanced group is reserved for the seasoned driver who is comfortable passing or being passed anywhere on the track. Group 4 often runs with the TT drivers and as such it is as close to wheel to wheel racing as one gets in a non-competitive environment. Many drivers who do not have the desire to compete for lap times will stay in group 4. For those who wish to move on to TT you must prove you have what it takes by mastering group 4. 


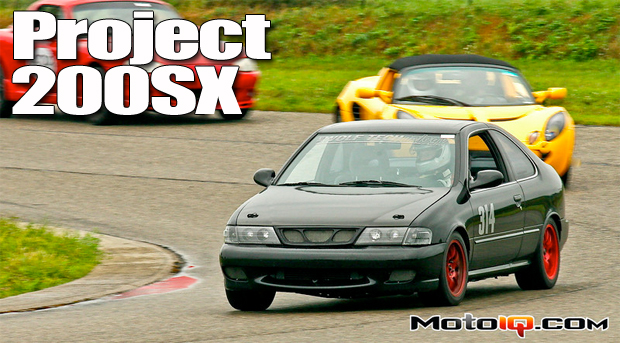
For our first event with N.A.S.A. we used their H.P.D.E. calculator to determine what run group we should register for… Based on our previous track experience with Project 200SX we considered going right to 3-4 however we decided it was smarter to start lower and move up if speed warranted. We registered for group 2 and headed to the garage to make sure the car was ready for two straight days of track abuse. We loaded up our rig and headed to Autobahn Country Club in Joliet for our first N.A.S.A. event.  Upon arrival the first thing we noticed was the sheer # of people and cars at the event. With all of the different HPDE and race groups and the sheer # of people driving, organization is paramount. The event is ran like a finely oiled machine and a schedule is strictly adhered to. This made it easy to determine when exactly you were going to be on track and how much time you had between sessions for repairs etc… We unloaded our car, attached our numbers and headed towards tech. The car passed without issue and we took the time before the driver’s meeting to check all fluid levels and torque all lugs. We attended the mandatory driver’s meeting and were then broken up in to our respective run groups. We reported to our classroom to meet our head instructor and get prepped for time on track with N.A.S.A. Your usual things are discussed in class, passing zones, point by to pass rules, flags, and general safety. With these formalities out of the way it was time for our first session. 


Having driven at Autobahn’s South Course one other time we were well aware of its layout and the proper driving line. This weekend would be the ideal time to perfect our line and build up speed. We hit the grid behind about  ten cars of various makes and models not really knowing what to expect. With N.A.S.A. being a large organization the cars and speed have the ability to vary greatly.


As the grid marshall released us we took to the track…. After a warm up lap I was quite surprised to find what I considered to be a funeral procession. I was half wondering if people were still warming up or they were driving at speed. What I quickly realized was that this was certainly a group of people that were new to the track, I wasn’t quite sure what to expect relative to passing etiquette. Not that we were the fastest thing on 4 wheels but our track experience and the car’s ability  certainly proved to be fast within groups 1 and 2. What surprised me the most was the awareness and etiquette of the other drivers. Many of you will understand what I mean when you plant your shitbox firmly on the rear end of some exotic only to find that “Richard Allister’s” ego is too big to let you pass, that or he can’t see the mirror around his huge head. While there are assholes in every organization this was not the norm with N.A.S.A. as it is with many other “track day” only clubs. Perhaps the fact that you will be face to face with all the other drivers in your group and discussing the session incidents that helps to keep egos in check. The first session was spent learning how to be comfortable on track with drivers I was not familiar with and adjusting to the large differences in speed between the different vehicles. Initially my thoughts were that it might be a good idea to request a check ride to move in to group 3-4. However after the download something occurred to me. I was there to learn, NOT to be a track day hero. I checked myself and decided I could learn a LOT by spending the next 2 days in this group. 


If being on track with fast cars isn’t humbling enough then the paddock will be. What you can’t see next to our rig is the OTHER ST1 viper parked behind the black one and the stacker trailer rig to the left of the cars….


In all honesty the decision to stay in group 2 for the weekend was a very wise one. I learned a GREAT deal about being around people on the track. Setting myself up to overtake properly in the passing areas as well as looking out for others that were faster. I gained a ton of confidence with car placement, following distance, and how to react to different situations. N.A.S.A. also does flag drills at random times to make sure you are paying attention to the corner stations. In one instance they ended the session under red flag, then progressed to full course black to bring us in. I gained a lot of perspective on where I should be focusing my attention as it is VERY easy to get caught up in lapping. After spending the weekend in HPDE 2 I felt as if I was ready for a check ride to group 3 on my last session. 


Related

Previous page 1 2 3Next page
Previous Article
  • Uncategorized

Formula Drift Mid-Season Report: Is It Really The Tires?

  • JustinBanner
View Post
Next Article
  • Features

VIDEO: 7 1/2 Laps With Dai Yoshihara

  • Jeff Naeyaert
View Post

Leave a Reply Cancel reply

Your email address will not be published. Required fields are marked *

Input your search keywords and press Enter.