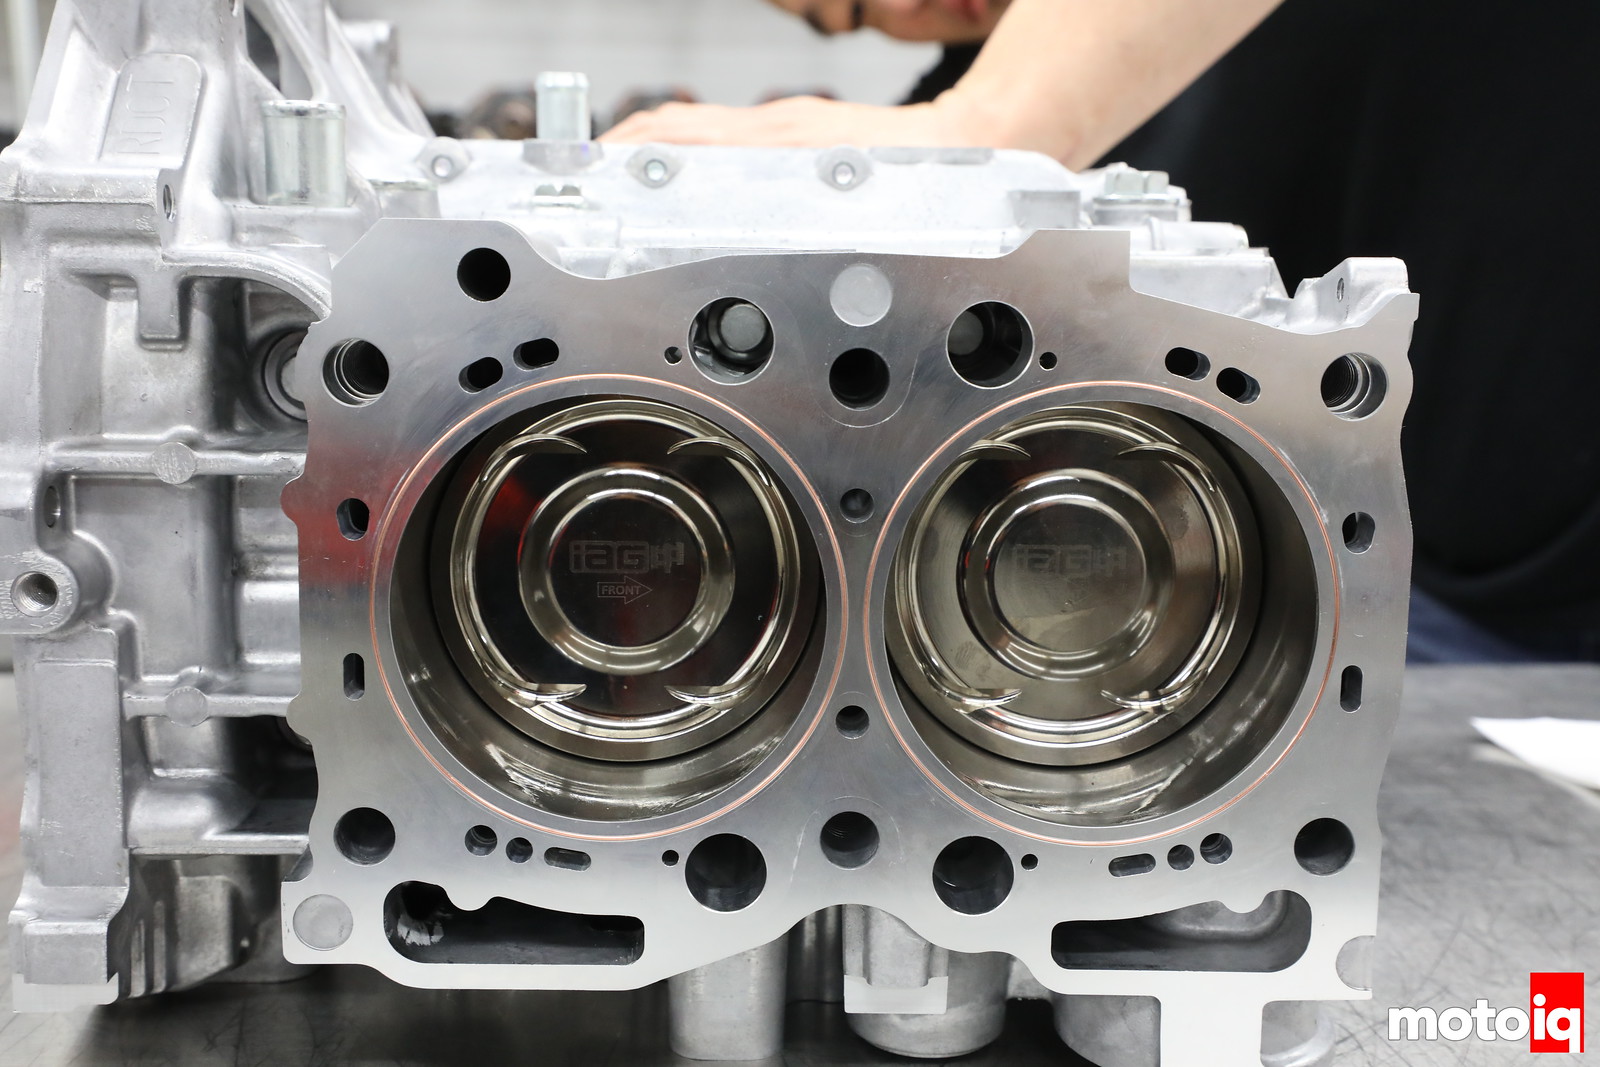
When the wire is nearly fully in the groove it is carefully cut to length slightly long.

The end of the wire is then filed for a perfectly flat, tightly butted fit.

The wire is then fully tapped into the block.

Here is the installed o-ring in the deck of the block. No more Subaru blown head gaskets!

With the o-rings installed, our short block then moves into the next clean room for final assembly.
Stay tuned as in our next episode we show the details of how IAG installed the heads, cams, and the front end of the engine.
Read all about project STI and the other chapters of this engine assembly!
Souces
IAG Performance
WPC Treatment
CTP Cryogenics


10 comments
Fantastic series Mike. Seeing this level of detail is masterful.
Is the situation with assembly of the piston pins the same for 6-cylinder boxer engines? I can’t imagine how you would get the pin into the center cylinders.
Also, there must be an obvious reason why the block can’t be assembled with the pistons, but I am kinda spacing it. For the Boxer builders, how does ease of assembly compare to straight engines?
Now, I am really curious as to how Porsche assembled their flat-12s. Going to have to do some Googling, I guess.
At least the older air cooled Porsche stuff is different because the cylinders come off the block individually.
Yes Joe.
let us know what you find out
I forgot about the air cooling. I am sure that the same situation applies for the big 12 as Dan mentioned.
I did find a decent build video for the Water Cooled Porsche Flat-6 but it looks exactly as hard as I thought it would be. Knowing Porsche, they probably have a special assembly tool at the factory for getting that pin in more easily. Or maybe some special jig?
Oh, I am sorry. Obviously, the rod bolts can’t be torqued. I knew it was something simple.
The rod bolts can be torqued but the stretch which is the proper technique is used.
Love it – i wish i could have this build.
What is the copper wire diameter and how much it sticks out of the block deck?
Don’t know didnt ask