Build Your Own 370Z: Photoshop and Illustrator
By Charlie Barnes
For all you dreamers and customizers alike, one thing we all have in common is the desire to put our “wonders” into some sort of reality. I wanted to see what the Nissan 370Z looked like in different skins, and maybe even possible making my own wallpaper. I then contacted Mike Kojima and asked for some 370Z images to make my digital drawing a reality. I soon found myself very impressed with the lines of this car. It definitely has the classic 240Z feel. At first glance, I do confess, felt it was another heavy 350Z with a facelift, but that soon all changed as I started to redraw this fine piece of machinery using adobe illustrator.

Using the Pentool in illustrator, I began to trace all the major lines of the car (Outside perimeter, hood, windows, wheels, headlights, etc.) with a stroke of 2pt. I like defining the major lines first to differentiate them with the body lines. As I proceeded to do the body lines, I used a stroke of 1pt so they are less intrusive but still shows shape. I used a Yellow color to help see my lines on top of the 370Z image. After finishing up the contour lines, I changed the Iine color back to black. Now, the line drawing was ready for some color.
I then saved the image as an AI file and then opened up Photoshop to do some digital painting. As you can see from the samples, there are different ways to approach this. I will show the most basic way and you can go from there.
In Adobe Photoshop, open your line-art graphic and on your LAYER menu, go to Normal, then Multiply. This removes all the white out of your line drawing and gets you ready to color.

On your top menu bar, go to Layer, New, Layer it the letter “G” for your Paintbucket tool and change your foreground color to white. Click OK when you are done and fill layer 2 with white using the Paintbucket tool.
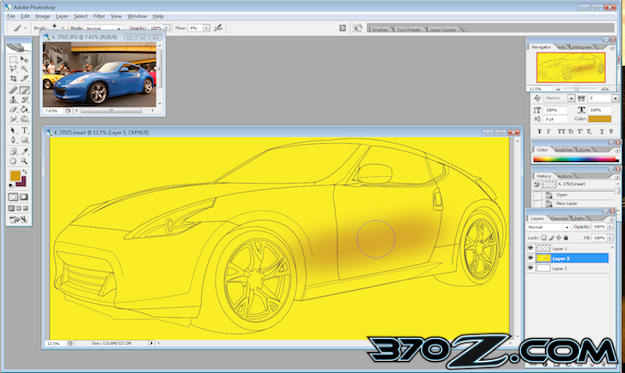
Now that you have your white background, create another layer for your color. This time I chose Yellow. I again used the Paintbucket to fill Layer 3 with Yellow. This will be the base of your car. Using the original image as a reference, I began to shade the paintjob using the paintbrush tool with an Opacity of 8 with a darker brown-orange color. I continued to “paint” with this process until I was done shading.
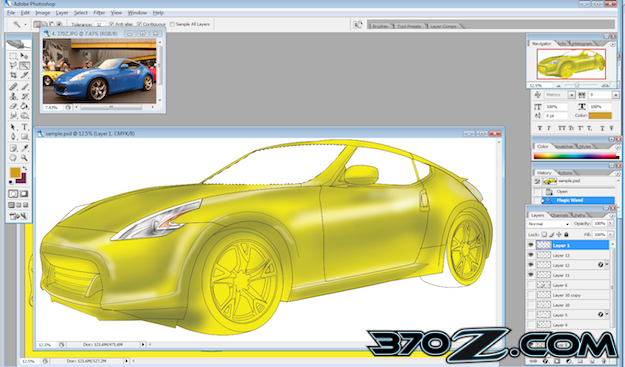
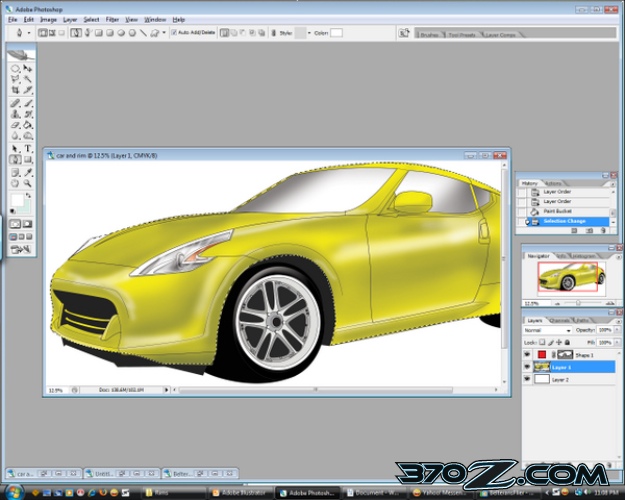
Using the Magic Wand Tool or “W” I went to the original line art layer(layer1) and hit SHIFT and proceeded to click on the windows. Once they were selected, I began to color the windows with a black and grey for some window detail. I did the same technique for the Tires and Wheels, Headlights, and Grill.
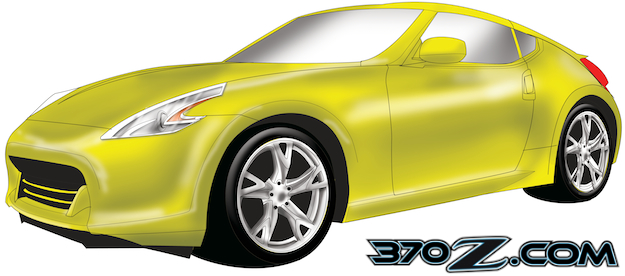
Now, here is the final product. It is a simple way of laying down some digital paint with out going to the dealership just to see one in your favorite color. Here are a few other samples of different techniques to do digital paintjobs. The possibilities are endless! Have fun Rendering!


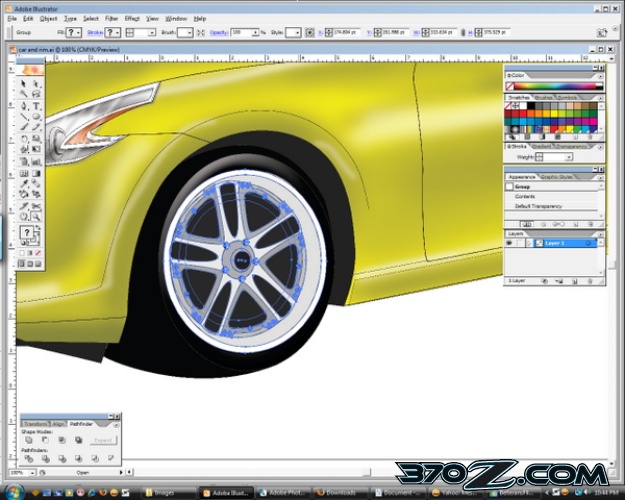
Now that we got our car drawn out and colored, it is time to put some new kicks. In this case, I chose the VOLK GT-V's. Googling the infamous World Wide Web, I found my VOLK GTY-V's and started to trace the wheels.

1. Using the Elipse Tool in Adobe Illustrator, I traced the outside most radius of the rim. I also removed the FILL so I can see in the middle of the rim. I also changed the stroke to Red.

2. Using the Pen Tool, I started to trace the rest if the detail of the rim until I got the detail I wanted.

3. Now that I got the rim drawn out in Illustrator, I made sure I added the right colors to it. Im now ready to start matching it to the 370Z we did earlier.

4. Using the Free Transform Tool, I stretched out the Volk GT-V rim to be a little bigger than the original 370Z rim. I decided to make the rim a WHOPPIN' twenty inches compared to the stock nineteen inch rims.

5. Using the Direct Selection Tool, I started moving the Lug Bolts,and the Center Cap.

6. I also begam to move the Outer Lip of the rim to give the illusion of looking at it from an angle.

7. Now, I am ready to move the Volk GT-V into place over the Stock Rim.
8. BAM! There you go! I did the same thing for the rear of the 370Z.
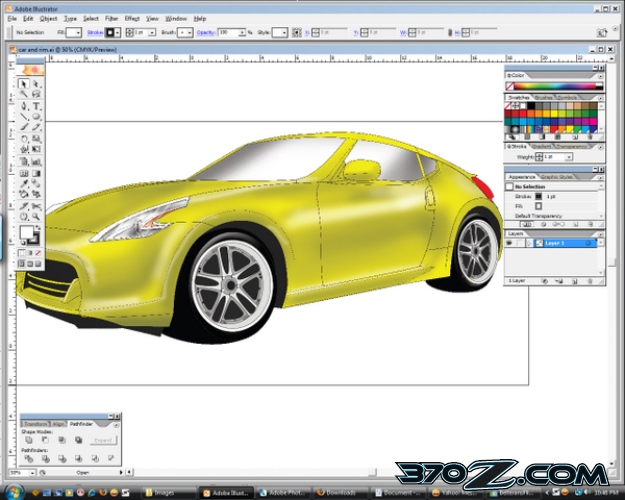
9. Almost Done! It's lookin' KILLER!
10. Now after saving my work in Illustrator, I opened my artwork in Adobe Photoshop. With the Pen Tool, trace around the 370Z except for the tires and wheels. Remember to take the Opacity to Zero on the Shape Layer in your Layers Palette. Once you are done, click the outline on the Shape 1 Layer pallete so the 370Z is slected.
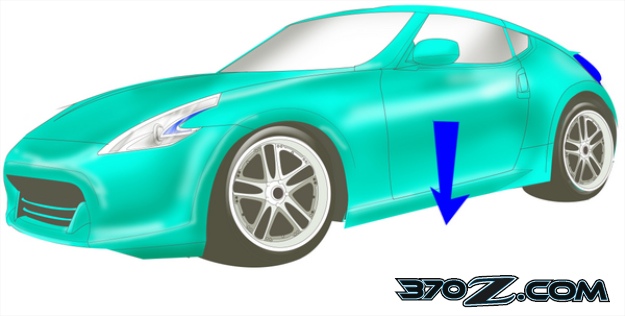
11. With the Move Tool, drag the 370Z down to the desired ride height. I also played with the color. I clicked on Image/Adjustments/Hue and Saturation and played with it to get the desired color. I chose this blue/green color.

12. There you go! Your lowered and rimmed 370Z!
370z Article 3:Adding your Aero Kit!

After sketching up the body kit, I traced it up with the PENTOOL in Adobe Illustrator. As you can see, the body kit has raised wheel wells compared to the stock ones. This was necessary to give it a more JGTC look suggested my Nissan Genius Mike Kojima. I also added a splitter and wide flared fenders for that awesome wide wheel look. Louvers for the front fender flairs added a nice touch as well. Now that we have the design, I saved it and opened it up in Adobe Photoshop.

I selected the body kit drawing and copy/pasted it so it would automatically create another layer.

We are now ready to color. I played it safe and gave it a base of white.

After adding the base of white, I went ahead and shaded the darker areas by using the brush tool on your toolbar and bringing down the pressure to about 8% and hardness to 0. The size will vary depending on what you are shading.
I also started to make the windshield more realistic with some detail.

Now, time for the details. I colored in the trim and splitter. I gave the wheels a little polished look to give it a more realism.
Other stuff I colored in like the yellow headlights, etc.

Now, adding the sponsor decals to make the car more official.

I then added a race graphic I drew up really quick for that flair.
One more thing I forgot, our Ace Driver’s name Annie Sam!

Now to finish the drawing/painting with a back ground.

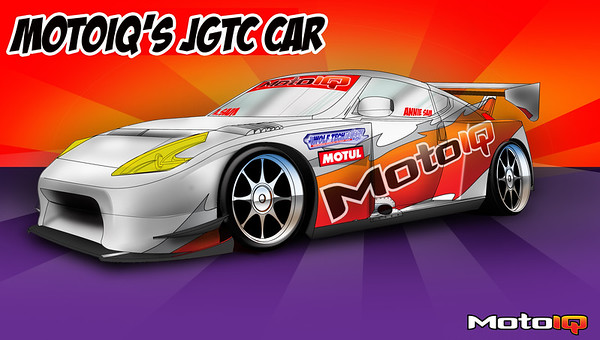
Last touch by any arteest, the signature. BAM! There ya go. Your built 370Z ready for some JGTC action!
There you have it. From start to finsih, from Basic car to Radical Race Car. I always wanted to design my own cars, maybe this is a good start. Thanx for reading peeps. I'll see you all Around!