,
Use the combination of bends in your design and the ribs of the material to get stiffness in the directions you need it. You can make it bend precisely across the ribs without buckling them by cutting a V-shaped groove where you want the corner to be. If the bend is parallel to the ribs, just trim out the face panel of one channel on the concave side of the bend. The remaining face panel will make a hinge with a smoothly curved surface on the outside. Make sure you account for some bend radius in setting up your dimensions if the design is sensitive to such changes.
On the engine side, I used Cardboard Aided Design to make brackets to install a thin SPAL electric puller fan on the Volvo radiator's fan shroud mounting points. With attention to detail and strategic bends, the 0.060-in aluminum sheet mounts came in at 14.3 grams each.
Cardboard Aided Design works for smaller parts, too. As delivered by Husqvarna, the luggage rack on Project TE610 was supported entirely by the cantilevered, forged aluminum fingers at the rear of the subframe, which are attached by what amounts to a butt weld on 1-in square tubing. The factory rack has a 9kg load limit warning cast in, but 15 or 20 miles of washboard roads at the right frequency have been known to fatigue and break those welds with half that load on the rack.
Note that this problem is not unique to the Husqvarna. The Honda XR650L commonly cracks its non-removable, steel subframe at the equivalent location. The XR650R doesn't even come with anything but plastic past the point where the upper and lower subframe tubes meet. It's a race bike, after all. If you search for pictures of reinforcements to that area on the web, for TE610s or XR650Ls, the typical approach is to weld on a few giant plates and hack up the plastic to clear it. That level of ugliness has its place, such as when trying to distract LeMons BS judges from your real innovation and craftsmanship. An Italian sweetheart with Swedish ancestry deserves better.
 |
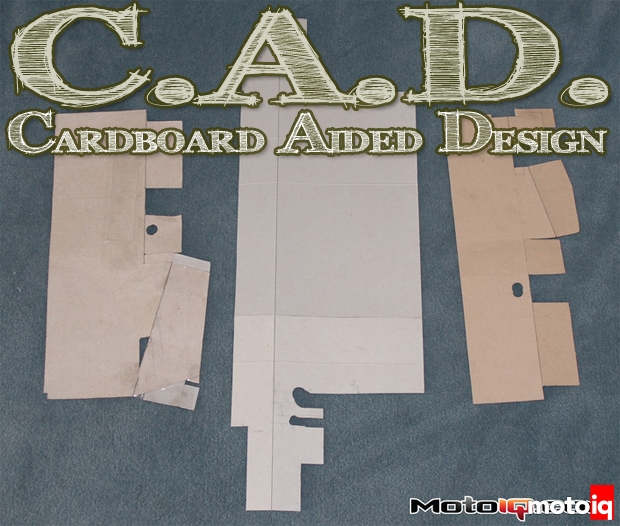
I gusseted across the weld on each side of the subframe end. Here's my CAD template for the upper gusset, connecting from as far back along the forged finger as it can reach, up the crossmember to the next longitudinal element, and using all the available space around the plastic fender. The compound angles and curves are complex and difficult to measure, but the cardboard template can be marked and trimmed a hair at a time until it is just right, much faster than aluminum. |
 |
The final result on the Husky's subframe, with the 1/8-in aluminum gusset above and 1/4-in plate (same thickness as the finger) added below. The lower gusset is deceptively complex, following the curves of the forged finger, clearing the existing weld rather than grinding it away, and fitting in the space between the subframe and the fender, which tapers in multiple directions. |
Use of Cardboard Aided Design helped the metal subframe reinforcements fit right the first time. As always, the welding by Zenith Performance Fabrication is beautiful. I'm pretty sure that if this subframe ever breaks, my biggest concern will have more to do with finding the nearest hospital than with finding someone to weld the bike. CAD technology was used for the gussets on Project TE610's battery tray, too.
Making a part out of cardboard before making the one that ends up on the car can help make nicer parts, whether they're going to end up on a Rolex GT car, my projects, or yours. You don't need a multi-thousand-dollar user license and vocational training courses to use it. You don't even have to be smarter than a fifth grader. Call it fourth grade arts and crafts.
Zenith Performance Fabrication