,
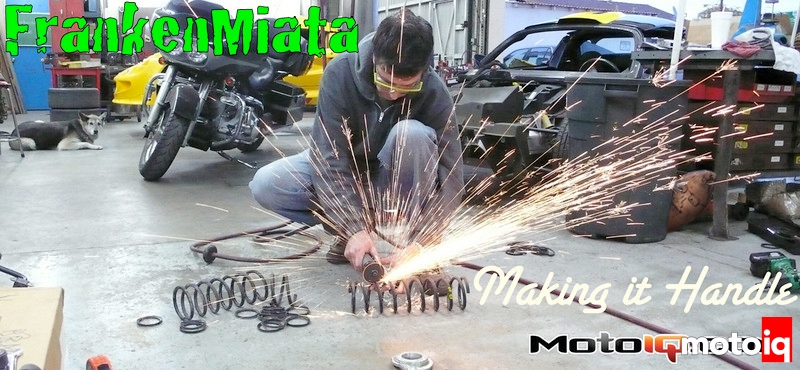
Sway Bars
Sway bars are the tuning tool of choice in LeMons. They’re cheap, easily adjusted, and, if you’re creative, can be cross-pollinated between unrelated cars. On a front-drive car, a massively-stiff rear bar can make understeer a distant memory. On a Miata, though, the quest is to maintain the near-perfect balance of the original car while knocking down the body roll to a less bump-stop-punishing level.
Keeping the front to rear roll stiffness distribution, or roll couple, where we wanted it meant that we had to understand some basics of how sway bars work.
|
|


This simple formula tells you how to calculate sway bar stiffness, which is virtually useless by itself. But for comparing bars its incredibly useful. Again, we set up a simple spreadsheet and started crunching numbers. The stock front and rear sway bars are 263 and 89 pounds per inch respectively.
 | ||
The end link, on (right) was fabricatedby welding leftover heim joints from our CR-X LeMon rear sway bar (which was actually a Mazda3 bar) to the bottom half of the stock Miata end link. To everyone’s amazement, this has not broken yet. |

A couple of our drivers have a street/track Miata that handles remarkably well on stock springs and shocks with just Racing Beat sway bars. We decided to aim for that performance on our car. Measuring the Racing Beat bars, including the wall thickness of the hollow front bar, and the lever arm of the adjustable bars in the settings that seemed to work best on the track, we calculated 575 lb/in in front and 224 lb/in in the back.
If you haven’t figured it out already, you calculate the stiffness of a hollow bar my first calculating the stiffness of a solid bar the same size, then subtracting the stiffness of the smaller bar that’s missing from the middle of it. A 1-inch bar with a 0.25″ wall thickness, for example, has a 0.5-inch bar missing from the middle of it. 1-inch bar minus 0.5-inch bar gets you the answer.
During our initial testing, we found the car was better able to put down its massive 144 turbocharged horsepower with the rear bar disconnected, so we took our 575/224 target and subtracted one stock rear bar (89 lb/in) to make a new target of 575/135.
 | Our rear bar was stiffened by welding a tab to each arm, giving us a new end link attachment point that shortens the lever arm 3/4 of an inch. To keep the end link nice and vertical, we moved it from the middle of its factory double-shear mount and hung it off the back of the mount instead. The rear tab of the sway bar mount was reinforced by welding a Honda engine lifting bracket to it, and a single-shear ball-joint style end link was fabricated from an S13 rear end link welded to the top half of the stock Miata link. | |
So, how to reach this target? Turns out the same couple with the Miata also have an FD RX-7 garage queen that has some sort of aftermarket front sway bar on it. The stock bar was hiding in the back of the garage. Though it doesn’t exactly bolt into a Miata, the RX-7 bar is remarkably close. With just a little welding we could make it fit.
According to the spreadsheet, the RX-7 bar was 519 lb/in. Since the ends of the bar are an odd pin-mount, there was no simple way to add holes for extra adjustability. We were stuck with 519. Since that’s 9.8% lower than our target, we just lowered our rear target 9.8 percent to match, bringing it down to 122 lb/in.
It turns out if you just shorten the arms on the stock rear bar by 3/4 of an inch, its 124 lb.in. Just like that, we’re on target.
Of course, we were under no illusions any of this would work. This formula is a nice theory, but little details like end link angularity and deflection, bushing deflection, the bending of the sway bar’s arms and, of course, measurement error, are all unknowns. There’s also the rather spurious way we came up with our targets. They were, at best, a good place to start.
Hoping to give ourselves something to tune with, we took the stock Miata front bar and figured out that if we welded 13.2-inch arms onto it (the stock rear arms are only 4.75 inches), it would be 122 lb.in. So we did that. Then we drilled extra holes in the arm, giving us 143 and 106 lb/in as options. We then fabricated a crudely elaborate mount to hang this new bar under the trunk, just above the muffler. If the modified stock bar didn’t make us happy, we could bolt the old front bar onto the back and play around.
Remarkably, the shortened stock bar did work. We still tried the heavier adjustable front bar in the back, but the balance was always better with the smaller bar. And so it was. Our goofy target was good enough.
 | ||
| Welding huge arms onto the stock front bar made it as soft as our modified rear bar and gave us adjustability the stock bar didn’t have. The sway bar mount, shown here during fabrication, ended up with multiple mounts, so the entire bar could move forward or backward to keep the end link geometry nice and square no matter which holes were used. We used this contraption during testing, but in the end, the stock bar (still bolted to the subframe in this picture) worked best. |
Top Mounts
 | ||
| The NB top mount, on the right, holds the top of the shock higher in the body, giing more compression travel. The upper spring seat is also higher, which lowers the car. Thanks to the shock mount, though, this lowering doesn’t come with a bumpstop pounding penalty. |
That stuff I said about not lowering your Lemon? Well, if you can find some way to do it that doesn’t reduce suspension travel, you’re golden.
NA Miata top mounts are unusual in that the spring and shock are both isolated from the body by a big, squishy rubber bushing. More importantly, though, they hold the top of the shock lower on the body than the later, NB top mounts, reducing available compression travel. Swapping to NB top mounts both gives you 3/4″ more compression travel by raising the top of the shock, and lowers the car about 3/4″ by moving the top of the spring up a similar amount.
It took us several months to stumble into free NB top mounts, but when we did, we made the upgrade. The only complicating detail when doing this swap is that the threaded portion on the top of NA shocks is only designed to thread through the thin steel of the NA top mount, while the NB shocks have a longer threaded stem designed to pass through the two thick rubber bushings that sandwich the steel of the NB mount. There is no way to get both those rubber bushings on the NA shock.
 | ||
 Putting an NA shock in an NB top mount is a little complicated. First you have to slice the NB bushing into slivers, then use these thinner bushings to accomodate the NA shock’s shorter shaft. Putting an NA shock in an NB top mount is a little complicated. First you have to slice the NB bushing into slivers, then use these thinner bushings to accomodate the NA shock’s shorter shaft. |
To make the NA shocks fit the NB mounts, we took one of the rubber bushings and sliced it in quarters, throwing away the top and middle sections and using the remaining bits as our new upper and lower bushings. How exactly do you slice a rubber bushing this thin? Look for a wrench tip as soon as I can find the photos.
These thin bushings don’t allow the shock to swing very far from perpendicular to the mount, and some swing is necessary as part of the suspension’s normal movement. This resistance will, in theory, put more bending load on the shocks and could posibly wear their seals faster. No problems so far, though.
Tires
LeMons rules forbid any tires with a treadwear rating under 190, forcing everyone onto honest street tires. We’ve run skinny 195/65-14 Falken Azenis RT-615s on stock 14×6-in. 1.8 Miata wheels since the beginning. Not only are these widely considered the best Lemons-legal tire (some say the Dunlop
 | ||
| We’ve been running the Azenis RT615 since the days of the CR-XXX pimpmobile with nothing but success. The balance of grip, long life, and price is impressive. |
Direzza Sport Z1 Star Spec is grippier, but they don’t come in our size, so we’ll never know), they’re dirt cheap and last an incredibly long time. If nobody flat-spots one, we can do an entire 14-hour endurance race wihtout changing or even rotating our tires and still have enough rubber left to do a track day. In the summer they tend to lose a lot of grip after 10 hours or so, but in the winter, they’re solid right up until the checkered flag.
For rain tires, we have a set of Toyo Proxes T1-Rs in the oddball size 195/55-14 (they don’t make a 65). In 11 races, including several in Northern California in the rainy season, we have never felt a single rain drop on track, so the Toyos sit mostly unused. We did one 2-hour stint on them in the dry when a downpour looked imminent, but it never rained and they proved to be rather greasy in the dry.
Alignment
The Miata comes with a very adjustable double-wishbone suspension, but this is both a blessing and a curse. You can dial in a really good track alignment without having to modify anything, but Mazda gives you plenty of rope to hang yourself with, a feature we have taken advantage of on a few occasions.
 | ||
| The camber looks extreme rolling through the pits, but even tire wear and on-track photos both show the tires perfectly straight when the car is loaded up in a corner. |
In general, what you want is enough caster to give the driver really good steering feel, enough camber to keep the contact patch flat in a corner, and just a hair of toe in at both ends for a modicum of stability.
Up front, we run maximum camber, maximum caster, and as close to zero toe as we can get without going toe-out.This makes front end alignments really easy, as you simply swing camber and caster adjusters to their max settings and then set toe with a tape measure.
After blowing up a power steering line and realizing we didn’t really need power steering anyway, we briefly toyed with the idea of running less than the maximum caster in an effort to reduce steering effort and driver fatigue. That was an unmitigated disaster. Steering effort went away completely when the car was loaded up in a corner, causing the driver to lose any feeling of grip, inadvertently make wild, erratic steering inputs, and cause the car to go into a wallowing, under-damped oscillatory fit of slowness. The number of ways the car goes dynamnically wrong with minium caster is simply shocking. We immediately swung the adjusters back to max and got on with going fast.
In the rear we’re running roughly 3/4 of max camber and, again, just a hair of toe in.
You’ll notice the complete lack of solid alignment numbers. That’s because although we have had the car on an alignment rack, double-checking the alignment with a tape measure showed that we don’t know how to operate an alignment rack. All the numbers from that rack are now suspect and have therefore been thoroughly forgotten.
-Dave Coleman
Back to The FrankenMiata Geek Hub..

Back to The Best Engineered Cars of Lemons…