• Tech
    • Tech Category
      • Engine
      • Bottom End
      • Rods and Pistons
      • Head and Headwork
      • Cams and Valvetrain
      • Cooling and Heat Management
      • Intake
      • Headers and Exhaust
      • Rotary
      • Engine Management and Tuning
      • Drivetrain
      • Transmission
      • Clutch and Flywheel
      • Differential and Final Drive
      • Driveshaft and Axle
      • Axles
    • Tech Category
      • Suspension
      • Shocks and Coilovers
      • Springs
      • Swaybars
      • Arms and Links
      • Bushings
      • Steering
      • Geometry Correction
      • Suspension Setup and Tuning
      • Brakes
      • Wheels and Tires
      • Fueling
      • Forced Induction and NOS
      • Aerodynamics
    • Tech Cat
      • Electrical
      • Battery and Power Distribution
      • Electronics
      • Wiring
      • Electrical System Education and Troubleshooting
      • Lubrication
      • Interior and Controls
      • Exterior
      • Paint and Bodywork
      • Wraps and Film Protection
      • Exterior Care and Maintenance
      • Data Acquisition and Tuning
      • Fabrication and Safety
      • Tips and How-To
  • Projects
    • Make A-D
      • Acura
      • Integra (DC2)
      • NSX
      • CSF RSX (DC5)
      • BMW
      • E30 (SR20 Powered)
      • E36 323is
      • E36 M3 (Black)
      • E36 M3 (Silver)
      • E39 M5
      • E46 M3
      • E90 M3
      • E46 Racecar
      • Yost Auto E92 M3
      • Yost Auto F82 M4
      • Chevrolet
      • Camaro Gen5
      • Corvette Stingray (C7 Z51)
      • Corvette Stingray (C8 Z51)
      • GMC Canyon
      • Dodge
      • Viper GTS
    • Make E-I
      • Ford
      • E350 Tow Rig
      • F150 EcoBoost
      • Fiesta ST
      • Focus ST
      • Mustang 5.0 (Grey)
      • Mustang 5.0 (White)
      • Mustang S197 (Budget Track Car)
      • Mustang S550 GT
      • Honda
      • Civic EF Racecar
      • Civic Si (Coupe)
      • Civic Si (EP3)
      • Civic Si (Saloon)
      • EJ Civic
      • Polystrand CRX
      • S2000 (AP1)
      • S2000 (AP2)
      • Infiniti
      • G20 Racecar
      • G20 (P10 AWD Turbo)
      • G35
      • G37S
    • Make J-M
      • Isuzu
      • Vehicross
      • Lexus
      • ISF
      • SC300
      • Mazda
      • V8 RX7 (3rd Gen)
      • RX-7 (3rd Gen)
      • RX-7 Restomod (3rd Gen)
      • Skyactiv 3
      • Frankenmiata
      • Miatabusa
      • My Girlfriend’s Miata
      • Mitsubishi
      • EVO VIII
      • EVO IX
      • EVO X
      • CSF EVO X Racecar
      • Professional Awesome EVO VIII
    • Make N-P
      • Nissan
      • 200SX
      • 200SX SE-R
      • 240SX Land Speed Racer
      • 300ZXTT
      • 350Z
      • 350Z Drift Car
      • 370Z
      • GT-R (R33)
      • GT-R (R35)
      • GT-R (Team America BNR32)
      • LS S13
      • NX GTi-R
      • Pathfinder
      • S13 Drift/Grip Do-it-All Mega 240
      • Sentra SE-R
      • Sentra Spec V
      • Silvia
      • STurdteen Drift Car
      • Porsche
      • 991 GT3RS
      • Cayman (987)
      • Cayman T
      • Cayman GTS 4.0
    • Make S-Z
      • Scion
      • FR-S
      • Scion Tuner Challenge FR-S
      • TC
      • Subaru
      • Autocross BRZ
      • Legacy GT
      • STI (gen 2)
      • STI (gen 3)
      • WRX (GD)
      • WRX (VA)
      • Toyota
      • 4Runner
      • AE86 Corolla
      • GR Corolla
      • Starletabusa
      • Supra Mark IV
      • Tacoma
      • Tundra
      • Volkswagen
      • MKIV Jetta TDI
      • MKVI Golf TDI
      • MKVII Golf R
      • Sipster (Rabbit)
    • Other Projects
      • Powersports
      • Aprilia RS50
      • Aprilia SR50
      • Doodlebug
      • Ducati 998
      • Ducati Hypermotard
      • Honda Ruckus
      • Husqvarna TE610
      • Go Karts
      • Other
      • Sim Racer
      • Aurora Cobra
      • Garage
      • NP01 Prototype
  • Features
    • Features
      • Feature Cars
      • Drag Race Cars
      • Drift Cars
      • Land Speed Cars
      • Open-Wheel Cars
      • Rally Cars
      • Road Race Cars
      • Street Cars
      • Time Attack Cars
      • Drag Racing
    • Features
      • Events
      • Drifting
      • Land Speed Racing
      • Open-Wheel Racing
      • Time Attack Racing
      • Rally Racing
      • Road Racing
      • Car Shows
      • Columns
      • SlipAngle Podcast
  • Video
  • Shop *NEW*
  • MotoIQ Garage Services
  • About
  • Shop *NEW*
  • MotoIQ Garage Services
  • About
MotoIQ
MotoIQ
  • Tech
    • Tech Category
      • Engine
      • Bottom End
      • Rods and Pistons
      • Head and Headwork
      • Cams and Valvetrain
      • Cooling and Heat Management
      • Intake
      • Headers and Exhaust
      • Rotary
      • Engine Management and Tuning
      • Drivetrain
      • Transmission
      • Clutch and Flywheel
      • Differential and Final Drive
      • Driveshaft and Axle
      • Axles
    • Tech Category
      • Suspension
      • Shocks and Coilovers
      • Springs
      • Swaybars
      • Arms and Links
      • Bushings
      • Steering
      • Geometry Correction
      • Suspension Setup and Tuning
      • Brakes
      • Wheels and Tires
      • Fueling
      • Forced Induction and NOS
      • Aerodynamics
    • Tech Cat
      • Electrical
      • Battery and Power Distribution
      • Electronics
      • Wiring
      • Electrical System Education and Troubleshooting
      • Lubrication
      • Interior and Controls
      • Exterior
      • Paint and Bodywork
      • Wraps and Film Protection
      • Exterior Care and Maintenance
      • Data Acquisition and Tuning
      • Fabrication and Safety
      • Tips and How-To
  • Projects
    • Make A-D
      • Acura
      • Integra (DC2)
      • NSX
      • CSF RSX (DC5)
      • BMW
      • E30 (SR20 Powered)
      • E36 323is
      • E36 M3 (Black)
      • E36 M3 (Silver)
      • E39 M5
      • E46 M3
      • E90 M3
      • E46 Racecar
      • Yost Auto E92 M3
      • Yost Auto F82 M4
      • Chevrolet
      • Camaro Gen5
      • Corvette Stingray (C7 Z51)
      • Corvette Stingray (C8 Z51)
      • GMC Canyon
      • Dodge
      • Viper GTS
    • Make E-I
      • Ford
      • E350 Tow Rig
      • F150 EcoBoost
      • Fiesta ST
      • Focus ST
      • Mustang 5.0 (Grey)
      • Mustang 5.0 (White)
      • Mustang S197 (Budget Track Car)
      • Mustang S550 GT
      • Honda
      • Civic EF Racecar
      • Civic Si (Coupe)
      • Civic Si (EP3)
      • Civic Si (Saloon)
      • EJ Civic
      • Polystrand CRX
      • S2000 (AP1)
      • S2000 (AP2)
      • Infiniti
      • G20 Racecar
      • G20 (P10 AWD Turbo)
      • G35
      • G37S
    • Make J-M
      • Isuzu
      • Vehicross
      • Lexus
      • ISF
      • SC300
      • Mazda
      • V8 RX7 (3rd Gen)
      • RX-7 (3rd Gen)
      • RX-7 Restomod (3rd Gen)
      • Skyactiv 3
      • Frankenmiata
      • Miatabusa
      • My Girlfriend’s Miata
      • Mitsubishi
      • EVO VIII
      • EVO IX
      • EVO X
      • CSF EVO X Racecar
      • Professional Awesome EVO VIII
    • Make N-P
      • Nissan
      • 200SX
      • 200SX SE-R
      • 240SX Land Speed Racer
      • 300ZXTT
      • 350Z
      • 350Z Drift Car
      • 370Z
      • GT-R (R33)
      • GT-R (R35)
      • GT-R (Team America BNR32)
      • LS S13
      • NX GTi-R
      • Pathfinder
      • S13 Drift/Grip Do-it-All Mega 240
      • Sentra SE-R
      • Sentra Spec V
      • Silvia
      • STurdteen Drift Car
      • Porsche
      • 991 GT3RS
      • Cayman (987)
      • Cayman T
      • Cayman GTS 4.0
    • Make S-Z
      • Scion
      • FR-S
      • Scion Tuner Challenge FR-S
      • TC
      • Subaru
      • Autocross BRZ
      • Legacy GT
      • STI (gen 2)
      • STI (gen 3)
      • WRX (GD)
      • WRX (VA)
      • Toyota
      • 4Runner
      • AE86 Corolla
      • GR Corolla
      • Starletabusa
      • Supra Mark IV
      • Tacoma
      • Tundra
      • Volkswagen
      • MKIV Jetta TDI
      • MKVI Golf TDI
      • MKVII Golf R
      • Sipster (Rabbit)
    • Other Projects
      • Powersports
      • Aprilia RS50
      • Aprilia SR50
      • Doodlebug
      • Ducati 998
      • Ducati Hypermotard
      • Honda Ruckus
      • Husqvarna TE610
      • Go Karts
      • Other
      • Sim Racer
      • Aurora Cobra
      • Garage
      • NP01 Prototype
  • Features
    • Features
      • Feature Cars
      • Drag Race Cars
      • Drift Cars
      • Land Speed Cars
      • Open-Wheel Cars
      • Rally Cars
      • Road Race Cars
      • Street Cars
      • Time Attack Cars
      • Drag Racing
    • Features
      • Events
      • Drifting
      • Land Speed Racing
      • Open-Wheel Racing
      • Time Attack Racing
      • Rally Racing
      • Road Racing
      • Car Shows
      • Columns
      • SlipAngle Podcast
  • Video
  • Tech

MotoIQ Garage Fabrication – Introduction to Fab

  • Steve Rockwood

,

MotoIQ Garage Fabrication - Introduction to Fab stickout
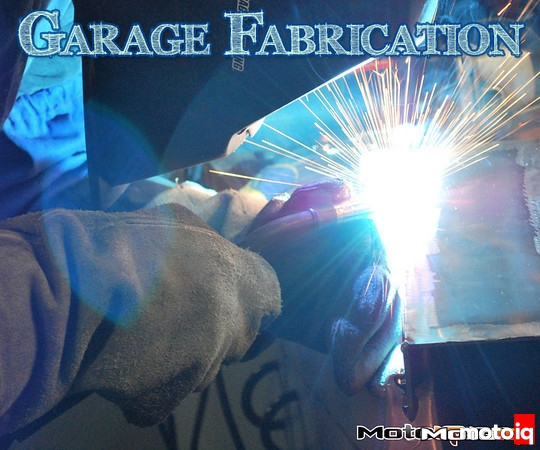
The “stickout” is key to ensuring a consistent weld.  Too far, and the weld will start with frustrating popping, too little and you'll burn the wire up into the tip and jam it.  I usually aim for about 1/2″.

To run the bead itself, you need to understand the relationship of current, wire speed and metal thickness.  Metal thickness determines amps.  Amps determines wire speed.  The thicker the metal, the higher the amperage.  The higher the amperage, the higher the wire speed needs to be to keep up.  If you've got any of this out of whack, you're going to have some pretty ugly or dangerous (or both) welds.  The problem with this and cheap welders, I've found, is that when you have enough wire speed to keep up with the current, your first second or two of welding is a sputtering mess.  The solution for this has to do with the stickout length you should have set before you started.  If you've got it short enough (but not too short), you should have a nice, clean arc to start with.  Go ahead and hold the gun about 90 degrees from the workpiece and start running your bead. 

If you're new to welding, chance are pretty high you'll encounter one of the most frustrating problems, especially with thinner metal: your nice clean arc due to minimal stickout is going to burn right through your workpiece.  This is where a lot of beginners get frustrated and put everything up on Craigslist.  Instead of just watching your puddle spread and eventually fall through, or welding an inch, then stopping, then starting again, you need to increase the stickout while you're welding.  To keep things in perspective, the shorter the stickout, the stronger and more concentrated the arc is; the longer the stickout, the milder it will be.  So, once you've got everything warmed up, slowly back off.  If you start sputtering, bring it back closer.  This is something that will take a lot of practice, and the difference between closer and farther when it comes to stickout can be measured in very small amounts (maybe ¼” total). 

MotoIQ Garage Fabrication - Introduction to Fab welding

While welding, make sure to pay attention to the molten puddle itself, not the arc (yes, I know it's pretty) to see problems as they go, and to make sure your weld is filling the joint completely.  To make life easier, the welding motion I like to use is called the “cursive e”.  Basically, you're drawing a bunch of little cursive lower case e letters in successive motion:

MotoIQ Garage Fabrication - Introduction to Fab welding cursive e
The “cursive-e” motion is extremely easy (assuming you can write cursive) and allows for the excellent “stack of dimes” look.  Pardon my MS Paint skills. 

This will make for the nice “stacked dimes” appearance, and will also serve to take some of the headache out of maintaining a good puddle.  As always, practice makes perfect, but to reduce the amount of needless practice, if your weld looks like the following, here is likely where you're running out of talent:

MotoIQ Garage Fabrication - Introduction to Fab how not to weld bad
This pile of disaster is exactly how not to weld.  Starting from top: first up is welding with the wire speed set too low.  While technique can make this look decent, the huge Heat Affected Zone (HAZ) and excessive buildup shows how slow the travel speed had to be to make this weld. Second shows the wire speed set way too high.  The weld will sputter like crazy (I put plenty of holes in my clothing) and the weld will build up excessively.  The third weld shows too little current, causing the weld to build up at first, then as things got hotter, the weld flattened out reasonably.  The ultra-slow travel speed spreads the HAZ to a larger area here as well.  The fourth disaster is what happens when the current is set too high, blowing through the material.  The fifth weld on the left shows reasonably good technique (travel speed was still a little low) and the right shows too much stickout.


Related

Previous page 1 2 3 4 5 6 7 8Next page
Related Topics
  • Tips and How-To
Previous Article
  • Features
  • Chevrolet
  • Projects

AEM – Infinity ECU Tuned Pirelli World Challenge Camaro

  • Jeff Naeyaert
View Post
Next Article
  • Uncategorized

Formula Drift Round 3 – West Palm Beach – Mike Kojima Edition – Behind The Smoke Season 3

  • Aaron LaBeau
View Post

Leave a Reply Cancel reply

Your email address will not be published. Required fields are marked *

Input your search keywords and press Enter.