• Tech
    • Tech Category
      • Engine
      • Bottom End
      • Rods and Pistons
      • Head and Headwork
      • Cams and Valvetrain
      • Cooling and Heat Management
      • Intake
      • Headers and Exhaust
      • Rotary
      • Engine Management and Tuning
      • Drivetrain
      • Transmission
      • Clutch and Flywheel
      • Differential and Final Drive
      • Driveshaft and Axle
      • Axles
    • Tech Category
      • Suspension
      • Shocks and Coilovers
      • Springs
      • Swaybars
      • Arms and Links
      • Bushings
      • Steering
      • Geometry Correction
      • Suspension Setup and Tuning
      • Brakes
      • Wheels and Tires
      • Fueling
      • Forced Induction and NOS
      • Aerodynamics
    • Tech Cat
      • Electrical
      • Battery and Power Distribution
      • Electronics
      • Wiring
      • Electrical System Education and Troubleshooting
      • Lubrication
      • Interior and Controls
      • Exterior
      • Paint and Bodywork
      • Wraps and Film Protection
      • Exterior Care and Maintenance
      • Data Acquisition and Tuning
      • Fabrication and Safety
      • Tips and How-To
  • Projects
    • Make A-D
      • Acura
      • Integra (DC2)
      • NSX
      • CSF RSX (DC5)
      • BMW
      • E30 (SR20 Powered)
      • E36 323is
      • E36 M3 (Black)
      • E36 M3 (Silver)
      • E39 M5
      • E46 M3
      • E90 M3
      • E46 Racecar
      • Yost Auto E92 M3
      • Yost Auto F82 M4
      • Chevrolet
      • Camaro Gen5
      • Corvette Stingray (C7 Z51)
      • Corvette Stingray (C8 Z51)
      • GMC Canyon
      • Dodge
      • Viper GTS
    • Make E-I
      • Ford
      • E350 Tow Rig
      • F150 EcoBoost
      • Fiesta ST
      • Focus ST
      • Mustang 5.0 (Grey)
      • Mustang 5.0 (White)
      • Mustang S197 (Budget Track Car)
      • Mustang S550 GT
      • Honda
      • Civic EF Racecar
      • Civic Si (Coupe)
      • Civic Si (EP3)
      • Civic Si (Saloon)
      • EJ Civic
      • Polystrand CRX
      • S2000 (AP1)
      • S2000 (AP2)
      • Infiniti
      • G20 Racecar
      • G20 (P10 AWD Turbo)
      • G35
      • G37S
    • Make J-M
      • Isuzu
      • Vehicross
      • Lexus
      • ISF
      • SC300
      • Mazda
      • V8 RX7 (3rd Gen)
      • RX-7 (3rd Gen)
      • RX-7 Restomod (3rd Gen)
      • Skyactiv 3
      • Frankenmiata
      • Miatabusa
      • My Girlfriend’s Miata
      • Mitsubishi
      • EVO VIII
      • EVO IX
      • EVO X
      • CSF EVO X Racecar
      • Professional Awesome EVO VIII
    • Make N-P
      • Nissan
      • 200SX
      • 200SX SE-R
      • 240SX Land Speed Racer
      • 300ZXTT
      • 350Z
      • 350Z Drift Car
      • 370Z
      • GT-R (R33)
      • GT-R (R35)
      • GT-R (Team America BNR32)
      • LS S13
      • NX GTi-R
      • Pathfinder
      • S13 Drift/Grip Do-it-All Mega 240
      • Sentra SE-R
      • Sentra Spec V
      • Silvia
      • STurdteen Drift Car
      • Porsche
      • 991 GT3RS
      • Cayman (987)
      • Cayman T
      • Cayman GTS 4.0
    • Make S-Z
      • Scion
      • FR-S
      • Scion Tuner Challenge FR-S
      • TC
      • Subaru
      • Autocross BRZ
      • Legacy GT
      • STI (gen 2)
      • STI (gen 3)
      • WRX (GD)
      • WRX (VA)
      • Toyota
      • 4Runner
      • AE86 Corolla
      • GR Corolla
      • Starletabusa
      • Supra Mark IV
      • Tacoma
      • Tundra
      • Volkswagen
      • MKIV Jetta TDI
      • MKVI Golf TDI
      • MKVII Golf R
      • Sipster (Rabbit)
    • Other Projects
      • Powersports
      • Aprilia RS50
      • Aprilia SR50
      • Doodlebug
      • Ducati 998
      • Ducati Hypermotard
      • Honda Ruckus
      • Husqvarna TE610
      • Go Karts
      • Other
      • Sim Racer
      • Aurora Cobra
      • Garage
      • NP01 Prototype
  • Features
    • Features
      • Feature Cars
      • Drag Race Cars
      • Drift Cars
      • Land Speed Cars
      • Open-Wheel Cars
      • Rally Cars
      • Road Race Cars
      • Street Cars
      • Time Attack Cars
      • Drag Racing
    • Features
      • Events
      • Drifting
      • Land Speed Racing
      • Open-Wheel Racing
      • Time Attack Racing
      • Rally Racing
      • Road Racing
      • Car Shows
      • Columns
      • SlipAngle Podcast
  • Video
  • Shop *NEW*
  • MotoIQ Garage Services
  • About
  • Shop *NEW*
  • MotoIQ Garage Services
  • About
MotoIQ
MotoIQ
  • Tech
    • Tech Category
      • Engine
      • Bottom End
      • Rods and Pistons
      • Head and Headwork
      • Cams and Valvetrain
      • Cooling and Heat Management
      • Intake
      • Headers and Exhaust
      • Rotary
      • Engine Management and Tuning
      • Drivetrain
      • Transmission
      • Clutch and Flywheel
      • Differential and Final Drive
      • Driveshaft and Axle
      • Axles
    • Tech Category
      • Suspension
      • Shocks and Coilovers
      • Springs
      • Swaybars
      • Arms and Links
      • Bushings
      • Steering
      • Geometry Correction
      • Suspension Setup and Tuning
      • Brakes
      • Wheels and Tires
      • Fueling
      • Forced Induction and NOS
      • Aerodynamics
    • Tech Cat
      • Electrical
      • Battery and Power Distribution
      • Electronics
      • Wiring
      • Electrical System Education and Troubleshooting
      • Lubrication
      • Interior and Controls
      • Exterior
      • Paint and Bodywork
      • Wraps and Film Protection
      • Exterior Care and Maintenance
      • Data Acquisition and Tuning
      • Fabrication and Safety
      • Tips and How-To
  • Projects
    • Make A-D
      • Acura
      • Integra (DC2)
      • NSX
      • CSF RSX (DC5)
      • BMW
      • E30 (SR20 Powered)
      • E36 323is
      • E36 M3 (Black)
      • E36 M3 (Silver)
      • E39 M5
      • E46 M3
      • E90 M3
      • E46 Racecar
      • Yost Auto E92 M3
      • Yost Auto F82 M4
      • Chevrolet
      • Camaro Gen5
      • Corvette Stingray (C7 Z51)
      • Corvette Stingray (C8 Z51)
      • GMC Canyon
      • Dodge
      • Viper GTS
    • Make E-I
      • Ford
      • E350 Tow Rig
      • F150 EcoBoost
      • Fiesta ST
      • Focus ST
      • Mustang 5.0 (Grey)
      • Mustang 5.0 (White)
      • Mustang S197 (Budget Track Car)
      • Mustang S550 GT
      • Honda
      • Civic EF Racecar
      • Civic Si (Coupe)
      • Civic Si (EP3)
      • Civic Si (Saloon)
      • EJ Civic
      • Polystrand CRX
      • S2000 (AP1)
      • S2000 (AP2)
      • Infiniti
      • G20 Racecar
      • G20 (P10 AWD Turbo)
      • G35
      • G37S
    • Make J-M
      • Isuzu
      • Vehicross
      • Lexus
      • ISF
      • SC300
      • Mazda
      • V8 RX7 (3rd Gen)
      • RX-7 (3rd Gen)
      • RX-7 Restomod (3rd Gen)
      • Skyactiv 3
      • Frankenmiata
      • Miatabusa
      • My Girlfriend’s Miata
      • Mitsubishi
      • EVO VIII
      • EVO IX
      • EVO X
      • CSF EVO X Racecar
      • Professional Awesome EVO VIII
    • Make N-P
      • Nissan
      • 200SX
      • 200SX SE-R
      • 240SX Land Speed Racer
      • 300ZXTT
      • 350Z
      • 350Z Drift Car
      • 370Z
      • GT-R (R33)
      • GT-R (R35)
      • GT-R (Team America BNR32)
      • LS S13
      • NX GTi-R
      • Pathfinder
      • S13 Drift/Grip Do-it-All Mega 240
      • Sentra SE-R
      • Sentra Spec V
      • Silvia
      • STurdteen Drift Car
      • Porsche
      • 991 GT3RS
      • Cayman (987)
      • Cayman T
      • Cayman GTS 4.0
    • Make S-Z
      • Scion
      • FR-S
      • Scion Tuner Challenge FR-S
      • TC
      • Subaru
      • Autocross BRZ
      • Legacy GT
      • STI (gen 2)
      • STI (gen 3)
      • WRX (GD)
      • WRX (VA)
      • Toyota
      • 4Runner
      • AE86 Corolla
      • GR Corolla
      • Starletabusa
      • Supra Mark IV
      • Tacoma
      • Tundra
      • Volkswagen
      • MKIV Jetta TDI
      • MKVI Golf TDI
      • MKVII Golf R
      • Sipster (Rabbit)
    • Other Projects
      • Powersports
      • Aprilia RS50
      • Aprilia SR50
      • Doodlebug
      • Ducati 998
      • Ducati Hypermotard
      • Honda Ruckus
      • Husqvarna TE610
      • Go Karts
      • Other
      • Sim Racer
      • Aurora Cobra
      • Garage
      • NP01 Prototype
  • Features
    • Features
      • Feature Cars
      • Drag Race Cars
      • Drift Cars
      • Land Speed Cars
      • Open-Wheel Cars
      • Rally Cars
      • Road Race Cars
      • Street Cars
      • Time Attack Cars
      • Drag Racing
    • Features
      • Events
      • Drifting
      • Land Speed Racing
      • Open-Wheel Racing
      • Time Attack Racing
      • Rally Racing
      • Road Racing
      • Car Shows
      • Columns
      • SlipAngle Podcast
  • Video
  • Tech

MotoIQ Garage Fabrication – Introduction to Fab

  • Steve Rockwood

,

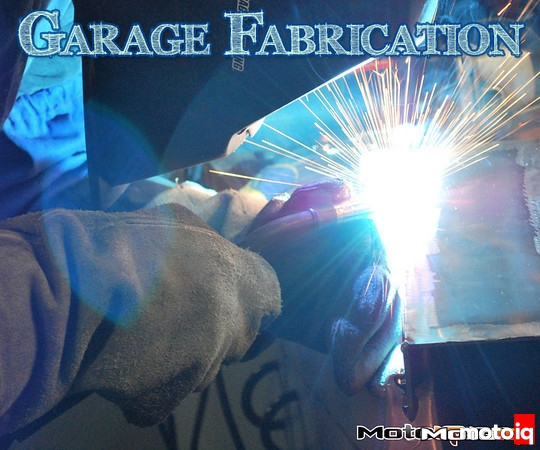
Now that the piece is held together in a somewhat stable manner, and your welder shouldn't be making boogers, it's time to start burning metal on the real deal.  As with setting the pieces up, a little patience goes a long way here.  Instead of just burning through the whole weld from left to right in one continuous pass, it's best to tack weld the two pieces together and then weld it in sections.  The tack welds themselves should be done with minimal stickout to ensure strong penetration and to minimize the amount of material used to complete the tack.  Tack weld the workpiece about once every six inches to ensure a stable joint, failure to do so will likely result in the metal warping and pulling away at one end or another.  The tack welds need to have solid penetration as they will be the only thing holding the piece together until final welding.  Keep in mind that you may not be able to access a weld joint after tacking a new piece on, so make sure to plan ahead while you are assembling your workpiece and finish weld anything that will be hidden before the workpiece is fully tacked. 

MotoIQ Garage Fabrication - Introduction to Fab tack weld ready
All tack welded and ready for finishing.  Note the full open corners.  This allows for more even distribution of heat between the two pieces of metal and also allows for a cleaner look as the weld material will fill in the corner.

If you're welding an enclosed container like this, make sure to drill a gas relief hole (1/8″ is usually sufficient) in one of the sides (preferably the one least likely to be seen).  Welding makes a lot of heat.  Heat expands things.  If you don't have a gas relief hole, as you finish the last weld, that gas will no longer have any place to escape through.  Since your newly-created slag is the softest part of the container, this is where the gas will push through, creating annoying little boogers that are unsightly and extremely porous.  After you've finished welding, allow the entire workpiece to cool, then weld in the gas-relief hole.  For this project, I tacked five sides of the container together, and left the top for last.  More on that in a bit.

MotoIQ Garage Fabrication - Introduction to Fab gas relief hole
A gas relief hole drilled into an inconspicuous side will allow for the expanding gasses that will soon be trapped in your workpiece a place to escape through other than your ongoing weld.  This outgassing usually manifests as an extremely frustrating bubble immediately after the arc is shut off.

Once you've got it tacked and ready to finish weld, go ahead and start running your beads.  If it's an especially large piece with lots of welding time, you will need to pay attention to how much time you're welding compared to the rated duty cycle of your welder.  A welder's duty cycle is rated as a percentage of how much time it can maintain an arc in a 10 minute period.  A welder with a 40% duty cycle will be able to weld for four out of ten minutes.  Keep in mind that the rated duty cycle decreases with increased welding current, so this will most likely become more of a limiting factor when you've got it turned all the way up.  Do not push your welder beyond this limit if you can help it.  Some welders have built in features that don't allow you to exceed duty cycle, some don't, so if you've got a large job it's best to pay attention to duty cycle.

To attach small things that don't weigh too much, like tabs, I like to use welding magnets.  This allows you to position the tab without needing to hold it.  Like everything else you're going to weld, it's best to tack-weld the tab on first, and then remove the magnet.  Trusting the magnet to hold while running a bead, or not end up welded to your workpiece, is not a good idea.

MotoIQ Garage Fabrication - Introduction to Fab tab magnet
These little magnets save your friends from burns that would happen if they were helping you hold items like these tabs onto the workpiece.

Now that I've got all the tabs and five of the sides fully welded, it's time to put the booze and coinage inside so I can entomb them forever (or until Martin gets motivated and cuts it open for some righteous slot-machine action).  However, there are some serious considerations when you're going to trap something extremely flammable (the booze) in a metal box along with a bunch of heat-conducting metal coins.  This is compounded by the fact that my idiotic brain was perusing the bottles by external dimensions, not construction, and ended up with a plastic bottle.  To make things kind of marginally “safe” (again, fire extinguishers are not optional equipment when welding), I decided to fill the container to about an inch shy of the top with water to absorb most of the heat.  Since water vapor will likely make for a lot more gas volume that needs to escape from the box, I made the gas relief hole extra large to compensate.

MotoIQ Garage Fabrication - Introduction to Fab water cooling
Making things moderately dangerous (as opposed to extremely) is some water to act as cooling for the hot welding about to commence.  The sealed box I'm making with a gas relief hole would probably make a decent flame thrower if I allowed the bottle to heat enough to melt, lack of foresight and buying a plastic bottle are more reasons why you shouldn't listen to me.  At all.


Related

Previous page 1 2 3 4 5 6 7 8Next page
Related Topics
  • Tips and How-To
Previous Article
  • Features
  • Chevrolet
  • Projects

AEM – Infinity ECU Tuned Pirelli World Challenge Camaro

  • Jeff Naeyaert
View Post
Next Article
  • Uncategorized

Formula Drift Round 3 – West Palm Beach – Mike Kojima Edition – Behind The Smoke Season 3

  • Aaron LaBeau
View Post

Leave a Reply Cancel reply

Your email address will not be published. Required fields are marked *

Input your search keywords and press Enter.