,
 Installation on the rear of most BMWs is fairly straight forward, and we were able to reuse several parts which were installed in Part 1. The paper gaskets for the rear shock mounts, for instance, didn’t even need to come off, as they stuck to the car, almost as if they were anticipating their newly upgraded roommates.
 The “proper” way to get to the rear shock mounts is to remove everything from the trunk. Sometimes I’m lazy, but with rear suspension I also like to plan ahead. These easy-access, but not attractive, doors were cut into the rear trunk liner earlier, and they allow much quicker changes to the suspension parts when needed, and also quick and easy access for the rear adjustment knobs. Plus, they can be closed up enough that no one will notice your hack job.
 Rear springs take a little bit of effort to get off the car when you’re on your own, but it’s not a tough job by any means. With the rear shock unbolted, you simply pull down on the rear hub to drop it enough to pull the spring out. Much easier with two people, so doing it on my own I cheated and snuck a crow bar under a lower coil of the spring to help. If you don’t pull the arm down enough, you may find that there’s a bit of energy stored up in the spring as your pry it out, so use caution!
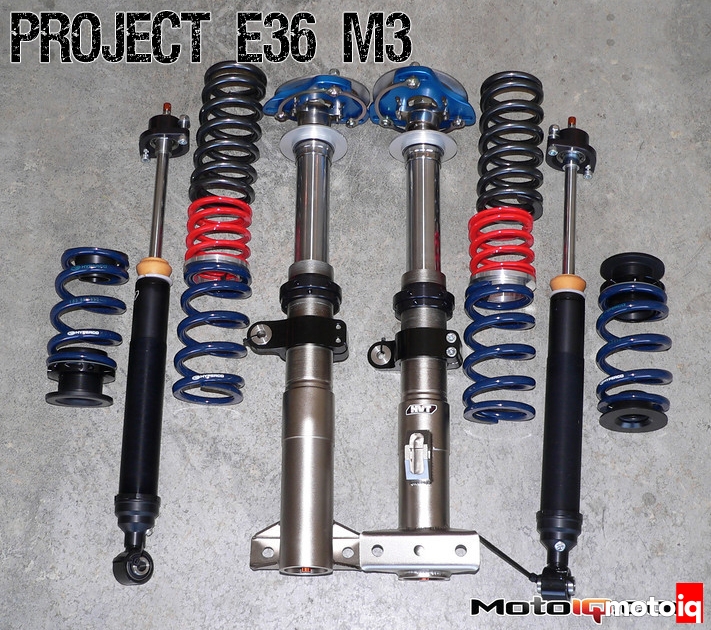
 This is a view of the old stock spring next to new rear spring and perches with height adjuster. The original rear springs are soft enough that this setting resulted in a near-stock rear ride height, so we ended up dialing it down a fair amount to get to our desired 11.75 inches from the center of the Roundel wheel cap to the bottom of the rear fender. Yet another reason we were happy to have our new OEM center caps from Bavarian Autosport, as they’re very useful with suspension settings.
 A quick peak of the new rear shocks and springs bolted up and ready to go.
 The fronts are a little more involved, but still not a tough job. We ended up removing the front sway bar for easier access. It’s just a matter of removing 3 bolts on the lower part of the strut, but be sure to support the control arm to avoid damaging anything. We used a jack for the support, and this classy bungee cord to hold the hub assembly up.
Once the lower bolts are removed and everything is secure, loosen the three nuts on the top of the strut tower, but don’t remove them unless you or a helper have a hand on the strut itself to keep it from dropping.


