,
We chose AEM sensors not only because it allowed us a one-stop shop, but also because they provide calibration tables to make life easier for us should we decide to use these sensors for other purposes like idiot lights and chimes, or event-driven components like water injection. Additionally, AEM's commitment to quality has made these extremely reliable, accurate and quick responding units. All of our sensors are accurate to within +/- 3%, with response times of less than 1ms for the pressure sensor and a thermal time constant of 10 seconds for the coolant sensor.
 |
AEM's UEGO Sensor is a true wideband sensor. Our UEGO kit came with the controller, sensor, and finned stand-off bung you see here. The fins are to keep the sensor relatively cool, and the stand-off keeps the sensor from blocking exhaust flow. Pay no attention to the snail thing it's attached to, that's, erm, Project G20 Racecar's smog pump, nothing to see here folks. |
 |
| We mounted our UEGO controller on an out of the way position on a stock bracket on our G20's shock tower to allow for ease of serviceability and keep it away from elements. While the wires are definitely visible and might look better tucked away, we prefer to route wiring based on distance from moving objects and elements first, visibility and serviceability second, and aesthetics last. |
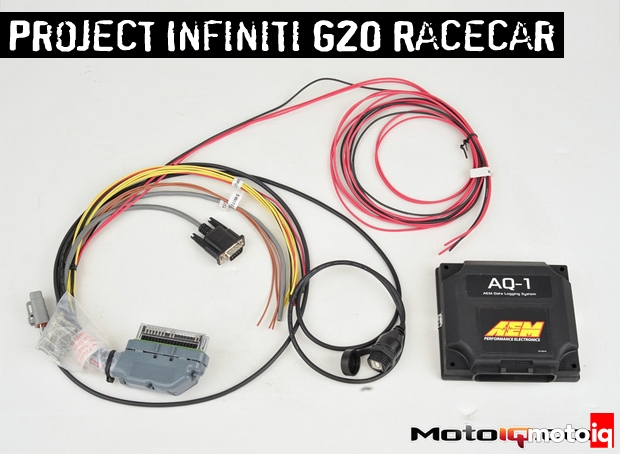
Installation was relatively simple and straightforward. We simply plugged in the necessary power feeds (constant, switched and ground) and the sensor feeds. We mounted the unit on the firewall, and the USB data port was located on passenger's side of the dash for quick and easy downloads between sessions. When installing the AQ-1, there are only two caveats: the unit must be mounted in a specific orientation, and you must power the AEM sensors with the AQ-1's integrated 5V sensor supply wire. Do not, repeat DO NOT, connect the sensors directly to 12V power. Did we mention that you should not connect your sensors to 12V power?
 |
Care must be taken to ensure the AQ-1 is mounted in a certain orientation. These are the common mounting orientations, and there are a number of additional allowable orientations detailed in the software's help section. |
|
| As a result, we mounted our AQ-1 on the firewall in front of the passenger footwell. As it turns out, the firewall on a P10 G20 is exactly 90° to the frame rails, making for a perfect mounting location. The AQ-1 was spliced into the factory harness near the ECU to reduce exposure of our splices to elements. A high quality crimper and tool were used on all wire splices. Adding a component to help ensure reliability only to use unreliable connectors would be unfortunately ironic. |

 |
| Our USB port was installed into the dash on the passenger's side of the dash to allow for quick and easy downloads between sessions. We mounted it inside as opposed to somewhere easy to access on the outside to reduce exposure and to reduce the likelihood of an expensive laptop falling off of the vehicle during download. |