
• Tech
    • Tech Category
      • Engine
      • Bottom End
      • Rods and Pistons
      • Head and Headwork
      • Cams and Valvetrain
      • Cooling and Heat Management
      • Intake
      • Headers and Exhaust
      • Rotary
      • Engine Management and Tuning
      • Drivetrain
      • Transmission
      • Clutch and Flywheel
      • Differential and Final Drive
      • Driveshaft and Axle
      • Axles
    • Tech Category
      • Suspension
      • Shocks and Coilovers
      • Springs
      • Swaybars
      • Arms and Links
      • Bushings
      • Steering
      • Geometry Correction
      • Suspension Setup and Tuning
      • Brakes
      • Wheels and Tires
      • Fueling
      • Forced Induction and NOS
      • Aerodynamics
    • Tech Cat
      • Electrical
      • Battery and Power Distribution
      • Electronics
      • Wiring
      • Electrical System Education and Troubleshooting
      • Lubrication
      • Interior and Controls
      • Exterior
      • Paint and Bodywork
      • Wraps and Film Protection
      • Exterior Care and Maintenance
      • Data Acquisition and Tuning
      • Fabrication and Safety
      • Tips and How-To
  • Projects
    • Make A-D
      • Acura
      • Integra (DC2)
      • NSX
      • CSF RSX (DC5)
      • BMW
      • E30 (SR20 Powered)
      • E36 323is
      • E36 M3 (Black)
      • E36 M3 (Silver)
      • E39 M5
      • E46 M3
      • E90 M3
      • E46 Racecar
      • Yost Auto E92 M3
      • Yost Auto F82 M4
      • Chevrolet
      • Camaro Gen5
      • Corvette Stingray (C7 Z51)
      • Corvette Stingray (C8 Z51)
      • GMC Canyon
      • Dodge
      • Viper GTS
    • Make E-I
      • Ford
      • E350 Tow Rig
      • F150 EcoBoost
      • Fiesta ST
      • Focus ST
      • Mustang 5.0 (Grey)
      • Mustang 5.0 (White)
      • Mustang S197 (Budget Track Car)
      • Mustang S550 GT
      • Honda
      • Civic EF Racecar
      • Civic Si (Coupe)
      • Civic Si (EP3)
      • Civic Si (Saloon)
      • EJ Civic
      • Polystrand CRX
      • S2000 (AP1)
      • S2000 (AP2)
      • Infiniti
      • G20 Racecar
      • G20 (P10 AWD Turbo)
      • G35
      • G37S
    • Make J-M
      • Isuzu
      • Vehicross
      • Lexus
      • ISF
      • SC300
      • Mazda
      • V8 RX7 (3rd Gen)
      • RX-7 (3rd Gen)
      • RX-7 Restomod (3rd Gen)
      • Skyactiv 3
      • Frankenmiata
      • Miatabusa
      • My Girlfriend’s Miata
      • Mitsubishi
      • EVO VIII
      • EVO IX
      • EVO X
      • CSF EVO X Racecar
      • Professional Awesome EVO VIII
    • Make N-P
      • Nissan
      • 200SX
      • 200SX SE-R
      • 240SX Land Speed Racer
      • 300ZXTT
      • 350Z
      • 350Z Drift Car
      • 370Z
      • GT-R (R33)
      • GT-R (R35)
      • GT-R (Team America BNR32)
      • LS S13
      • NX GTi-R
      • Pathfinder
      • S13 Drift/Grip Do-it-All Mega 240
      • Sentra SE-R
      • Sentra Spec V
      • Silvia
      • STurdteen Drift Car
      • Porsche
      • 991 GT3RS
      • Cayman (987)
      • Cayman T
      • Cayman GTS 4.0
    • Make S-Z
      • Scion
      • FR-S
      • Scion Tuner Challenge FR-S
      • TC
      • Subaru
      • Autocross BRZ
      • Legacy GT
      • STI (gen 2)
      • STI (gen 3)
      • WRX (GD)
      • WRX (VA)
      • Toyota
      • 4Runner
      • AE86 Corolla
      • GR Corolla
      • Starletabusa
      • Supra Mark IV
      • Tacoma
      • Tundra
      • Volkswagen
      • MKIV Jetta TDI
      • MKVI Golf TDI
      • MKVII Golf R
      • Sipster (Rabbit)
    • Other Projects
      • Powersports
      • Aprilia RS50
      • Aprilia SR50
      • Doodlebug
      • Ducati 998
      • Ducati Hypermotard
      • Honda Ruckus
      • Husqvarna TE610
      • Go Karts
      • Other
      • Sim Racer
      • Aurora Cobra
      • Garage
      • NP01 Prototype
  • Features
    • Features
      • Feature Cars
      • Drag Race Cars
      • Drift Cars
      • Land Speed Cars
      • Open-Wheel Cars
      • Rally Cars
      • Road Race Cars
      • Street Cars
      • Time Attack Cars
      • Drag Racing
    • Features
      • Events
      • Drifting
      • Land Speed Racing
      • Open-Wheel Racing
      • Time Attack Racing
      • Rally Racing
      • Road Racing
      • Car Shows
      • Columns
      • SlipAngle Podcast
  • Video
  • Shop *NEW*
  • MotoIQ Garage Services
  • About
  • Shop *NEW*
  • MotoIQ Garage Services
  • About
MotoIQ
MotoIQ
  • Tech
    • Tech Category
      • Engine
      • Bottom End
      • Rods and Pistons
      • Head and Headwork
      • Cams and Valvetrain
      • Cooling and Heat Management
      • Intake
      • Headers and Exhaust
      • Rotary
      • Engine Management and Tuning
      • Drivetrain
      • Transmission
      • Clutch and Flywheel
      • Differential and Final Drive
      • Driveshaft and Axle
      • Axles
    • Tech Category
      • Suspension
      • Shocks and Coilovers
      • Springs
      • Swaybars
      • Arms and Links
      • Bushings
      • Steering
      • Geometry Correction
      • Suspension Setup and Tuning
      • Brakes
      • Wheels and Tires
      • Fueling
      • Forced Induction and NOS
      • Aerodynamics
    • Tech Cat
      • Electrical
      • Battery and Power Distribution
      • Electronics
      • Wiring
      • Electrical System Education and Troubleshooting
      • Lubrication
      • Interior and Controls
      • Exterior
      • Paint and Bodywork
      • Wraps and Film Protection
      • Exterior Care and Maintenance
      • Data Acquisition and Tuning
      • Fabrication and Safety
      • Tips and How-To
  • Projects
    • Make A-D
      • Acura
      • Integra (DC2)
      • NSX
      • CSF RSX (DC5)
      • BMW
      • E30 (SR20 Powered)
      • E36 323is
      • E36 M3 (Black)
      • E36 M3 (Silver)
      • E39 M5
      • E46 M3
      • E90 M3
      • E46 Racecar
      • Yost Auto E92 M3
      • Yost Auto F82 M4
      • Chevrolet
      • Camaro Gen5
      • Corvette Stingray (C7 Z51)
      • Corvette Stingray (C8 Z51)
      • GMC Canyon
      • Dodge
      • Viper GTS
    • Make E-I
      • Ford
      • E350 Tow Rig
      • F150 EcoBoost
      • Fiesta ST
      • Focus ST
      • Mustang 5.0 (Grey)
      • Mustang 5.0 (White)
      • Mustang S197 (Budget Track Car)
      • Mustang S550 GT
      • Honda
      • Civic EF Racecar
      • Civic Si (Coupe)
      • Civic Si (EP3)
      • Civic Si (Saloon)
      • EJ Civic
      • Polystrand CRX
      • S2000 (AP1)
      • S2000 (AP2)
      • Infiniti
      • G20 Racecar
      • G20 (P10 AWD Turbo)
      • G35
      • G37S
    • Make J-M
      • Isuzu
      • Vehicross
      • Lexus
      • ISF
      • SC300
      • Mazda
      • V8 RX7 (3rd Gen)
      • RX-7 (3rd Gen)
      • RX-7 Restomod (3rd Gen)
      • Skyactiv 3
      • Frankenmiata
      • Miatabusa
      • My Girlfriend’s Miata
      • Mitsubishi
      • EVO VIII
      • EVO IX
      • EVO X
      • CSF EVO X Racecar
      • Professional Awesome EVO VIII
    • Make N-P
      • Nissan
      • 200SX
      • 200SX SE-R
      • 240SX Land Speed Racer
      • 300ZXTT
      • 350Z
      • 350Z Drift Car
      • 370Z
      • GT-R (R33)
      • GT-R (R35)
      • GT-R (Team America BNR32)
      • LS S13
      • NX GTi-R
      • Pathfinder
      • S13 Drift/Grip Do-it-All Mega 240
      • Sentra SE-R
      • Sentra Spec V
      • Silvia
      • STurdteen Drift Car
      • Porsche
      • 991 GT3RS
      • Cayman (987)
      • Cayman T
      • Cayman GTS 4.0
    • Make S-Z
      • Scion
      • FR-S
      • Scion Tuner Challenge FR-S
      • TC
      • Subaru
      • Autocross BRZ
      • Legacy GT
      • STI (gen 2)
      • STI (gen 3)
      • WRX (GD)
      • WRX (VA)
      • Toyota
      • 4Runner
      • AE86 Corolla
      • GR Corolla
      • Starletabusa
      • Supra Mark IV
      • Tacoma
      • Tundra
      • Volkswagen
      • MKIV Jetta TDI
      • MKVI Golf TDI
      • MKVII Golf R
      • Sipster (Rabbit)
    • Other Projects
      • Powersports
      • Aprilia RS50
      • Aprilia SR50
      • Doodlebug
      • Ducati 998
      • Ducati Hypermotard
      • Honda Ruckus
      • Husqvarna TE610
      • Go Karts
      • Other
      • Sim Racer
      • Aurora Cobra
      • Garage
      • NP01 Prototype
  • Features
    • Features
      • Feature Cars
      • Drag Race Cars
      • Drift Cars
      • Land Speed Cars
      • Open-Wheel Cars
      • Rally Cars
      • Road Race Cars
      • Street Cars
      • Time Attack Cars
      • Drag Racing
    • Features
      • Events
      • Drifting
      • Land Speed Racing
      • Open-Wheel Racing
      • Time Attack Racing
      • Rally Racing
      • Road Racing
      • Car Shows
      • Columns
      • SlipAngle Podcast
  • Video
  • Professional Awesome EVO VIII
  • Projects
  • Mitsubishi

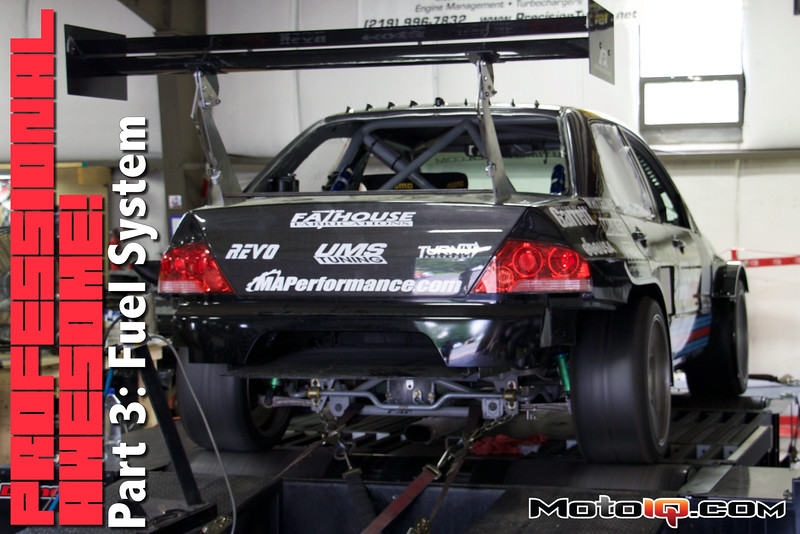
Project Professional Awesome Time Attack Evo: Part 3 – Fuel System

  • Daniel O'Donnell

,


We run three of these AEM E85 compatible in-tank fuel pumps. One for the main fuel tank to fill the two utilized in the surge tank. With their compact design, installation into the modified main tank and Radium surge tank is extremely simple. Two feed pumps has proven to be plenty of fuel to feed our E85 powered engine to 635whp (and hopefully more in the future).

Regarding the pumps we use, we’ve been very impressed with AEM’s 320lph E85-Compatible High Flow In-Tank Fuel Pumps. We currently use three in our application. Two in the surge tank (we may add an additional pump, I’ll discuss the reasons why shortly) and one in our modified stock fuel tank to feed the surge tank. If you're a non-engineer simpleton like myself, you might be asking “Daniel, how can one fuel pump feed the surge tank enough fuel to supply the two primary fuel pumps in the surge tank?” Well my special little friend, the two surge tank pumps are under pressure due to the fuel pressure regulator, the feed pump is not (at least not to the same degree). When a fuel pump is under pressure, it does not flow as much fuel as if it had no pressure, so you can generally get away with running less pump on the feed to the surge tank than from the surge tank to the engine. I will say, we do monitor fuel pressures to ensure we’re keeping up the fuel supply and the AEM Infinity ECU, with big enough injectors, will compensate for loss in fuel pressure… to a point. If you are losing fuel pressure because supply can’t keep up, no amount of compensation will help. Luckily we don’t have those problems as the AEM fuel pumps keep up without issue!


We've used Fuel Injector Clinic's 2150cc injectors for years. The incredible thing about these injectors is how well they work when just idling or in part throttle situations even though one set can move enough fuel to provide adequate flow for over eleven Honda D-Series engines going full throttle at once. That translates into a healthy amount of overhead for our application with room to grow in the future.

We run Fragola -8 feed lines and fittings from the fuel tank to the surge tank and then on to the Fuel Injector Clinic fuel rail. We run -6 return lines back to the surge tank, which also loops back to the main tank to ensure we don’t over pressurize the system. We run four, monster size, 2150cc injectors from Fuel Injector Clinic.These are good to about 1000 crank horsepower at a base pressure of 43psi on e85, more if that pressure is cranked up. Working with the AEM Infinity ECU, these injectors idle like a dream and are perfectly capable of street usage.

Now, this is where I’ll bring up the possibility of adding an additional pump into our surge tank system. This is on the back burner, because the system is working well right now, but we are always looking for areas of improvement. We may add that additional fuel pump so we can increase base fuel pressure. This would improve fuel atomization, which in turn can improve power and reduce chances of detonation. How so? Well, again, not an engineer here, but basically better atomization yields smaller droplets of fuel. Smaller droplets of fuel mix better with the incoming charge air. Better fuel mixture and smaller droplets make for a more uniform flame propagation, reducing hot spots. There are more reasons as well, and I’d love to hear additional input about fuel pressure in the comments section below. Just a quick note, Mercedes F1 increased fuel rail pressure for their direct injection system this year from 250 bar to 500 bar, this was supposedly worth a 40hp increase as well as improving fuel efficiency. Now the difference between a 500 bar system and a 43 psi system is substantial, but the same principles apply, just to a lesser degree.

As I mentioned before, the fuel pumps pump less fuel at higher pressure levels, possibly necessitating additional fuel pumps to ensure proper supply, hence adding a third pump. Why haven’t we done this already? Well the biggest issue is that we are on the limit of what is possible for low rpm, low load situations for the 2150cc injectors. Even a modest bump in pressure would increase fuel flow of the injectors and make idle and low load situations rich, perhaps even too rich to run properly. There is a limit to how short of a time the injectors physically open and we are there! The other option is to switch to a smaller injector, so with a higher base pressure, it matches the flow of the larger injector at the standard base pressure. We haven’t gone this route because the added pressure does put more stress on the fuel pumps and injectors and everything works well as is, so no rush to change, at least yet.


Our Turbosmart FPR 2000 keeps tabs on our fuel pressure and like all Turbosmart products, has proven reliable and repeatable. We utilize one of the extra ports to monitor fuel pressure and that information is sent over to the AEM Infinity which utilizes the data to calculate the exact amount to open the injectors so any variations in fuel pressure are accounted for. We've also added a Schrader valve to the system to be able to quickly release pressure in the fuel system and verify the accuracy of the fuel pressure sensor with a manual gauge easily.

All this fuel pressure business is held in check via a Turbosmart FPR-2000 fuel pressure regulator. As the name suggests, this is designed to be good to 2000 horsepower, a lofty goal for us indeed! A quick side note, as I also mentioned before, I am not the brightest bulb at times and I had an assumption about fuel pressure regulators that was very wrong. I talked with a buddy about this and he had the same assumption I did. I figured I’ll let you know what I learned and maybe it will help a few folks out there. Why do fuel pressures increase/decrease with manifold pressure/vacuum? My assumption was the fuel requirement of the engine increased or decreased with load, so the injectors pressures adapted accordingly. WRONG! The pressures increase or decrease to match intake manifold pressures so all of a sudden the fuel injector flow rate doesn’t change. For example, if you base fuel pressure is 43 psi and you are turbocharged and boosting at 20 psi, if the fuel pressure didn’t increase and stayed at 43 psi the fuel injectors would have to overcome the 20 psi of pressurized air in the manifold and spit out fuel at merely 23 psi. This would be significantly less fuel for the same injector pulse width. The same, but opposite, is true under vacuum at low loads, you’d get too much fuel at the same pulse width. Some of you may be rolling your eyes at being a car guy for 2 decades and just learning this recently, but sometimes I miss out on those little common sense details of the car world!
 

Previous page 1 2 3Next page
Previous Article
  • Uncategorized

How to Install an Oil Pan Baffle – Moroso – Track Life Episode 5

  • GTChannel
View Post
Next Article
  • Features
  • Tech

Lessons in Turbo Technology with Garrett – Burst Containment

  • Mike Kojima
View Post

Leave a Reply Cancel reply

Your email address will not be published. Required fields are marked *

MotoIQ Proudly Presents Our Partners:

Input your search keywords and press Enter.