
,

The first step is to remove the old parts. Notice the zip ties and that our old air filter no longer has its dust sock. That is because at some point we lost the original intake while riding around town. Turns out hanging an air filter off the OEM plastic intake elbow with no support is a bad idea! We found a replacement elbow on eBay so we could keep riding and used the zip tie artistry to support our new filter. It’s worked well for the last year. Once we cut the zip ties, we removed the air filter, elbow, and carb, all of which took a mere 10 minutes.

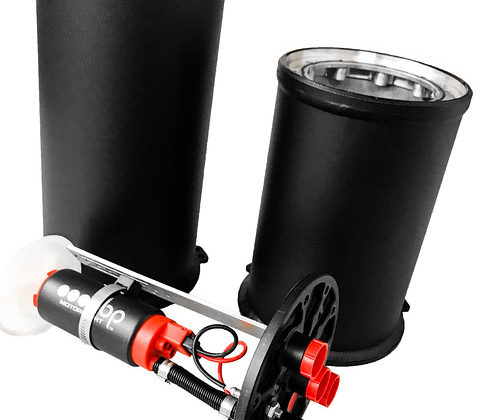
You can see just much larger the throat of the VM18 is compared to our VM15 knockoff. More air in will mean more power. We actually think this knockoff carb was limiting our power output. The FA50, even with the ghetto fabbed exhaust, was running into its fuel limit at high RPM and limiting top speed. It may also have been running into an airflow problem as well. It doesn’t matter though, this thing is now in our box of discarded old moped parts.

Here you can see just how much larger the throttle slide is of the new VM18 carb. The VM15 looks pathetic! We should note that we actually have a set of reed valves for this engine, but accessing them requires removing the engine (the reed block is sandwiched just under the frame and the old, corroded screws didn’t want to come free). We were hoping to install them with the carb, but had to hold off for now.

Removing the slide is a little tedious, but easy. Compress the return spring to free the cable end, then slip it off the slide. The slide, spring, and carb top will all be replaced. For the choke cable, we simply unhooked it from the old carb and tucked it back into the frame. When we pull the motor to rebuild it, we will remove the cable completely, as it is incompatible with the lever style choke on the VM18.

Because the VM18’s throttle slide is longer than the VM15, the throttle cable needs to be lengthened to match. The adjusted does not give enough free cable end to work, so the sheath will need to be shortened. We ended up cutting out about ½” of the sheath at this elbow by the throttle. This whole section of the throttle cable should be solid, but ours was broken so it made it a convenient place to cut back some of the sheath and get the free length we needed.

3 comments
Any updates on this lil fella? I just picked one up for free.
Chapel,
It’s still in my garage, waiting on me to get around to do this engine rebuild. Right now it’s just way too cold to do a lot of garage work, but I do plan on rebuilding the motor sometime this year. Too many projects on the plate, but this one WILL get pushed back to the front!
I have the same bike almost to a T and was hoping you might be able to give me some tuning advice.