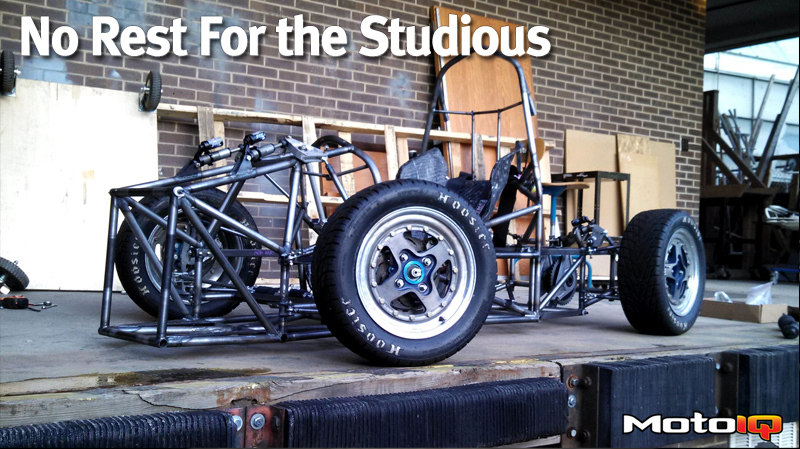

No Rest For the Studious: The Story of the University of Delaware BHR14 (Part 2)
A few months ago, we shared the first part of the tale of how a small SAE team in Delaware began building their BHR14 SAE racecar. We left off with a few CAD renderings and teaser shots of mills and saws doing mill and saw stuff. Well now it’s time to get into the meat and bones of this build, which is of course the build itself! We pick up in October, when the design process was still ongoing, but finalized enough to begin turning tube to car.
All of these pictures were taken with cell phones, so the quality may be below MotoIQ’s normal standards.
 Faro has an office in Kennett Square, PA and did a demonstration of their products on the UD campus. The SAE team was asked to bring in an engine so the Faro people would have something cool to scan. We were hoping for an accurate CAD model of the engine to help ensure the engine would fit into the new chassis (we had been using a model we made ourselves, but measured by hand. On a complex shape like an engine, this can leave out important bits that stick out, like the cam sensor). While the demonstration model was inadequate, Faro graciously offered to scan an engine if we brought it to their office! We did just that and even let me do some scanning. I don’t remember exactly what I was plotting here, probably some fin or engine accessory that stuck out. The final model ended up being too large a file to use in an assembly, but it did allow us to tweak our tape-measure model and check our eyeballed measurements with data accurate down to 0.001”.
 We started with hard measurements (the ones we were making above), which gave us data for all of our engine mounts, water inlets and outlets, spark plug coils, intake and exhaust ports (and their mounting bolts), and the external accessory covers. We then covered these basic shapes with a “point cloud” which is done with a laser scanner. The point cloud is not as accurate, so these hard points are necessary for full accuracy. The point cloud blew up the file size into something unusable, so we just used the hard point data.
 The Fab Police would have a field day with us. Learning to TIG weld takes a lot of time… time we didn’t have. Many “death grapples” were made in the run up to actual chassis building. The death grapples served two purposes: teaching new members how to properly notch tubes, and to let me learn to weld. Others tried as well, but being the senior member I had a slight advantage going in and then spent a ton of hours practicing (being a Senior with only 6 lectures a week certainly helped with that). All our notching was done on a lathe using a hole saw. Using a tube collet, we could get the angle of the cut perfect and using the autofeed of the lathe let us control the speed of the cut so we minimized hole saw breakage. Once the tube scraps were notched, they were cleaned up and brought over to the welding area where they were sacrificed to a death grapple so I could figure out how to TIG tubes. Don’t worry, they got a lot better as time went on.
 An assembly line formed with two lathes. The first lathe did all the notching, while this lathe, manned and womaned by Ethan and Sharnita, was used to clean off the anti-corrosion coating on the ends of the tubes. In between, each tube took a trip to the belt sander to clean off the slag leftover from the hole saw. After sanding, the tubes were all cleaned inside and out with alcohol and a rag to ensure all our welds were as clean as possible. Remember, NEVER use brake cleaner to clean metal you’re going to weld!
 Some square tubing was used in the floor of the car, so these had to be sanded by hand. Good thing we have freshmen like Tyler! If a notch was a bit off, we would also tweak it with a die grinder, hence the headphones and face shield. Our machine shop is small, and the welding area is even smaller, so people working on top of each other was pretty common.