
,
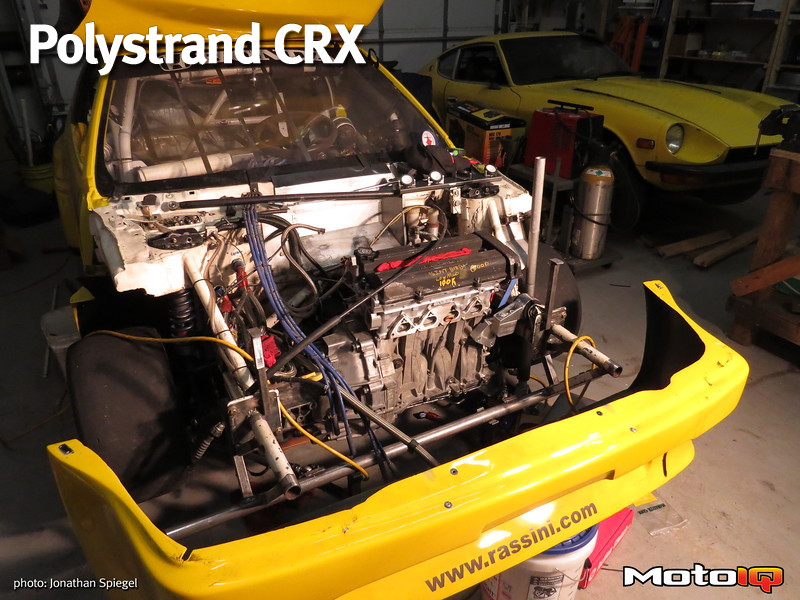
Current SCCA GT-Lite rules allow for fairly extensive engine modification, including oversize valves, cylinder head porting, aftermarket rods and pistons, camshafts, valvesprings, etc… As long as you don’t add any material to the head and block, and keep the compression at 15:1 or less, it’s pretty much anything goes. Our goal with this engine is to build reliable power with little maintenance required. This is easy to achieve with off-the-shelf aftermarket parts. Since the engine will rarely see much more than 7000 rpm due to the restricted intake, there’s no point in running wild camshaft profiles. I’m also not a big fan of running high-dome pistons, since they often will restrict flame-front travel, and can create piston to valve clearance issues, especially in high compression applications.
Believe it or not, in the Denver metropolitan area, it was hard to find a machine shop that could bore the block. While a few places would take it (and then send it out somewhere to have the work done), I wanted to be able to talk directly with the machinist who would handle the work. After some hunting around, I found a great little out-of-the-way place filled with old-timers that have been doing this kind of work for decades – Colorado Custom Cylinder Heads, in Englewood, CO. Gary DeWerth, the proprietor, is exactly the kind of guy I was looking for. I grew up hot-rodding small and big-block Chevys, and he brought back fond memories of the machinists that helped me get my start in the world of performance engine building. We probably spent more time talking about engine building than it took for his shop to do the work – this guy knows his stuff. Pistons were measured, and the proper clearances and surface finish determined before I left the shop. The block was dropped off to get machined with a 0.5 mm overbore, along with cleaning off the deck a little to make sure we had a perfect surface for the head gasket. The work was done on schedule and at a reasonable price, and I dropped off the head to be machined next.
 After a thorough cleaning, we started the assembly of the bottom end. Note the generous slathering of assembly lube on the King Racing bearings.
With a host of aftermarket parts to choose from, we decided to use some very tried-and-true components from Brian Crower. In the interest of longevity, we decided to run Brian Crower rods, valvesprings, and steel retainers (since we won’t be revving that high, titanium was deemed unnecessary). Based on the rpm levels, we probably could have gotten away with stock rods and ARP bolts, but the extra peace of mind we get from having a bulletproof bottom end is more than worth the cost. We should be able to run several seasons with little more than routine oil changes and keeping an eye on valve lash.
 New thrust bearings – with more lube. Install these with the slotted side facing the crankshaft thrust surfaces.
The bottom end was assembled using King Racing crankshaft and rod bearings. As each bearing insert was installed, it was coated with a healthy dose of assembly lube. New OEM thrust bearings were installed as well, and all bolts were given a dose of lube on the threads and on the thrust faces of the washers as well.
 Slide the thrust bearings into the slot between the crankshaft thrust surfaces and the block. There are two of them. One each on the fore and aft sides of the number 4 journal.
 Always make sure the main bearing bolts thread easily into the block by hand. If not, chase the threads in the block with a bottoming tap and clean both the holes in the block and the bolts very thoroughly. Make sure you lube the threads before installation.
2 comments
Any progress on this thing? It’s such an awesome project.
Any updates?