,
Insulation
Unless you live right on the equator, insulation is a good investment. It will keep you cooler in the summer and warmer in the winter. Insulation is expressed by its R-value, the Resistance it offers to heat flow. A higher R power insulates better. An invaluable option chosen when building this house was insulated garage doors. Without insulated doors, the garage would never be as well protected because the doors offer a large space for heat to easily flow. However, the bare walls also need some insulation. R11 is the minimum R value that should be used in garage walls, but this garage will be completed with R13.
 |
| Hard to believe many aftermarket bumpers are made out of the same stuff that will insulate, but fiberglass is the most common material used for insulation. |
Always measure what you think you need and add some more. The walls in the garage are 8′ tall and spaced about 16″ center to center of the 2x4s. Insulation 15 ¼” wide by 93″ tall was a perfect fit. Each piece covers 116.25 square inches, about the same as in between each support. Insulation is sold as individual pieces (batts), or in rolls of 12 batts. The garage walls, including the pieces on either sides of the garage doors and above the doors, measured about 4300 square inches. Since there won’t be any insulation over the 2×4 boards themselves, 3 rolls was enough to cover the garage.
 |  |
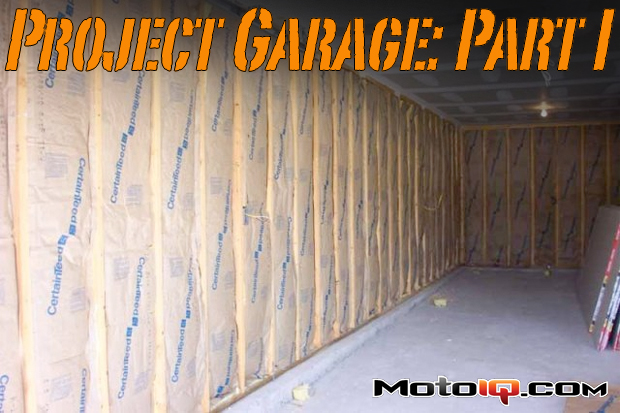
| Before insulation… | And after! |
Insulating is easy. To be extra safe, use gloves and a face mask to protect yourself from inhaling the fiberglass or having it come into contact with your skin. It will make your throat, arms, legs, pretty much anything it contacts, itch like crazy. Most of the pieces were the perfect fit for these spaces and didn’t need to be cut. Just push the insulation between the 2x4s from the floor to the ceiling, paper side out. The vapor barrier (paper) should always be towards the living space. You can staple the paper to the framing wood to hold it in place. To cut the insulation around outlets or for smaller spaces, use a sharp utility knife and a ruler. Measure the space width and slice into the paper side in a few locations then down the entire piece. It may take another 2-3 slices to cut through the whole piece.