


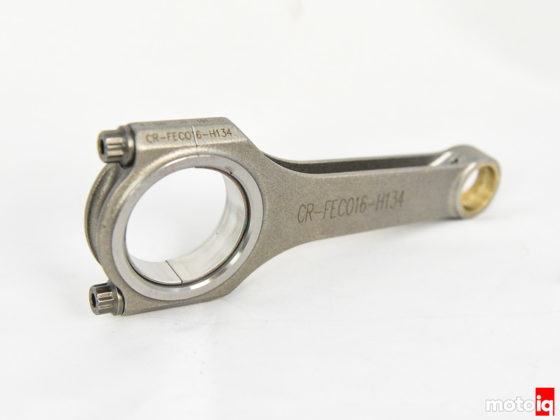
Since there was no fluid in the system at all, we used a vacuum to help draw fluid through the system, just like how we had used the vacuum to pull the clutch fluid out of the old master in the first place. Then, a standard clutch bleeding process can take place. However, you don’t want to fully depress the clutch pedal as special care is required at this stage.
Tilton requires that you carefully measure the clutch pedal travel and re-work the clutch pedal stop to prevent overtravel of the HRB. Overtravel of the hydraulic release bearing will potentially result in damage to the HRB, to your clutch, or to your transmission. The instructions are very explicit about how to adjust the clutch pedal stop. It’s easy enough, though. You basically have someone try to turn the drive wheels with the car in gear, and then you depress the clutch until the wheels release. Then, move the clutch pedal an extra 1/4″ and then make sure your pedal stop is set.
We simply removed the Toyota clutch pedal switch, since it was no longer used, and replaced it with a bolt and some jam nuts. Presto! Now we were confident that we would not overtravel the HRB. The only negative aspect of the clutch change ended up being that the clutch pedal has a tendency to not return all the way to the top, so sometimes there’s some funky initial take-up when depressing the clutch. For a street car I might care. For the race car? Ain’t care.
With the clutch properly bled, we cranked the car over to ensure the starter would properly engage the flywheel, and then it was time for another moment of truth. We put the transmission in neutral, started the engine, pushed in the clutch, put the car in gear, and slowly let the clutch out. THE WHEELS TURNED! We were ready for a check ride.

We took the car for a check ride around the streets around the shop. I still maintain active insurance on Project SC300 and the car is registered. Since it’s older than 25 years (jeez!) it’s now emissions exempt in Georgia.
It….
sounded…
horrendous.
I mean truly bad. Was something wrong?
Not so, said L2. It was a multi-plate clutch with a super light flywheel and solid mounts everywhere with a car that has no interior. While it may have sounded like awful gear crazy death, they assured me it really just sounded like race car.
So, with trepidation I packed my things and went home for the night, to return the next day for my jZilla Track Days advanced/open lapping event. How’d it go?

And, if you’re interested in in-car footage, courtesy of our friends at EZVIZ, you can see that, too:
It went just fine! The car survived almost thirty laps around the famous Road Atlanta circuit. And, honestly, the car was ready for more, but I was not. Between the stress of the prior few days, the Atlanta heat and humidity, and my not having been track-driving in quite some time, I got really worn out really quickly.
Our tires were manufactured in 2012, our brake pads were getting low, and we just didn’t need to push it. We had proved the electronics were holding (no hiccups) and the driveline could take it. So, we decided to declare victory and retire for the day.
What are my impressions? I’m really happy, honestly. The clutch is extremely forgiving. The super light flywheel makes revving and heel-toe downshifting a breeze (although I have to learn the new set-up better). The overall gearing is quite nice and it doesn’t seem too short or too long. But, if I need to, I can easily change the rear ratio. If I had to make a complaint, it would be that Tremec has put reverse right next to 5th gear. This is somewhat scary as there is real potential to money shift. However, the transmission comes equipped with a lockout solenoid. I am considering wiring that solenoid to a switch on the Racepak. I would leave that switch on ALWAYS. If I needed to put the car in reverse for some reason, I would have to consciously turn the switch off. I’d need to remember to put it back on, but that’s not so hard, is it?
What’s next for Project SC300? We need wheels. We need tires. We need way more brakes! And a proper race car alignment and corner weighting probably couldn’t hurt, either.
9 comments
Fantastic coverage as always, could you tell me what “aircraft marking paint” you use on those adapter nuts?
I knew someone would ask!
A couple of searches gave me the following:
http://crosschecknow.com/
This product is also available in several other places.
Thanks for putting me to task 🙂
> If I needed to put the car in reverse for some reason, I would have to consciously turn the switch off. I’d need to remember to put it back on, but that’s not so hard, is it?
When the car is already in reverse, it doesn’t matter what the solenoid does right? Maybe you can use a momentary switch, so that you need to hold that switch to enter R. Or program that switch to hold the solenoid open a few seconds only.
Good points.
My guess is that the lockout solenoid causes a physical blockage of the shift gate from entering the R position. If the car is IN reverse, and you try to engage the solenoid, I’m not actually sure what would happen! Good question for me to ask Tremec.
A momentary / programmed function could work for sure, assuming that engaging the lockout solenoid while the car is IN reverse has no ill effects.
Assuming the Tremec transmission has a reverse position switch (for example, IIRC Nissan and Toyota transmissions have a detent on the rail for reverse, which closes the switch when in said position), which it absolutely should for the sake of having a reverse light, one could in theory use some fairly simple programming to have the reverse lockout closed EXCEPT in moments where 1) the vehicle isn’t in motion, which ideally would use wheel speed sensors for reference and 2) when the reverse position switch is closed, thus the lockout wouldn’t try to engage while the vehicle is in reverse. I say “in theory” because it has been literal years since I had to commit CAN databus serial data protocols to memory, so I must admit right this second I’m not sure how one would go about doing that unless your ECU receives signals from your wheel speed sensors, has a spare digital input pin for the reverse position switch, and also a spare digital output pin, not to mention some sort of built in programming to reference those values and output an on/off signal based on the conditions I suggested earlier. Alternatively, one could technically program an Arduino Nano or something like that to look for a CANBUS header message for vehicle speed with a reading of zero or a closed condition on the reverse position switch circuit, and open the reverse lockout solenoid under either condition with a relay, but good lord that scenario seems like overkill to me, although certainly not crazy expensive.
My experience with TR-6060 equipped vehicles is limited primarily to alignments/oil changes/test drives, but I had taken apart quite a few Toyota/Nissan RWD manual transmissions back in school, especially whilst undergoing Nissan-specific training, and I can’t imagine GM/Ford/Tremec would have tried to come up with a design that’d be any more/less simple than a detent switch and a few lines of code.
You’re absolutely right and I have a few options.
Hypothetically the Haltech Elite 2500 ECU can output a signal on one of the digital outputs when the vehicle is in motion.
If not, the Autosport Labs datalogger/GPS can absolutely control a digital output based on vehicle speed. Since it’s reading the CAN from the Haltech, and I wired the wheel speed sensors into the Haltech, the logger knows both real wheel speed and GPS vehicle speedl
As long as the lockout solenoid doesn’t sink a lot of current, it would not be hard to do.
I also have the LAUNCH button on my steering wheel. Since all that does is control a rev limiter, I could also make that button dual-purpose. The logger can see when the button is pressed, so I could also allow the LAUNCH button to disable reverse lockout.
Sounds like as long as nothing goes terribly funky with the wiring to your launch button, that could be an excellent plan, especially since it’s not exactly like momentarily activating your two step wouldn’t be an issue when you’re putting the car into reverse. Maybe use a MOSFET and a dedicated fuse for the solenoid, just to be on the safe side, vis a vis the potential current situation? With the MOSFET you could technically just take virtually any small plastic enclosure (like, say, an old square keyfob), cur out a square big enough to stick a heatsink for the MOSFET through, and fill the enclosure with silicone after wiring the unit up, and have basically something smaller than a relay that doesn’t get affected by weather/vibrations/etc. that gives you some peace of mind, although I personally suspect said solenoid won’t pull enough current for that to become an issue any time soon. All that being said though, couldn’t the solenoid be powered through your RacePak PDM if it did pull too much current for the ECU to handle? I must admit, this suddenly has me curious to see how much current that solenoid uses; if I had a TR-6060 laying around, I’d almost be bothered enough to use one of my spare relays and some jumper wires and find out. I mean, the spring it has to work against can’t be THAT stiff, could it?
Haha, your in-car video sounds more like a plane taking off and doing fly-bys here and there
All in, great to see the car on the road and running!
Thanks! It’s been a long time coming. We’re quite excited to keep at it. Don’t worry – the articles won’t stop.