
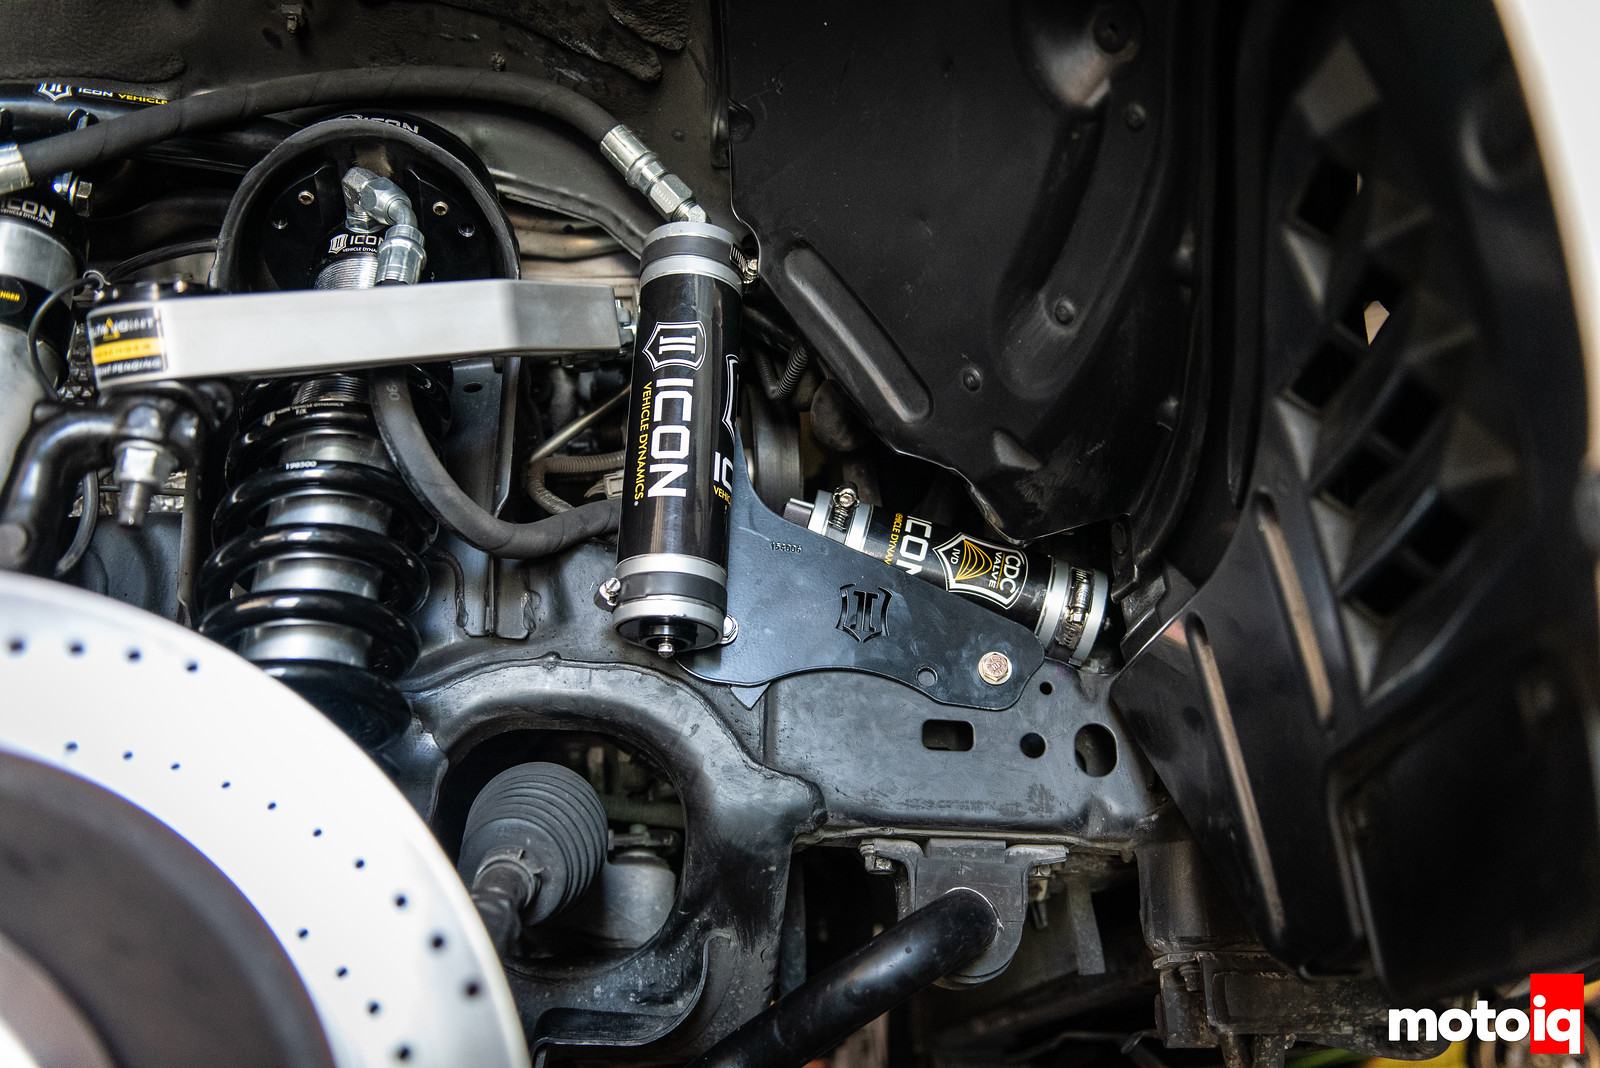

Next, the shock bottom eye was bolted in next into our newly welded bracket. The double shear mount supports the lower shock eye completely.

Next we mounted the shocks remote reservoirs. We had to do a bit of thinking to determine the best place to put them to make sure we had articulation room and tire clearance.

We ended up putting the main coilover reservoirs behind the frame rail after making sure that it was still easy to reach the compression damping adjustment. This gave us plenty of room for tire clearance.

Here is everything in close to the final configuration. Even with all those suspension parts, the trucks OEM configuration is largely undisturbed. As the last step we reinstalled the ABS sensor wire, brake lines and front anti sway bar.

Here is our completed front suspension installation. As a note, many off roaders leave the sway bars off but we consider them to be critical for on road and fast dirt road handling. Note that many race trucks have sway bars. The big Tundra is most at home going fast through the desert and on rally like dirt roads and is hard to drive on tight trails because of its size and lack of visibility. Sway bars help in these sort of situation where maximum articulation wit no sway bars is best for tight and technical trails. At a minimum it is only a few minutes to disconnect the sway bar end links if you needed more articulation so no big deal.
14 comments
It’s always interesting to see these builds that showcase higher end components than most people will reach for. That being said, I think you are pushing the envelope of calling this “bolt on” when you needed to weld the shock mounts, fabricate your own brackets, and cut away the inner fender. I still appreciate the design work that went into this suspension package.
Thank you for the edit suggestions. These mods are very minimal when compared to a lot of dual shock conversions and rear suspension conversions that add this much travel. If you look at our build series our first step was pure bolt on and we wanted to go beyond that.
I’m trying to understand from the pictures, but does the top hoop in the front bolt to the frame, come up and attach to the top of the coilover mount? do the 4 top hat bolts pass through the hoop assembly into the coilover? I love how this setup is essentially a long travel system without adding the longer upper and lower control arms. Jealous for sure.
You got the loop mount right! This system has a lot more droop than the stock suspension and gives you about 1″ more up travel than the stock suspension and a couple more in droop in the front and about 2 more inches of up travel in the rear and 5 more inches of droop so if you get air born, the suspension will droop and give you more travel to absorb the landing.
This is all out of my range of experience. Big trucks, open wilderness and fast bombing of stuff.
Are you going to post some comparison videos that can highlight the differences?
Yes the video is coming out this week or next week.
It’s a bit of a shame that suspension companies ONLY make off road suspension kits. Nobody makes lowering or street kits for trucks anymore. I really want to lower my Tacoma but there’s only a single low quality lowering kit for it and it only has a 2″ drop. I don’t intend to do any real off-roading with my truck and I think lowered 4-5″ with some nice fat wheels and tires would look really good and make it a bit more practical for the towing/commuting/hauling I do with it. I bet the Icon dampers with some custom springs and arms would work really nicely.
I’ve done a tundra with icon coilovers with the same damping benefits with the lift collar all the way up and it was the same height as stock. It also enjoyed the same ride & handling benefits seen here in Mike’s experience.
So you basically have a Toyota Raptor. Very cool. My friend owns a Raptor and when he took me out and jumped it I was ready to crap my pants. . . until we landed. That thing jumps smoother than my trucks take a washboard dirt road. I have been nothing but disappointed with run of the mill Bilstein “heavy duty” shocks. If you want quality damping unfortunately you really have to open your wallet.
I’m running the same Icon RXT leafs and Omega bypass shocks on my 17′ Tundra, and need to install some air bags for towing. Hoping you could give a parts break down for what was used on this build, specifically the upper and lower mounting brackets for the bags and cradles. Thanks in advance and crazy nice build BTW!
All the parts and the manufacturers are listed in the article.
yea but who makes those offset mounts for the airbags?
Comes with the airbags.
You got the loop mount right! This system has a lot more droop than the stock suspension and gives you about 1″ more up travel than the stock suspension and a couple more in droop in the front and about 2 more inches of up travel in the rear and 5 more inches of droop so if you get air born, the suspension will droop and give you more travel to absorb the landing.