,
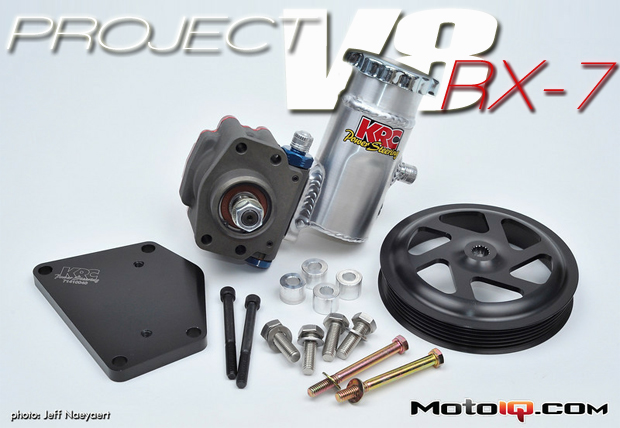
The aluminum KRC pump can be outfitted with optional flow valves to fine tune the amount of assist and feel to the driver’s preferences. If our pump needs adjustment we can easily change valves without even removing the pump from the car!
 |
| The inlcuded valve on our KRC pump flows 2.11 GPM. KRC Changeable Flow Valves can be purchased individually or as a kit. The 4 valves on the left stamped with letters INCREASE the flow anywhere from 2.37 gallons per minute up to 3.17 gallons per minute–allowing more assist and less feel. The 4 valves on the right stamped with numbers DECREASE the flow from 1.84 gallons per minute to as low as 1.05 gallons per minute–allowing less assist and thus more feel. We decided to wait and see how our steering felt before we ordered any of the flow valves–they ain’t cheap! |
Now that we have the pump, we need the lines and adaptors to connect it to the factory Mazda steering rack. If you’re fortunate enough to have an Earl’s Plumbing store nearby you can get everything you need to build your power steering lines capable of supporting the high pressure output of a power steering pump. Your standard AN lines and aluminum fittings are fine for the return line from the rack back to the pump reservoir, but won’t stand up to the pressure on the feed side. The nice thing is Earl’s makes a high pressure -6 triple steel and fabric braid-reinforced hose and fittings you can put together yourself in a few minutes and save some money over having a custom made high pressure line!
 |
| Ingredients for our high-pressure power steering line: a few feet of Earl’s power steering hose and a pair of 90 degree -6 stainless steel hose ends (also available in straight and 45 degree angles). We also needed a straight male AN -6 to 12mm x 1.5 adaptor to screw into the high-presssure side of our power steering rack. |
 |
| A closer look at the Earl’s high-pressure power steering fitting. |
 |
| To assemble, the left-hand threaded socket is secured in a vice and the hose is twisted in to the left. Once it bottoms out it’s helpful to back it off about a quarter turn to get the hose end started. |
 |
| Next the hose end is put in the vice, hose and socket are pushed on by hand ’til the threads grab. Twisted on as much as possible by hand and then by wrench the rest of the way. |