
,

The original links are whimpy 1-¼” tube that is definitely not 0.25” wall.

When installing the links, be sure to note where the grease fittings are. You want them pointing up so they don’t get damaged by debris. It’s also important to note that one rod end has a left-handed thread and the other is a normal right-handed thread (this is what makes these links turnbuckles and easy to adjust). I4X makes it extra easy to know which is which by marking the LHT side, seen here. You can put the links in either way, but it would be wise to ensure the RHT threads are on the same end of the truck to avoid confusion when you’re adjusting things.

I4X does not include instructions, so installing the bolts can be a bit tricky. They only include two washers and these need to go inside the bracket to center the spherical bearing. However, it’s also a really good idea to have washers on the nut and bolt head side as well to better distribute the bolt loads. We ended up grabbing a few washers at the local hardware store (though they were not Grade 8).

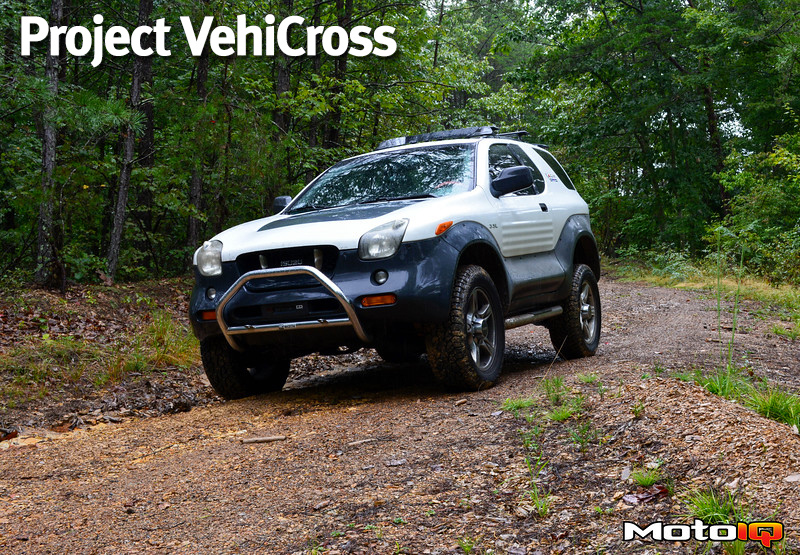
Swanky! The new lower link looks super badass under our Isuzu. Time to do the other side!

Let’s hope these links solve our driveshaft wobbles. After making sure everything was tight (Isuzu requests the links be tightened to 100 lb-ft), we screwed in the zerk fittings and greased up our new joints.

3 comments
Did you ever get the vibration issue solved? I am having the same issue. Mine is happening both under load with initial push of accelerator yet if push pedal more than 1/4′ inch it doesnt make noise. Does make noise at times with deceleration. How to solve driveline balance?
Hi James,
I never fully solved the noise issues in the Vehicross. However I have had a similar issue in the Cappuccino (loud groaning noise that sounds like driving over a rumblestrip, especially at highway speeds and under acceleration). I am currently having that differential rebuilt with all new bearings and shims. I actually bought another owner’s used differential carrier and the noise went away immediately. I am still having mine rebuilt as I had already ordered the parts and mine is an LSD while the spare I bought is open.
Anyway, it sounds like you are having the same issue so you will probably have to get your diff rebuilt. Sorry for the bad news.
Follow up. Have replaced u joints, wheel bearing and upper and lower tie rods and cv joints. Someone said the carrier assembly should be replaced. I am at a loss as I cannot drive down highway without it sounding like I am constantly going over rumble strips. (Maintaining speed on highway requires gas pedal to be barely pushed which is were this makes the noise. Just curious if you solved the issue and how if you did.