• Tech
    • Tech Category
      • Engine
      • Bottom End
      • Rods and Pistons
      • Head and Headwork
      • Cams and Valvetrain
      • Cooling and Heat Management
      • Intake
      • Headers and Exhaust
      • Rotary
      • Engine Management and Tuning
      • Drivetrain
      • Transmission
      • Clutch and Flywheel
      • Differential and Final Drive
      • Driveshaft and Axle
      • Axles
    • Tech Category
      • Suspension
      • Shocks and Coilovers
      • Springs
      • Swaybars
      • Arms and Links
      • Bushings
      • Steering
      • Geometry Correction
      • Suspension Setup and Tuning
      • Brakes
      • Wheels and Tires
      • Fueling
      • Forced Induction and NOS
      • Aerodynamics
    • Tech Cat
      • Electrical
      • Battery and Power Distribution
      • Electronics
      • Wiring
      • Electrical System Education and Troubleshooting
      • Lubrication
      • Interior and Controls
      • Exterior
      • Paint and Bodywork
      • Wraps and Film Protection
      • Exterior Care and Maintenance
      • Data Acquisition and Tuning
      • Fabrication and Safety
      • Tips and How-To
  • Projects
    • Make A-D
      • Acura
      • Integra (DC2)
      • NSX
      • CSF RSX (DC5)
      • BMW
      • E30 (SR20 Powered)
      • E36 323is
      • E36 M3 (Black)
      • E36 M3 (Silver)
      • E39 M5
      • E46 M3
      • E90 M3
      • E46 Racecar
      • Yost Auto E92 M3
      • Yost Auto F82 M4
      • Chevrolet
      • Camaro Gen5
      • Corvette Stingray (C7 Z51)
      • Corvette Stingray (C8 Z51)
      • GMC Canyon
      • Dodge
      • Viper GTS
    • Make E-I
      • Ford
      • E350 Tow Rig
      • F150 EcoBoost
      • Fiesta ST
      • Focus ST
      • Mustang 5.0 (Grey)
      • Mustang 5.0 (White)
      • Mustang S197 (Budget Track Car)
      • Mustang S550 GT
      • Honda
      • Civic EF Racecar
      • Civic Si (Coupe)
      • Civic Si (EP3)
      • Civic Si (Saloon)
      • EJ Civic
      • Polystrand CRX
      • S2000 (AP1)
      • S2000 (AP2)
      • Infiniti
      • G20 Racecar
      • G20 (P10 AWD Turbo)
      • G35
      • G37S
    • Make J-M
      • Isuzu
      • Vehicross
      • Lexus
      • ISF
      • SC300
      • Mazda
      • V8 RX7 (3rd Gen)
      • RX-7 (3rd Gen)
      • RX-7 Restomod (3rd Gen)
      • Skyactiv 3
      • Frankenmiata
      • Miatabusa
      • My Girlfriend’s Miata
      • Mitsubishi
      • EVO VIII
      • EVO IX
      • EVO X
      • CSF EVO X Racecar
      • Professional Awesome EVO VIII
    • Make N-P
      • Nissan
      • 200SX
      • 200SX SE-R
      • 240SX Land Speed Racer
      • 300ZXTT
      • 350Z
      • 350Z Drift Car
      • 370Z
      • GT-R (R33)
      • GT-R (R35)
      • GT-R (Team America BNR32)
      • LS S13
      • NX GTi-R
      • Pathfinder
      • S13 Drift/Grip Do-it-All Mega 240
      • Sentra SE-R
      • Sentra Spec V
      • Silvia
      • STurdteen Drift Car
      • Porsche
      • 991 GT3RS
      • Cayman (987)
      • Cayman T
      • Cayman GTS 4.0
    • Make S-Z
      • Scion
      • FR-S
      • Scion Tuner Challenge FR-S
      • TC
      • Subaru
      • Autocross BRZ
      • Legacy GT
      • STI (gen 2)
      • STI (gen 3)
      • WRX (GD)
      • WRX (VA)
      • Toyota
      • 4Runner
      • AE86 Corolla
      • GR Corolla
      • Starletabusa
      • Supra Mark IV
      • Tacoma
      • Tundra
      • Volkswagen
      • MKIV Jetta TDI
      • MKVI Golf TDI
      • MKVII Golf R
      • Sipster (Rabbit)
    • Other Projects
      • Powersports
      • Aprilia RS50
      • Aprilia SR50
      • Doodlebug
      • Ducati 998
      • Ducati Hypermotard
      • Honda Ruckus
      • Husqvarna TE610
      • Go Karts
      • Other
      • Sim Racer
      • Aurora Cobra
      • Garage
      • NP01 Prototype
  • Features
    • Features
      • Feature Cars
      • Drag Race Cars
      • Drift Cars
      • Land Speed Cars
      • Open-Wheel Cars
      • Rally Cars
      • Road Race Cars
      • Street Cars
      • Time Attack Cars
      • Drag Racing
    • Features
      • Events
      • Drifting
      • Land Speed Racing
      • Open-Wheel Racing
      • Time Attack Racing
      • Rally Racing
      • Road Racing
      • Car Shows
      • Columns
      • SlipAngle Podcast
  • Video
  • Shop *NEW*
  • MotoIQ Garage Services
  • About
  • Shop *NEW*
  • MotoIQ Garage Services
  • About
MotoIQ
MotoIQ
  • Tech
    • Tech Category
      • Engine
      • Bottom End
      • Rods and Pistons
      • Head and Headwork
      • Cams and Valvetrain
      • Cooling and Heat Management
      • Intake
      • Headers and Exhaust
      • Rotary
      • Engine Management and Tuning
      • Drivetrain
      • Transmission
      • Clutch and Flywheel
      • Differential and Final Drive
      • Driveshaft and Axle
      • Axles
    • Tech Category
      • Suspension
      • Shocks and Coilovers
      • Springs
      • Swaybars
      • Arms and Links
      • Bushings
      • Steering
      • Geometry Correction
      • Suspension Setup and Tuning
      • Brakes
      • Wheels and Tires
      • Fueling
      • Forced Induction and NOS
      • Aerodynamics
    • Tech Cat
      • Electrical
      • Battery and Power Distribution
      • Electronics
      • Wiring
      • Electrical System Education and Troubleshooting
      • Lubrication
      • Interior and Controls
      • Exterior
      • Paint and Bodywork
      • Wraps and Film Protection
      • Exterior Care and Maintenance
      • Data Acquisition and Tuning
      • Fabrication and Safety
      • Tips and How-To
  • Projects
    • Make A-D
      • Acura
      • Integra (DC2)
      • NSX
      • CSF RSX (DC5)
      • BMW
      • E30 (SR20 Powered)
      • E36 323is
      • E36 M3 (Black)
      • E36 M3 (Silver)
      • E39 M5
      • E46 M3
      • E90 M3
      • E46 Racecar
      • Yost Auto E92 M3
      • Yost Auto F82 M4
      • Chevrolet
      • Camaro Gen5
      • Corvette Stingray (C7 Z51)
      • Corvette Stingray (C8 Z51)
      • GMC Canyon
      • Dodge
      • Viper GTS
    • Make E-I
      • Ford
      • E350 Tow Rig
      • F150 EcoBoost
      • Fiesta ST
      • Focus ST
      • Mustang 5.0 (Grey)
      • Mustang 5.0 (White)
      • Mustang S197 (Budget Track Car)
      • Mustang S550 GT
      • Honda
      • Civic EF Racecar
      • Civic Si (Coupe)
      • Civic Si (EP3)
      • Civic Si (Saloon)
      • EJ Civic
      • Polystrand CRX
      • S2000 (AP1)
      • S2000 (AP2)
      • Infiniti
      • G20 Racecar
      • G20 (P10 AWD Turbo)
      • G35
      • G37S
    • Make J-M
      • Isuzu
      • Vehicross
      • Lexus
      • ISF
      • SC300
      • Mazda
      • V8 RX7 (3rd Gen)
      • RX-7 (3rd Gen)
      • RX-7 Restomod (3rd Gen)
      • Skyactiv 3
      • Frankenmiata
      • Miatabusa
      • My Girlfriend’s Miata
      • Mitsubishi
      • EVO VIII
      • EVO IX
      • EVO X
      • CSF EVO X Racecar
      • Professional Awesome EVO VIII
    • Make N-P
      • Nissan
      • 200SX
      • 200SX SE-R
      • 240SX Land Speed Racer
      • 300ZXTT
      • 350Z
      • 350Z Drift Car
      • 370Z
      • GT-R (R33)
      • GT-R (R35)
      • GT-R (Team America BNR32)
      • LS S13
      • NX GTi-R
      • Pathfinder
      • S13 Drift/Grip Do-it-All Mega 240
      • Sentra SE-R
      • Sentra Spec V
      • Silvia
      • STurdteen Drift Car
      • Porsche
      • 991 GT3RS
      • Cayman (987)
      • Cayman T
      • Cayman GTS 4.0
    • Make S-Z
      • Scion
      • FR-S
      • Scion Tuner Challenge FR-S
      • TC
      • Subaru
      • Autocross BRZ
      • Legacy GT
      • STI (gen 2)
      • STI (gen 3)
      • WRX (GD)
      • WRX (VA)
      • Toyota
      • 4Runner
      • AE86 Corolla
      • GR Corolla
      • Starletabusa
      • Supra Mark IV
      • Tacoma
      • Tundra
      • Volkswagen
      • MKIV Jetta TDI
      • MKVI Golf TDI
      • MKVII Golf R
      • Sipster (Rabbit)
    • Other Projects
      • Powersports
      • Aprilia RS50
      • Aprilia SR50
      • Doodlebug
      • Ducati 998
      • Ducati Hypermotard
      • Honda Ruckus
      • Husqvarna TE610
      • Go Karts
      • Other
      • Sim Racer
      • Aurora Cobra
      • Garage
      • NP01 Prototype
  • Features
    • Features
      • Feature Cars
      • Drag Race Cars
      • Drift Cars
      • Land Speed Cars
      • Open-Wheel Cars
      • Rally Cars
      • Road Race Cars
      • Street Cars
      • Time Attack Cars
      • Drag Racing
    • Features
      • Events
      • Drifting
      • Land Speed Racing
      • Open-Wheel Racing
      • Time Attack Racing
      • Rally Racing
      • Road Racing
      • Car Shows
      • Columns
      • SlipAngle Podcast
  • Video
  • 991 GT3RS
  • Porsche
  • Projects

Tune your OEM Active Suspension with DSC Sport’s Suspension Controller

  • Mike Kojima

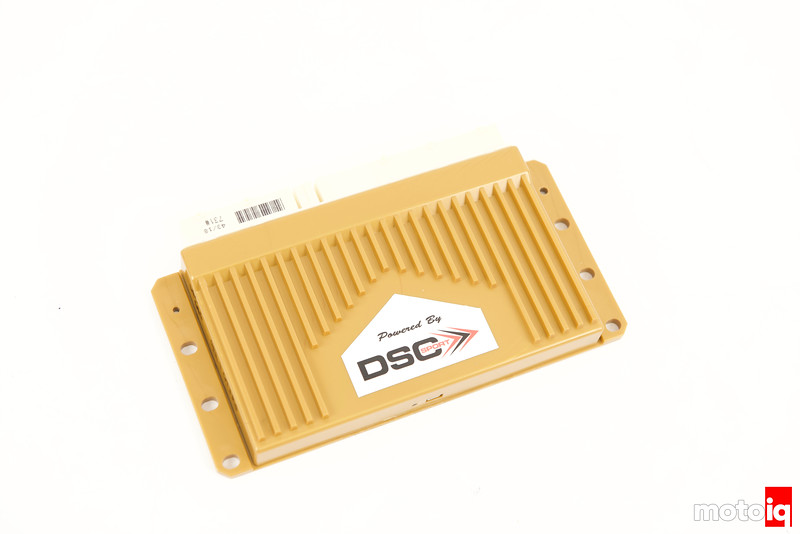
There are many parameters you can tweak with the DSC Sport Controller, with a dizzying amount of choices because the Porsche has a lot of sensors so the controller can be pretty powerful.  Let’s look at the many menus you can tune.

The first menu is under the G-Force tab. The G-Force Tab is where one sets the main damping force for each damper for any given G-Force, as well as where one sets the G Comfort Parameters for ride quality.  This is where you map out the stiffness and softness of the shock in cornering, acceleration and braking, and any vector in between.  We set things so the shocks go full send pretty quickly as G’s build-up but are reasonably soft when the G’s are low.  Here are the adjustments.

G-Force Table – The G-Force Table represents the physical G-Forces imparted on the vehicle. As such
the upper portion of the table represents the vehicle during braking; the lower portion of the table
represents the vehicle under acceleration; the right side of the table represents the vehicle turning left (GForce applied to the right side of the vehicle), and the left side of the table represents the vehicle turning right (GForce applied to the left side of the vehicle). The percentage selected here represents the overall percentage of
available damping force as set in the “Shock Calibration Table”.

Settings Edit Panel – Each selectable box inside the G-Force Table contains four smaller boxes
representing each corner of the vehicle. The cells are arranged to match each wheel; the top-left cell is
the front-left wheel, the right-top cell is the front-right wheel, the bottom-left cell is the rear-left wheel, and
the bottom-right cell is the rear-right wheel. The dampers are set in each box by changing the percentage
in the Settings Edit Panel. The percentage selected here represents the overall percentage of available
damping force as set in the “Shock Calibration Table”. Shades of grey directly correlate to the shock
calibration table. Always remember to hit update to save in the cell you are editing.

G Comfort Parameters Box – The G Comfort Parameters Box determines ride quality when there is little to
no G Force. The G Comfort Parameters Box can be set to any G-Force value, thereby influencing ride
quality from 0G’s to 0.4G’s in any direction, for example.

Default Rate – This is the “Default” soft shock setting when operating inside the “G patch” or
“box”. This number is the % from the shock calibration table. So if a 1 or 15 is present, 1% or 15%
of the shock, calibration will be applied.

Offset – This is a calculated value and is always set to 100 on the new units.

Rate of Change (Sensitivity) – This is the rate of change within the box or G Patch. The greater
the number, the higher the sensitivity. This means you will not deviate from the Default rate
(Lng rate) as quickly. The smaller the number, the lower the sensitivity. This means you will
deviate from the Default rate (Lng rate) more quickly. Therefore this is why we have a lower
number in “sport” mode (10) compared to “normal” mode (15).

G Rate Max – This number defines the box or G Patch. You need to move the decimal to the left
2 places, then you view this number as a G force value. For example, the number 20 represents
.2G. Within this .2G box, the Default rate (Lng Rate) applies. The size of the box can be from .3G
to .1G, anything outside of this can have some undesirable effects.

The next tab is the Brake Table. The Brake Table is where one sets the damping force modifier for each damper for any given brake pressure input force. By utilizing brake pressure the damper force can be increased before the vehicle begins diving under braking or waiting for the G sensor. This is a predictive strategy.  Here are the parameters you can edit and what they do.

Brake Pressure Table – Just as with the G-Force Table, each box of the Brake Table contains four smaller
boxes representing each corner of the vehicle. The percentage selected here represents the overall
percentage of available damping force as set in the “Settings Edit Panel”. The damper percentage is
applied when the brake is pressed and remains applied for the amount of time selected in the “Decay”
portion of the “Threshold Box”. After this time has elapsed, the G-Force table is applied.
The brake table is used to slow the weight transfer to the front tires, provide more front grip and help
reduce ABS intervention (when equipped). The rear dampers are stiffened to prevent (slow) the weight
transfer to the front tires and increase rear grip. This also helps reduce the load on the front tires and unwanted ABS intervention.

Settings Edit Panel – Each selectable box inside the G-Force Table contains four smaller boxes
representing each corner of the vehicle. The cells are arranged to match each wheel; the top-left cell is
the front-left wheel, the right-top cell is the front-right wheel, the bottom-left cell is the rear-left wheel, and
the bottom-right cell is the rear-right wheel. The dampers are set in each box by changing the percentage
in the Settings Edit Panel. The percentage selected here represents the overall percentage of available
damping force as set in the “Shock Calibration Table”. Shades of grey directly correlate to the shock
calibration table. Always remember to hit update to save in the cell you are editing.

Threshold Box – The Threshold Box allows one to set the amount of time the damper force is applied
once a set brake pressure has been exceeded and the vehicle is over a set minimum speed.
Decay – The Brake Pressure Table is applied before the G-Force Table is referenced. It is only
active for the specified “decay” value. This is usually set to 1000. 1000 = 1.0sec; 0500 = 0.5sec;
etc.

Pressure – This table is only active when you reach the set brake pressure setting, and is
calculated as BAR per millisecond.

Speed – This table is only active once you exceed the minimum speed. It is typically set to 5mph.

Related

Previous page 1 2 3 4 5 6 7 8Next page
Related Topics
  • Electronic Suspension Controller
  • Active Suspension
  • Suspension Controller
  • DSC Sport
  • Suspension Setup and Tuning
  • Shocks and Coilovers
  • suspension
Previous Article
  • STI (gen 2)
  • Projects
  • Subaru

WATCH: Fix Subaru Oiling Issues for Good!

  • Jeff Naeyaert
View Post
Next Article
  • Viper GTS
  • Projects
  • Dodge

Project Viper: Part 14 – Maintenance: Swaybar Bushings, Ball Joints and Boots

  • Billy Johnson
View Post
5 comments
  1. Dan DeRosia says:
    October 25, 2021 at 6:31 am

    I need to dig through this with notes and stuff but it’s really interesting getting an idea of the algorithm that the controller’s using. On the shock hardware side themselves, do you get the impression the stock Porsche dampers are functioning like the Tractive setup DSC offers, where it’s a solenoid bleed valve to tweak bypass flow around the piston shim stack? From hearing about issues with the magnetorheological shocks, I’ve always liked the idea of doing things this way more.

    I know what OEMs are using it for and all but… looking at the way you can set up the DSC controller, do you think there’s good opportunities to set up a race car to gain lap time with something like this system compared to a well setup 3 way motorsports damper setup, or are some of the ways you’d do body control with dampers for a streetable setup just kind of crutching not enough spring rate?

    Reply
    1. Avatar photo Mike Kojima says:
      October 25, 2021 at 4:55 pm

      I am pretty sure it’s a PWM solenoid controlling a bleed around the piston. The aftermarket Damptronic version is like that, there is the valve on top of the piston that controls the flow through the shaft.

      Reply
  2. Justin says:
    October 25, 2021 at 7:28 pm

    thanks for the in depth descriptions. DSC doesnt do a great job in telling people how to use this thing. this will help in tuning my c7 z06. I have the dsc box on my car and it really is professional level software and tuning with a steep learning curve (and a bad software interface to boot) therefore the only changes i have made are to the tour and sport G comfort settings and left track mode completely alone.

    Reply
    1. Avatar photo Mike Kojima says:
      October 25, 2021 at 7:48 pm

      They really don’t but once you get the hang of it, you can do a lot with it. How well does the magnaride respond to tuning inputs with the box?

      Reply
  3. Mike says:
    September 16, 2025 at 5:52 am

    This is a few years old, but was wondering if you had the resultant PDTS file lying around somewhere to use as a new baseline. As noted, the OOB settings need some love

    Reply

Leave a Reply Cancel reply

Your email address will not be published. Required fields are marked *

Input your search keywords and press Enter.