
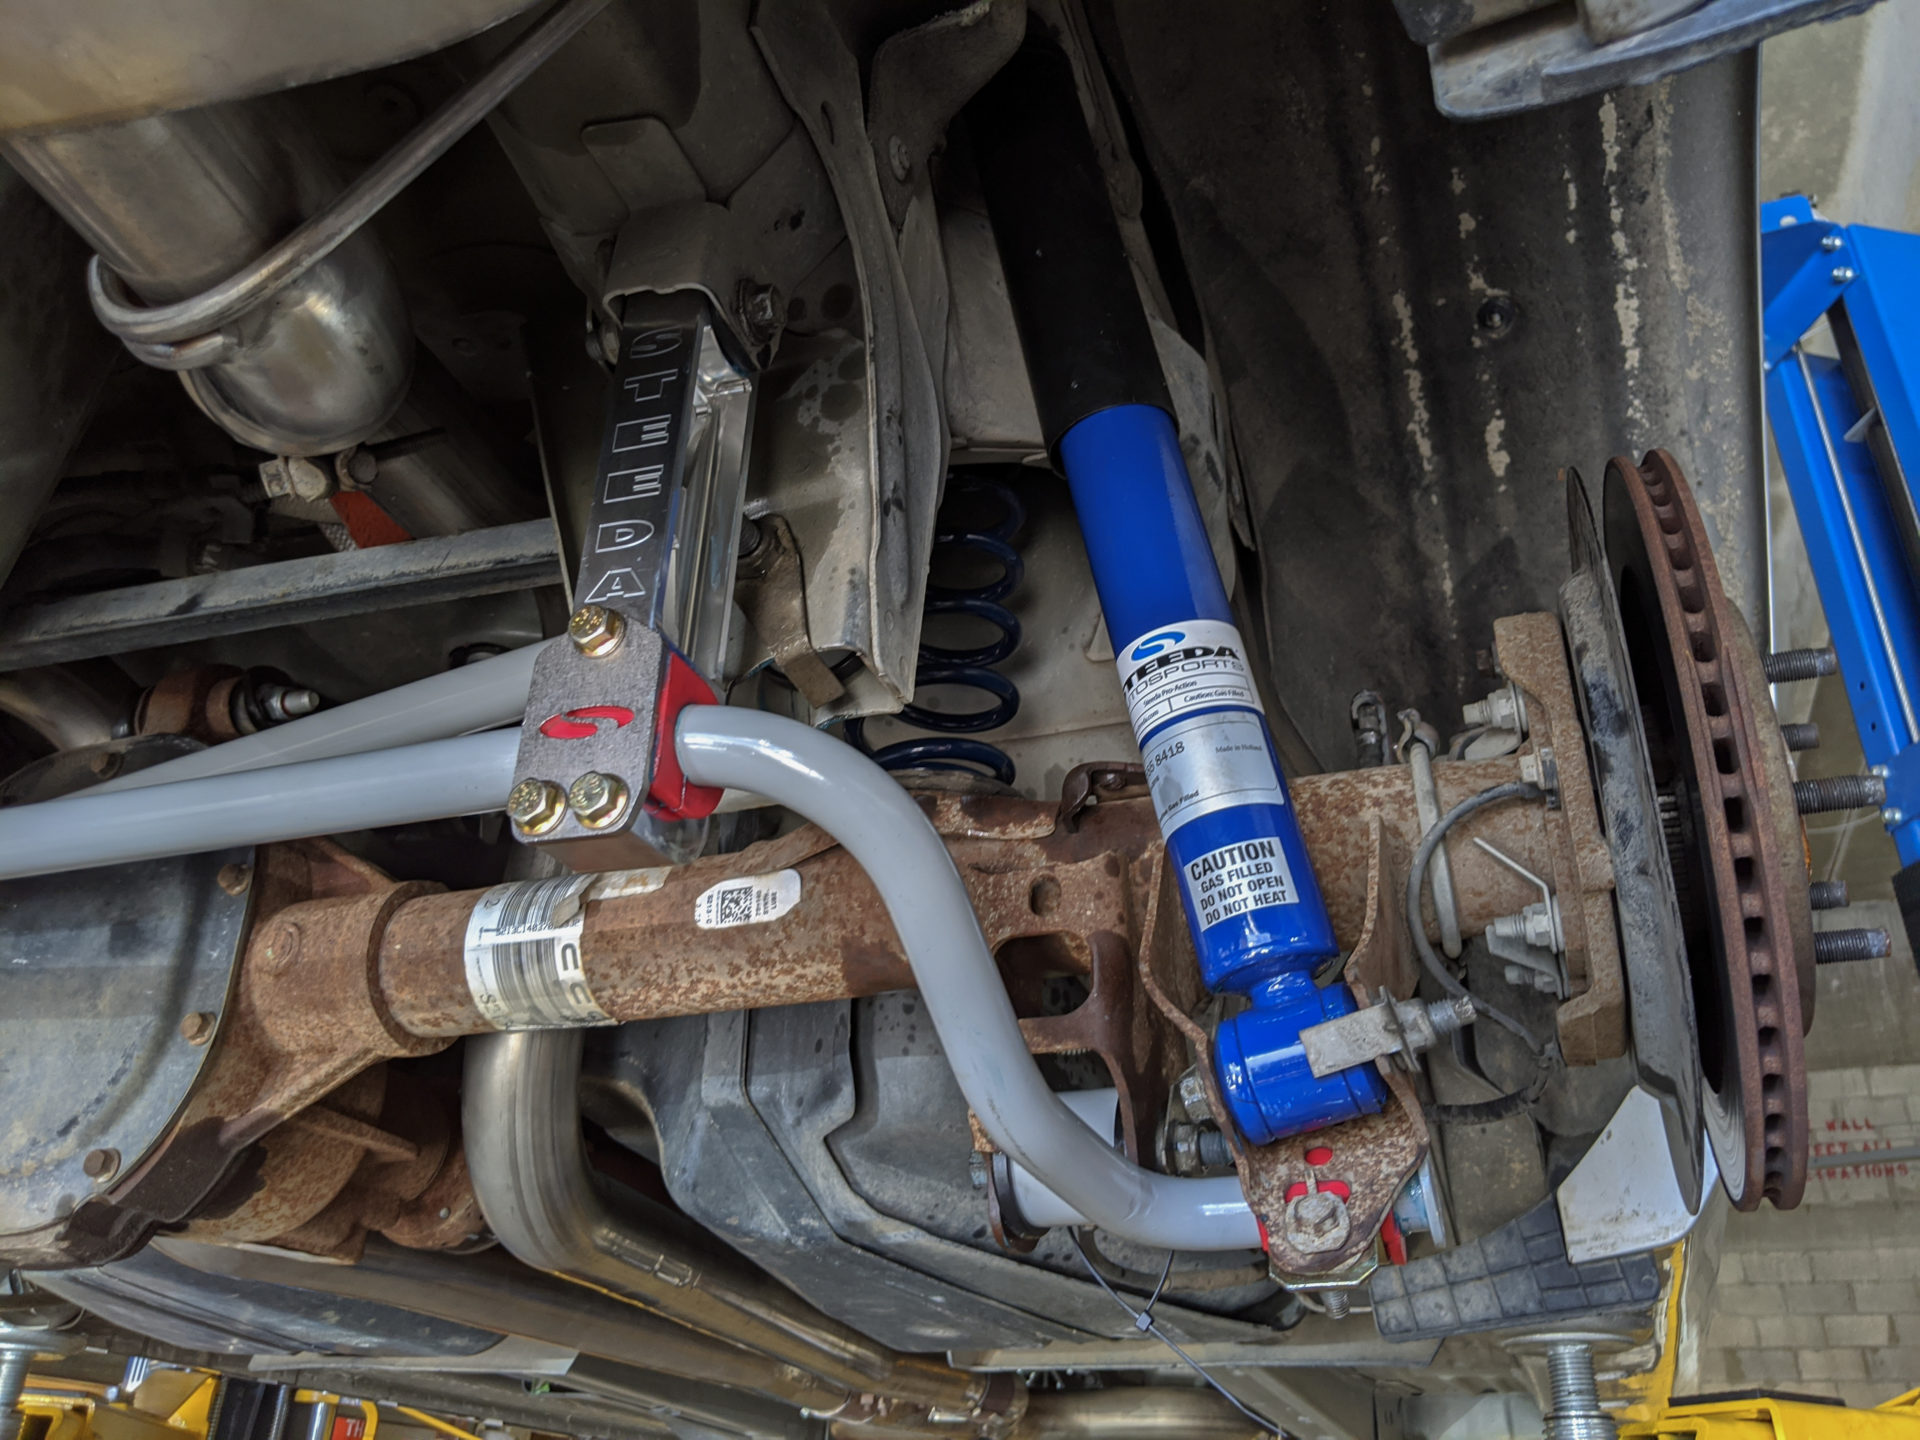

We installed and adjusted the Steeda Mustang Bumpsteer Kit to fix the front geometry of our car with the Extended Ball Joint lower control arms. This immediately fixed all of the inconsistent steering issues, darty behavior, and made the car extremely predictable and easy to drive.
STREET REVIEW Part-1:
On the road, the ride quality was immediately improved over stock. The car was way more ‘tied-down’ and responsive, while maintaining excellent road manners. As I started to push the car and have some ‘fun’ testing the handling and balance of the setup, I quickly came to the conclusion that the 1” rear bar was still too stiff.
When powering out of corners, the rear bar unloads the inside rear tire too much. There was very little grip during ‘combined loading’ (of acceleration and cornering) and it was far too easy to have on-throttle oversteer. The Eaton TruTrac did a good job at limiting inside wheel spin, but it was having to work very hard.
I proceeded for a couple weeks of driving the car this way only to continue to confirm my initial assessment.
 Due to my feedback, Steeda sent me their 7/8” rear swaybar (555-1052). This was more in the ballpark of what I raced in the BOSS 302R (on the stiffer-end).
STREET REVIEW Part-2:
With the smaller 7/8” rear bar installed, it was immediately apparent how much better the balance of the car was. The softer rear bar significantly improved rear grip and I was no longer fighting the car to keep the rear end behind me. The car will both understeer and oversteer if provoked with the right inputs. The car is now easier to drive and outright faster in the canyons or on track.
It’s now able to lay down all 400whp+ on Michelin Pilot Sport PS4s when powering out of corners. The Eaton TrueTrac LSD was much happier and worked even better, giving the car more consistent, predictable, and smooth break-away characteristics when the car was provoked into oversteer. This will greatly help once we install wider track-focused rubber on the car, which will further cause weight transfer and tax the differential due to the increased grip.
Now that the swaybar balance was in the ballpark, I can get back to the street review. Overall, I am extremely happy with the road manners of the suspension upgrades we have done over the last 2 Parts. The 7-year-old OEM suspension was very floaty and not that handling-focused, which gave many people a bad impression of the Mustang as being known for not handling all that well.
The modifications we have done completely transformed our 2014 Mustang GT to beyond BOSS 302 levels of response and performance. Keep in mind, the BOSS was renown for it’s handling poise and performance, beating the V8-powered E92 BMW M3 straight up on the racetrack. Our “Budget 400whp Track Car” now exceeds the BOSS’ horsepower and suspension and really has brought our Mustang into modern sportscar levels of handling and feel. The ride quality is significantly better than pretty much every S197 on coilovers that I can recall, while feeling sporty and responsive.
This is a suspension setup you could live with everyday and take on road trips without getting beat up. Meanwhile, the handling is there and will allow you to hang with pretty much anything on a canyon road since the limits and abilities are now so high that you’d be beyond reckless to get near the limits on the street, and now the car should be quite competent on the track.
An important takeaway is that BIGGER IS NOT ALWAYS BETTER. Throwing a massive rear swaybar on a car, especially a Mustang, is often not the best answer to reduce understeer. A car’s handling is an entire SYSTEM and once change can often adversely affect many others. For the S197 platform, I would try to use the smallest and softest rear swaybar I could get away with, and focus on adding front grip rather than taking away rear grip.
The Creation of a new Steeda Handling Package:
Having been a Ford development driver on various road cars ranging from the Ford GT to the GT500 and GT350; I had similar goals in terms of having a daily-drivable ride quality and excellent handling balance and feel for this Project S197 “Budget Track Car”.
I urged Steeda to offer this setup as a handling suspension package because of how well balanced and grip-oriented it is. They actually did it and created the Steeda Mustang Sport Handling Package (555-2356).
This Package Includes the: Pro Action Shocks, Sport Lowering Springs, 1 3/8″ Adjustable Front Swaybar, and the 7/8″ rear sway bar.
To make your S197 ride, perform and handle like Project S197 “Budget Track Car”, I would highly recommend this suspension package in addition to the other key components: Eaton TrueTrac LSD, Roush 3rd Link, Steeda Heavy Duty Upper Strut Mounts, Steeda Lower Control Arms with X11 Extended Ball Joints, and the Steeda Mustang Bumpsteer Kit.
Once we get our new wheels and tires on, we will hit the track for a full-on evaluation. Stay tuned!
Quick Reference:
Page 1 – Front OEM Spring/Shock Removal
Page 2 – Front Steeda Spring/Shock Install
Page 3 – Rear OEM Spring/Shock Removal
Page 4 – Rear Steeda Spring/Shock Install, Steeda Swaybars
Page 5 – Front Swaybar and Radiator Support Brace Removal
Page 6 – Front Steeda Swaybar and Radiator Support Brace Install, Rear Swaybar
Page 7 – Rear Steeda Swaybar Install
Page 8 – Street Review, Bumpsteer Kit, New Steeda Suspension Package
23 comments
COMING FROM AN “IMPORT” BACKGROUND, THIS ENTIRE PROJECT HAS BEEN SO INTERESTING TO READ ABOUT. THANKS FOR ALL YOUR EXPERTISE!!!
Billy Johnson articles are the best. I have had tons of miatas and now I want something with some actual hp and a lot better as a cruiser. I like this bodystyle the best out of the 2005+ Mustangs and following Billy’s blueprint sounds like it would be an amazing street car.
Thank you. I hope you enjoy the car.
What about just leaving the rear bar off? Or is that only suggested if you are running a Watts Link? Great article, glad to see the S197 the attention it deserves!
It depends on the rest of the suspension setup. As I mentioned in the previous article, most Watts Links raise the rear roll center too much, increasing roll resistance and weight transfer (hurting rear grip). Because of this, removing a rear swaybar is a common solution to the problem of having a high rear roll center. Running too stiff of a rear spring in a WL or PHB rear setup often leads to a loss of rear grip, where removing the rear bar would also be a solution. There are many different ways to make a car turn a fast lap. Some have more strengths than weaknesses but various setups can be made to perform similarly over 1 lap. At Roush, we won a ton of races with a rear swaybar and a panhard bar. This project is focused on how to make a great handling car that doesn’t beat you up on the street for as little money as possible, and we are achieving that. Ditching the rear bar off our setup would not make our car handle better, and this rear bar may not make a car with a Watts Link handle better. That’s part of the development process, which takes testing.
Really enjoying this build!
What size is the stock sway rear sway bar? Is it viable to use the stock bar in lieu of the 7/8″ Steeda bar?
This is the same size as the stock 05-10 GT rear bar and smaller than the 11-14 rear bar. To make a car have a balanced handling characteristic, the entire suspension system from the springs, shocks, swaybars, tires, differential, and geometry all need to work together. In general, people tend to put too large of rear swaybars on their S197 Mustangs; taking grip away from the rear in attempt to make the car more balanced, rather than working on ADDING grip to the front to make it balanced.
does nobody make shorter shocks so you don’t end up with reduced shock travel?
A shorter shock body would have no effect since the suspension travel is limited by the factory AXLE-mounted bumpstop.
Thank you for the write up, looking forward to purchasing that Steeda package when it comes back in stock next month! As for wheels, are those the S550 PP wheels (255/275 if I remember correctly)? Will you be moving to a square setup with this build, or sticking staggered? Thanks again!
Billy,
I’m curious on when you think we can see an update on the rear bump stop discussed in Page 6: “We unbolted the axle-mounted bumpstop in anticipation for a proper rear bumpstop that I am developing and will be out very shortly (stay tuned!).”
Very soon!
I’m curious on when you think we can see an update on the rear bump stop discussed in Page 6: “We unbolted the axle-mounted bumpstop in anticipation for a proper rear bumpstop that I am developing and will be out very shortly (stay tuned!).”
Any word on this?
Hi there, I was wondering if you think buying BMR K-member and a BMR A-Arm support brace (since they seem to go hand to hand with each other) is a good choice? Do you have much experience using those parts and how it collaborates with other suspension parts? It seem like a good choice considering you are shaving weight at the front despite spending a couple more hundred dollars.
And one more question, what are your thoughts on a rear shock tower brace? Is that also worth a buy?
Just bought a 2014 GT and this documentation of your design and build is outstanding. Not likely to track it, but I do want to have a more serious road car. Looking at cutting some costs, following your suspension plan, would changing the
Steeda heavy duty mounting plates to the Ford Performance Racing mountain plates
Steeda lower control arms with Steeda X11 ball joints
Provide good feel and control?
Thanks!
Billy, After reading through the comments in section 6, I found a similar question and your reasonings for Steeda LCA added to the build. Sound thought process. Thanks again for this excellent article series.
Hi Billy, a question regarding the springs. My 2014 GT has had the Ford Performance K springs lowering 1.5″ all the way around. Will this work well with your recommendations every where else on the suspension?
I’m not sure what the K spring rates are vs Steeda. I would imagine they aren’t too far apart and most of the other parts of the build should work great with them.
Thanks for the quick reply!
“I urged Steeda to offer this setup as a handling suspension package because of how well balanced and grip-oriented it is. They actually did it and created the Steeda Mustang Sport Handling Package (555-2356).”
You should clarify that it’s listed for 2011-2014. Guess early S197 owners are just out of luck.
I don’t see why that package couldn’t be used on 05-10 cars as well.
Billy,
I’ve been replicating this build as closely as possible over the past few months. So far, I’ve done the engine upgrades, tuning, and just recently installed all of the suspension and handling upgrades as suggested. I’m scheduled to get the Eaton LSD installed tomorrow. With the changes made so far, the car has obviously been lowered and handles much better. I can’t wait to see how it performs with the Eaton LSD. I am running into a minor issue since making the changes and that is hood flutter over 80 mph. I’m curious if you ran into this problem during your build and/or if you have suggestions on how to address it. As always, great stuff and really enjoying the process so far. Thanks.
Did you finish the build? How closely did you follow the build? How does it perform? I am looking to replicate this build. Thanks