
 To kick off our engine build, we CNC-lightened the rotors of our 13B REW before shipping them off to be cryogenically frozen by CTP Cryogenics to improve strength and durability then finished off with WPC treatment to reduce friction, wear, and heat.
Since we plan on revving this engine to over 9,000rpm, lightening the heavy iron rotors of the 13B and reducing the reciprocating mass becomes exponentially more important as the rpms increase. However, it’s important to have the right balance between reduced weight and strength/durability since this is going to be a high-power and high-rpm engine build. Lightening the rotors will also make the engine rev quicker and be more responsive to heel-toe downshifts.
 We started with a great foundation of a brand new 2,000-mile crate engine from Mazda. This engine was never overheated, warped, abused, detonated, or have any of the possible problems that could pop up when building an old engine.
 The rotors were cleaned up and ready to be lightened.
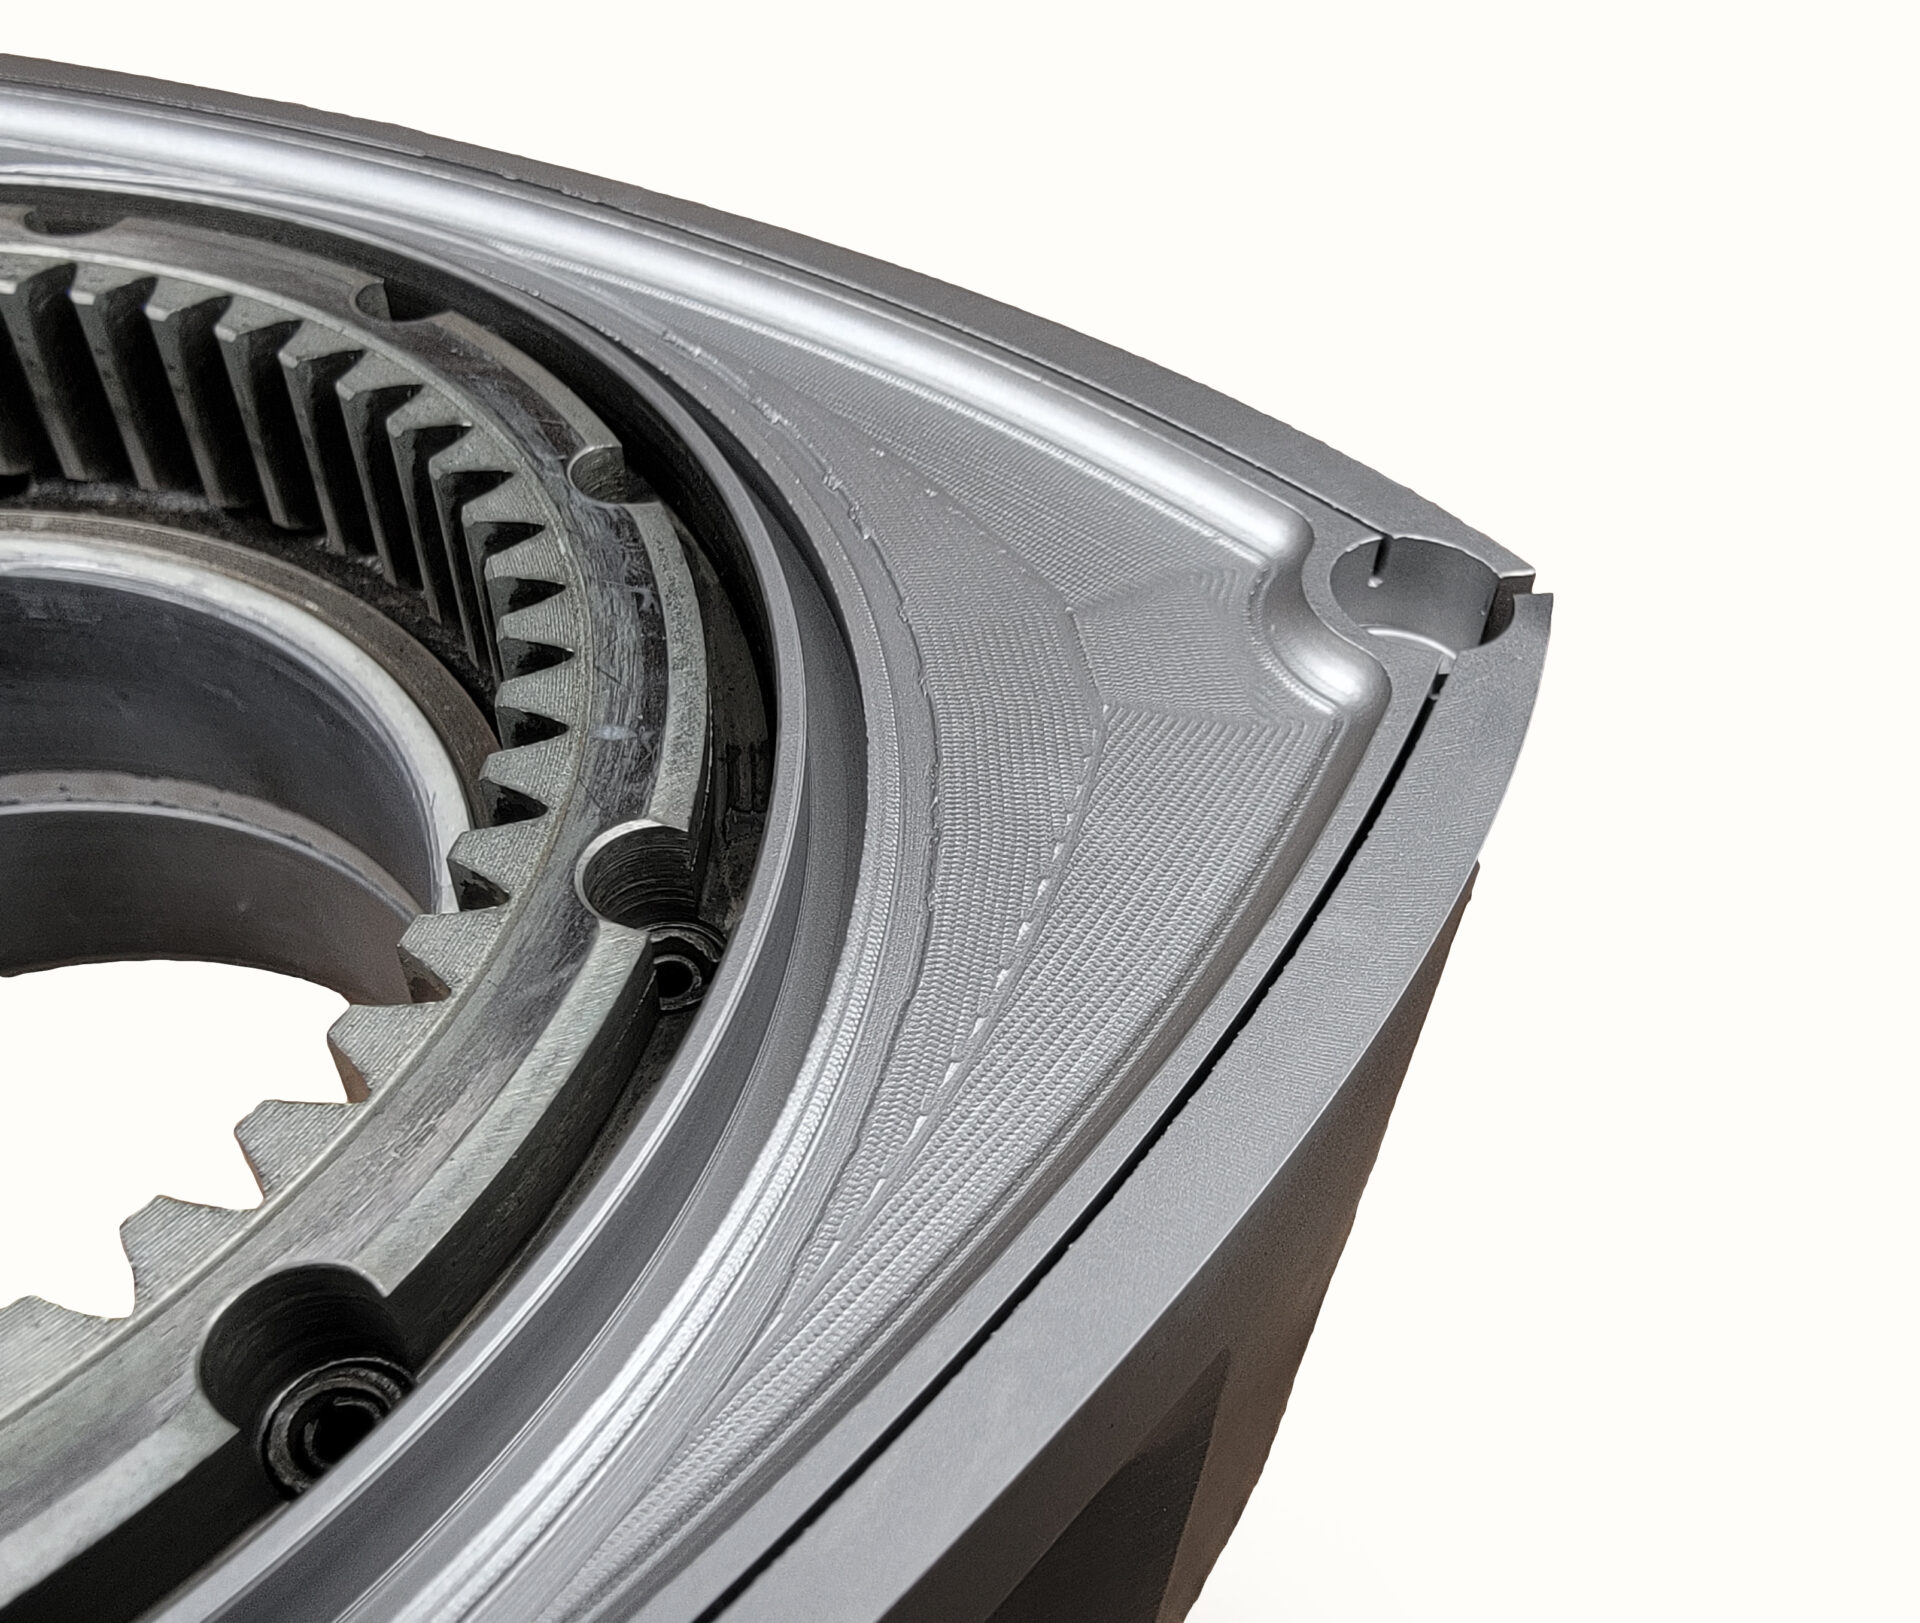
 From the factory, Mazda balances all 3 sides of each rotor by milling out these holes to different depths as needed. While this is theoretically ideal, almost no rotary engine builder does this. Decades of success from lightening rotors without trying to balance all 3 sides of the rotor has been proof that the benefits of lighter reciprocating mass outweigh the slight balance difference. Additionally, there are arguments that the weight of the oil sloshing around inside the rotor itself is greater than the weight difference of each side of the rotor, making it unnecessary to try to replicate Mazda’s balancing.
 Our rotors were lightened using a 5-axis DMU 50 from the Japanese company DMG Mori.
18 comments
I wonder what Rob Dahm would make it this!
He’s up to date and actually helped originally set up the ECU for this build: https://www.youtube.com/watch?v=2HLwZudQRHk
Sweet!
Was figuring out where this was in the timeline.
The video with Rob was around Part 9, then a standalone ECU was put in the car with a datalogger to get some baseline data on a relatively stock engine. Unfortunately the heater hose that was used as a fuel line by the shop who installed this engine was loose and caught the engine on fire. So between Part 11 and Part 12 is over a year of work upgrading the suspension and drivetrain that will be rolled out here shortly.
Billy, this series is amazing! I keep looking at importing a later JDM model RX7 and part of that research is reading this FD series over and over again. I am scared at the bill for buying and building a rotary, but this series will show everyone how to do it right!
Thanks for the feedback! Just do some safety and reliability-related modifications and enjoy the car! We will be doing articles on those items like the fuel and cooling systems which are crucial for rotaries – also to prevent fires like what happened to my car.
has anyone explored porting/smoothing the casting inside the rotor face (see the very last image)
That would make no difference in anything. except for possibly reducing heat transfer out of the rotor which is not good.
I believe Racing Beat went a step further and removed material and weight from inside the rotor. FWIW, Mazdatrix does not do this and removes weight from the outer side face of the rotor like most shops do. I’m sure removing material from inside the rotor has its merits/advantages; possibly driven by rulebooks in racing.
Great post! But…It’s Rotating Mass, not Reciprocating Mass.
It is a complex mix of both!
Would it be worth it to cryo/WPC treat the side housings?
I think so.
We will be covering that in an upcoming article. In short: YES
Wait, are you going to do a balancing after the machining ? Pretty sure it’s off now.
The rotor were balance from factory.
That is explained in the story!
Following from Japan.
Its great to see a serious build where the focus is on building a highly efficient rx7. I wish we had WPC in NZ… im taking my rotary parts to Japan to get them done.
Thank you Mike and Billy.
This is about as efficient as a rotary can get, it’s an engine with a very high VE but low TE.