,

Attention to detail is the name of the game, even on parts no one will see. Because ‘good enough’ is not good enough.
This bracket is going under the car. No one will likely ever pay it much attention. It still should look good. No detail is too small, and this task takes only moments to produce a really nice final product.
 Prior planning prevents poor performance!
When you run a fabrication shop and a race team, it helps to be prepared. You could say that they have a few fasteners around here. Even really long ones that make installing sway bar relocation brackets easy.

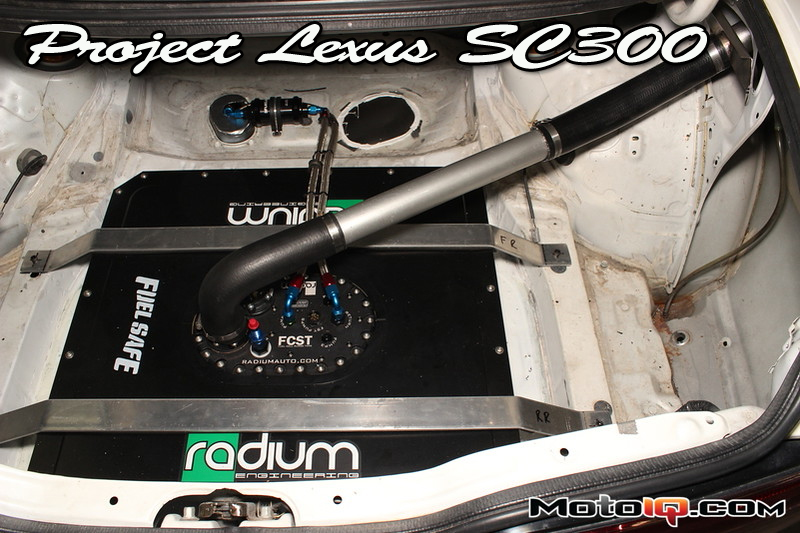
The sway bar is finally relocated out of the way and will not hit the fuel cell. Hooray!
Some jumping around on the car seemed to validate that even at extreme deflection angles the bar would not contact the fuel cell, but only hard driving will tell for sure. In the end, the brackets may need to be extended, but we have to start somewhere. However, it’s likely that spring rates will go up when the car finally gets some real race tires as opposed to the high-performance street rubber it wears now. That will further reduce control arm movement, which will, in turn, reduce sway bar movement. Physics is fun!

Removal of the factory tank left some holes.
One of the two holes will be used for fuel hose routing between the engine bay and the trunk area. The other hole can be closed up. This isn’t a super important task, but that doesn’t mean it shouldn’t be done with some thought. The factory nuts inside the car were welded to the chassis, so they were broken off and the area cleaned up.

Trace the hole onto some sheet steel and cut with a snips.
It’s pretty easy to cover a hole. Trace the hole with a permanent marker onto some metal and then trim it with proper snips. There are straight-, right- and left-cut snips depending on if you are going around corners and in which direction.

The bolt holes were taped, caulk was applied top and bottom, and a lead weight held everything until it set.
Yes, we could’ve taken the time to drill holes in the sheet metal and used a bolt and a nut, and that would’ve been a stronger fastening job for sure. However, this is not protecting anything critical and the caulk provides the added benefit of some waterproofing. A similar cap was made for the other side and was caulked directly to the factory gasket.