
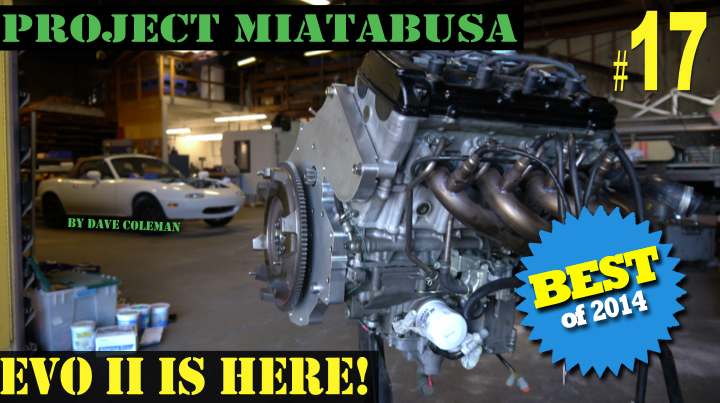
,
Now, the only problem with leaving the clutch basket in place is that there isn’t room for it. Between the power takeoff gear and the flywheel, we need room for a short spur for the Miata flywheel to pilot on, a Miata rear main seal, and a bearing to support the flywheel. The stock clutch basket takes up most of this room.
This solution was relatively easy. With our clutch being a solid plug, we don’t need it to be nearly as tall as the stock clutch stack. We simply made the plug as thick as all the outer clutch discs if you stacked them up by themselves (this gives us the same total contact area with the basket that the stock clutch had). Then we cut the basket down to the size of our new plug.


 Slide everything together and the solid clutch adaptor locks the shaft to the sprung hub.
Now things start getting really fancy. Our original design used two bearings, one at either end of the shaft. At the front of the engine was the tiny needle bearing used by the factory, and at the other end, by the flywheel, was a double-row ball bearing we mounted in the wedge-plate adaptor that's bolted to the stock Hayabusa clutch cover face. The factory Hayabusa bearing that used to live right next to the power takeoff gear was eliminated.
We had limited ourselves to two bearings on principle, not wanting to over constrain the design. A straight shaft running between two bearings can always stay aligned with both bearings, but running between three bearings requires all three bearings to be perfectly aligned. If we had two bearings in the Hayabusa case and one in our wedge plate, there was a chance we’d be forcing the shaft to bend, ever so slightly, to hit all three bearings. Add in the variables brought on by thermal expansion, and limiting ourselves to two bearings seemed the wise choice at the time.
 Miatabusa EVO I used this double-row ball bearing on the outboard side of the gear.
With the sprung hub and our cut-down clutch basket taking up the real estate where our bearing used to live, we would have to push that bearing farther toward the flywheel. Not only was it now the wrong shape for the available space, having the gear several inches from the nearest bearing didn't seem like a good idea. If the shaft flexed at all, it could open up the gear lash and make things worse. Since Dr. Ferdinand Hayabusa had put a bearing next to the gear when he designed the thing in the first place, we decided this time to bow to his wisdom and use that same bearing, even if it meant using a 3-bearing shaft.
 The EVO II shaft uses the two factory bearings, plus a third by the flywheel.
The next problem was that that third bearing was gonna be a doozy. Our EVO I shaft was made of two pieces with an elaborate splined interface that was really hard to put together and even harder to take apart. The wisdom of experience has shown us the virtue of a simpler one-piece shaft that makes serviceability dramatically better, but leads us down the path to a monster bearing.

11 comments
Finally an update!!
Happy to see that the project is still alive!!
I have no idea when this was posted, since I did not recieve an update.
I also cannot see any comments, also not on older posts…
The redesign of the website looks great.
Hopefully ticking the notify boxes again enables me to see the comments again…
The comments unfortunately were part of the information we weren’t able to transfer over from the “old” MotoIQ 🙁
“The engine is going back in the car now. ” What’s the date on this article? I don’t know if this ‘update’ is from 2014 or….?
Good to see an update after 2 years. Hopefully it wont take that long for the next one….
What happened to the Part 18 content (with the clutch exploded clutch basket) ? Was the information lost somehow, or has it been omitted from the new MotoIQ site for… reasons? Those failures contain good, hard-won information. It would be a shame to not post them!
Stumbled onto this build the other day and I think it is the most relevant piece of kit I have seen in a very long time. Have looked at a Busa swap from many different angles and there always seem to be more cons than it is worth. Grafting the Miata trans to the Busa engine in this way is a game changer. eagerly waiting for another build installment and I hope you guys can produce a kit that is affordable to the shade tree swapper.
Cheers
Larry
And here we are over two years later. I really would like to see this finished….
Update please!
Is there a website where you guys sell this kit and what are we talking about price wise .
And any update on the car ?
So? Did this just get scrapped or something? Nothing in almost 4 years….
there is a miatabusa website which doesn’t have much info, but if you look up miatabusa on instagram looks like it is alive and well.