

Once the design was finished, it was ready to be printed on my modified Creality CR-10S Pro V2. Like many hobbies, 3D printing is nearly impossible to leave thing stock, especially when you can take a $3-500 printer like the CR-10 and modify it to perform like a $3-5K printer.

After a few layers have been put down, the printing process is easier to understand.

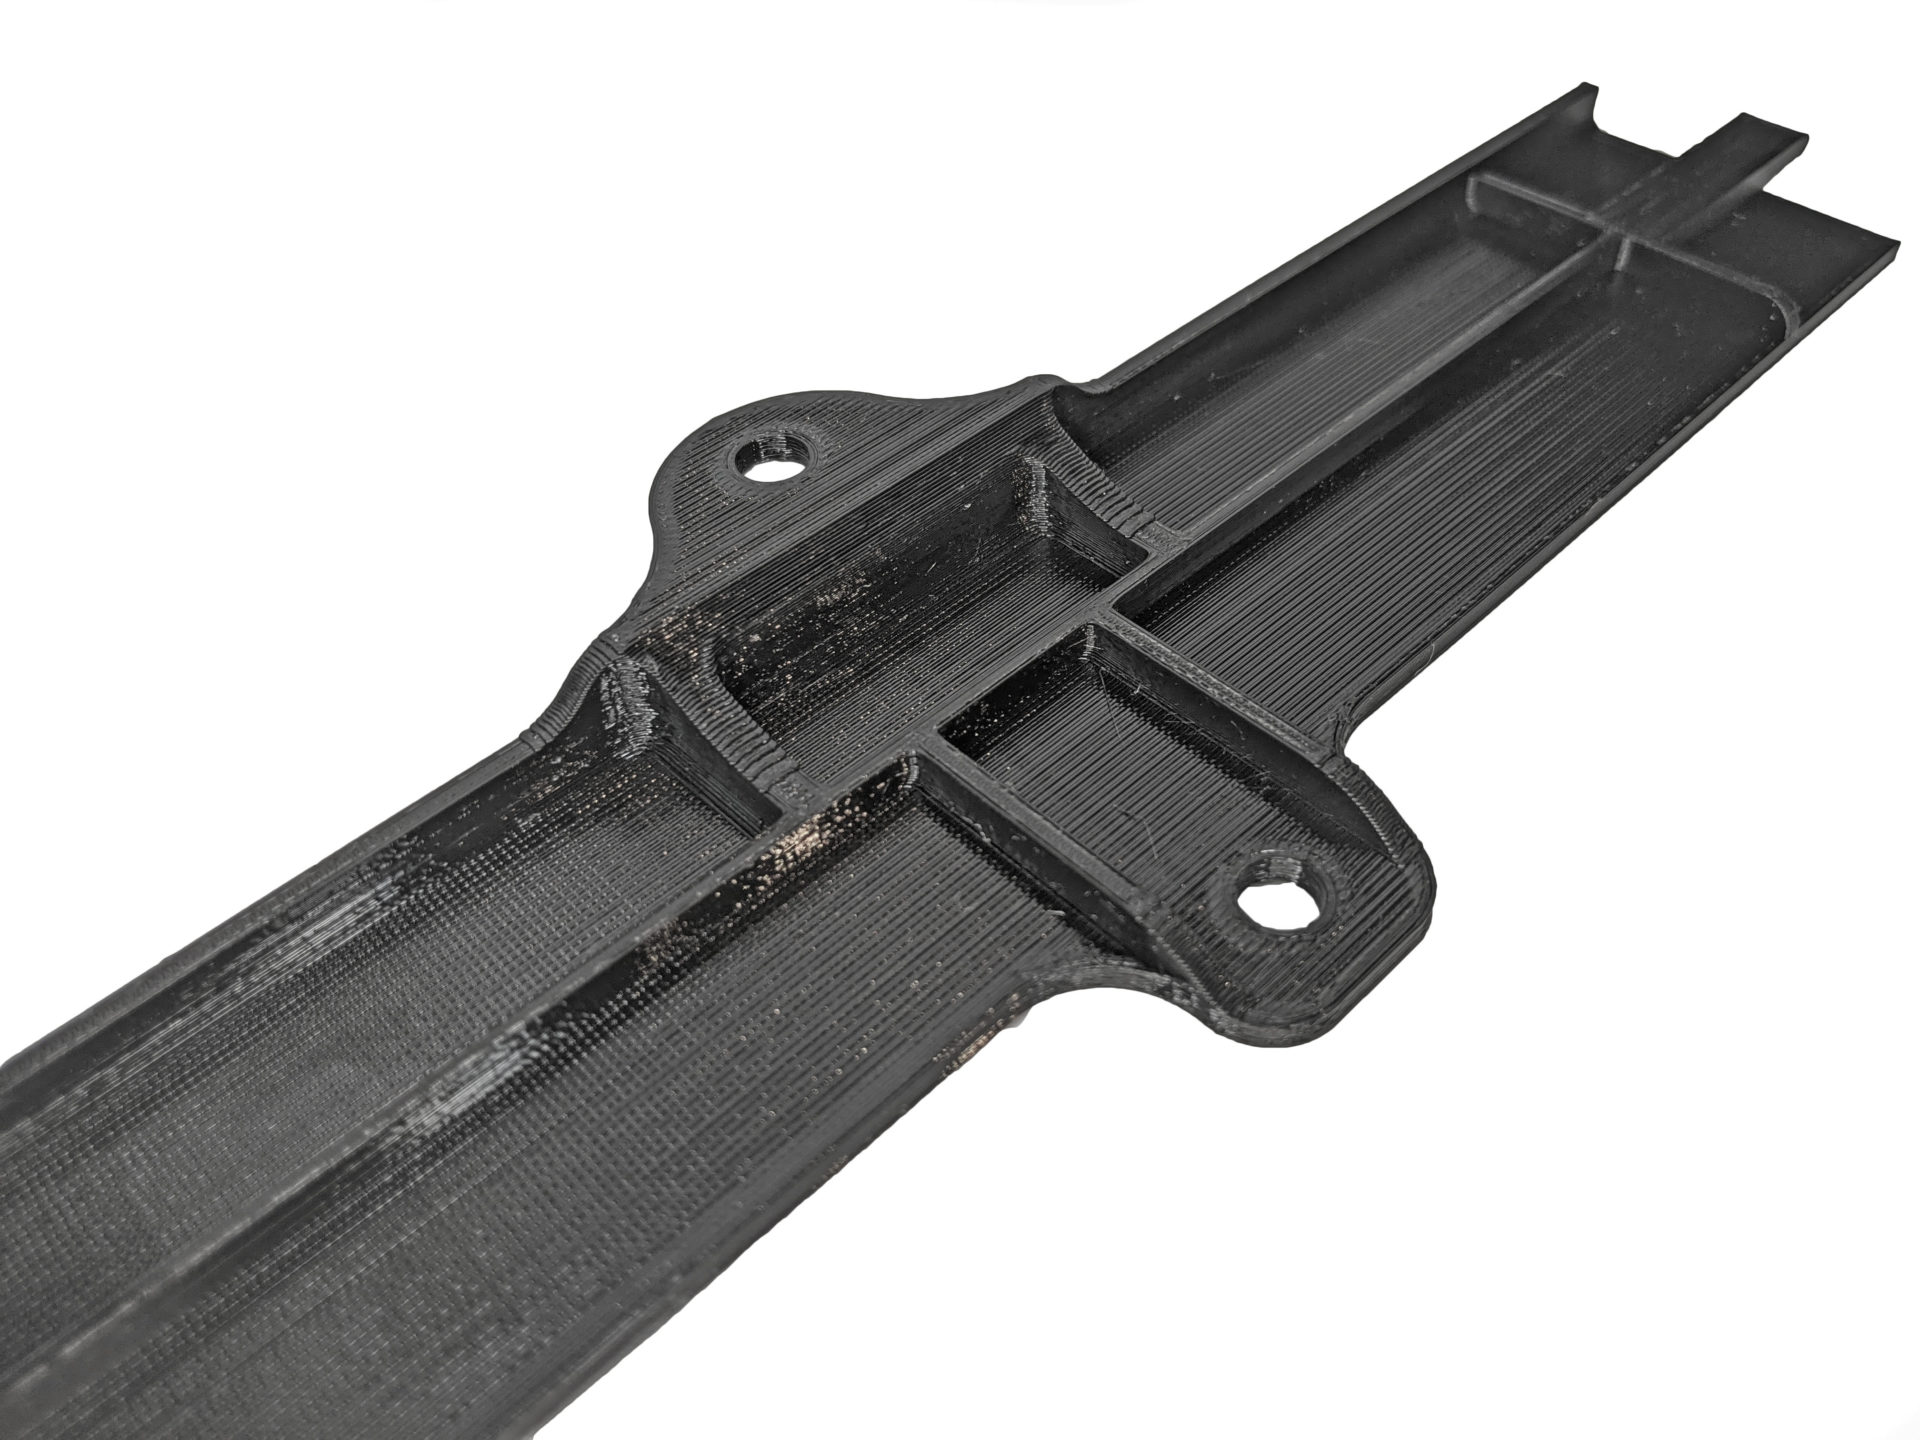
With the print complete, missing driver’s side center door frame is now made!

Compared to stock (above), the new 3D printed design (below) has thicker tabs with large-radius corners that reduce stress risers and crack propagation.

This is really important when the OEM tabs break at the sharp edges of the tabs.
Table of Contents:
Page 1 – Problem: Broken Door Frame Tabs
Page 2 – Broken Tabs Con’t & New OEM Front & Rear
Page 3 – Replacing Front & Rear Frames, Laser Scanning
Page 4 – Drawing & Designing Door Frames
Page 5 – 3D Printing Door Frames
Page 6 – Test Fitting & Destructive Testing
Page 7 – Redesigning NSX Door Frame & Finished Product
5 comments
Have you looked into black PEI like ULTEM9085? It’s pretty amazing for a FDM material. We have a lot of parts made with it, but we aren’t printing it ourselves so I don’t know if it’s something limited to the very expensive commercial/industrial printers.
Any chance you could share those stls?
You guys should try a Nylon CF like Esun EPA CF. the layer lines basically dissappear and you wont need to worry about car temps. I can promise those will deform on a hot day when you pull on the door card.
Nice work! Getting dangerous there with the CAD 🙂
How do these hold vs mita motorsports’ version?