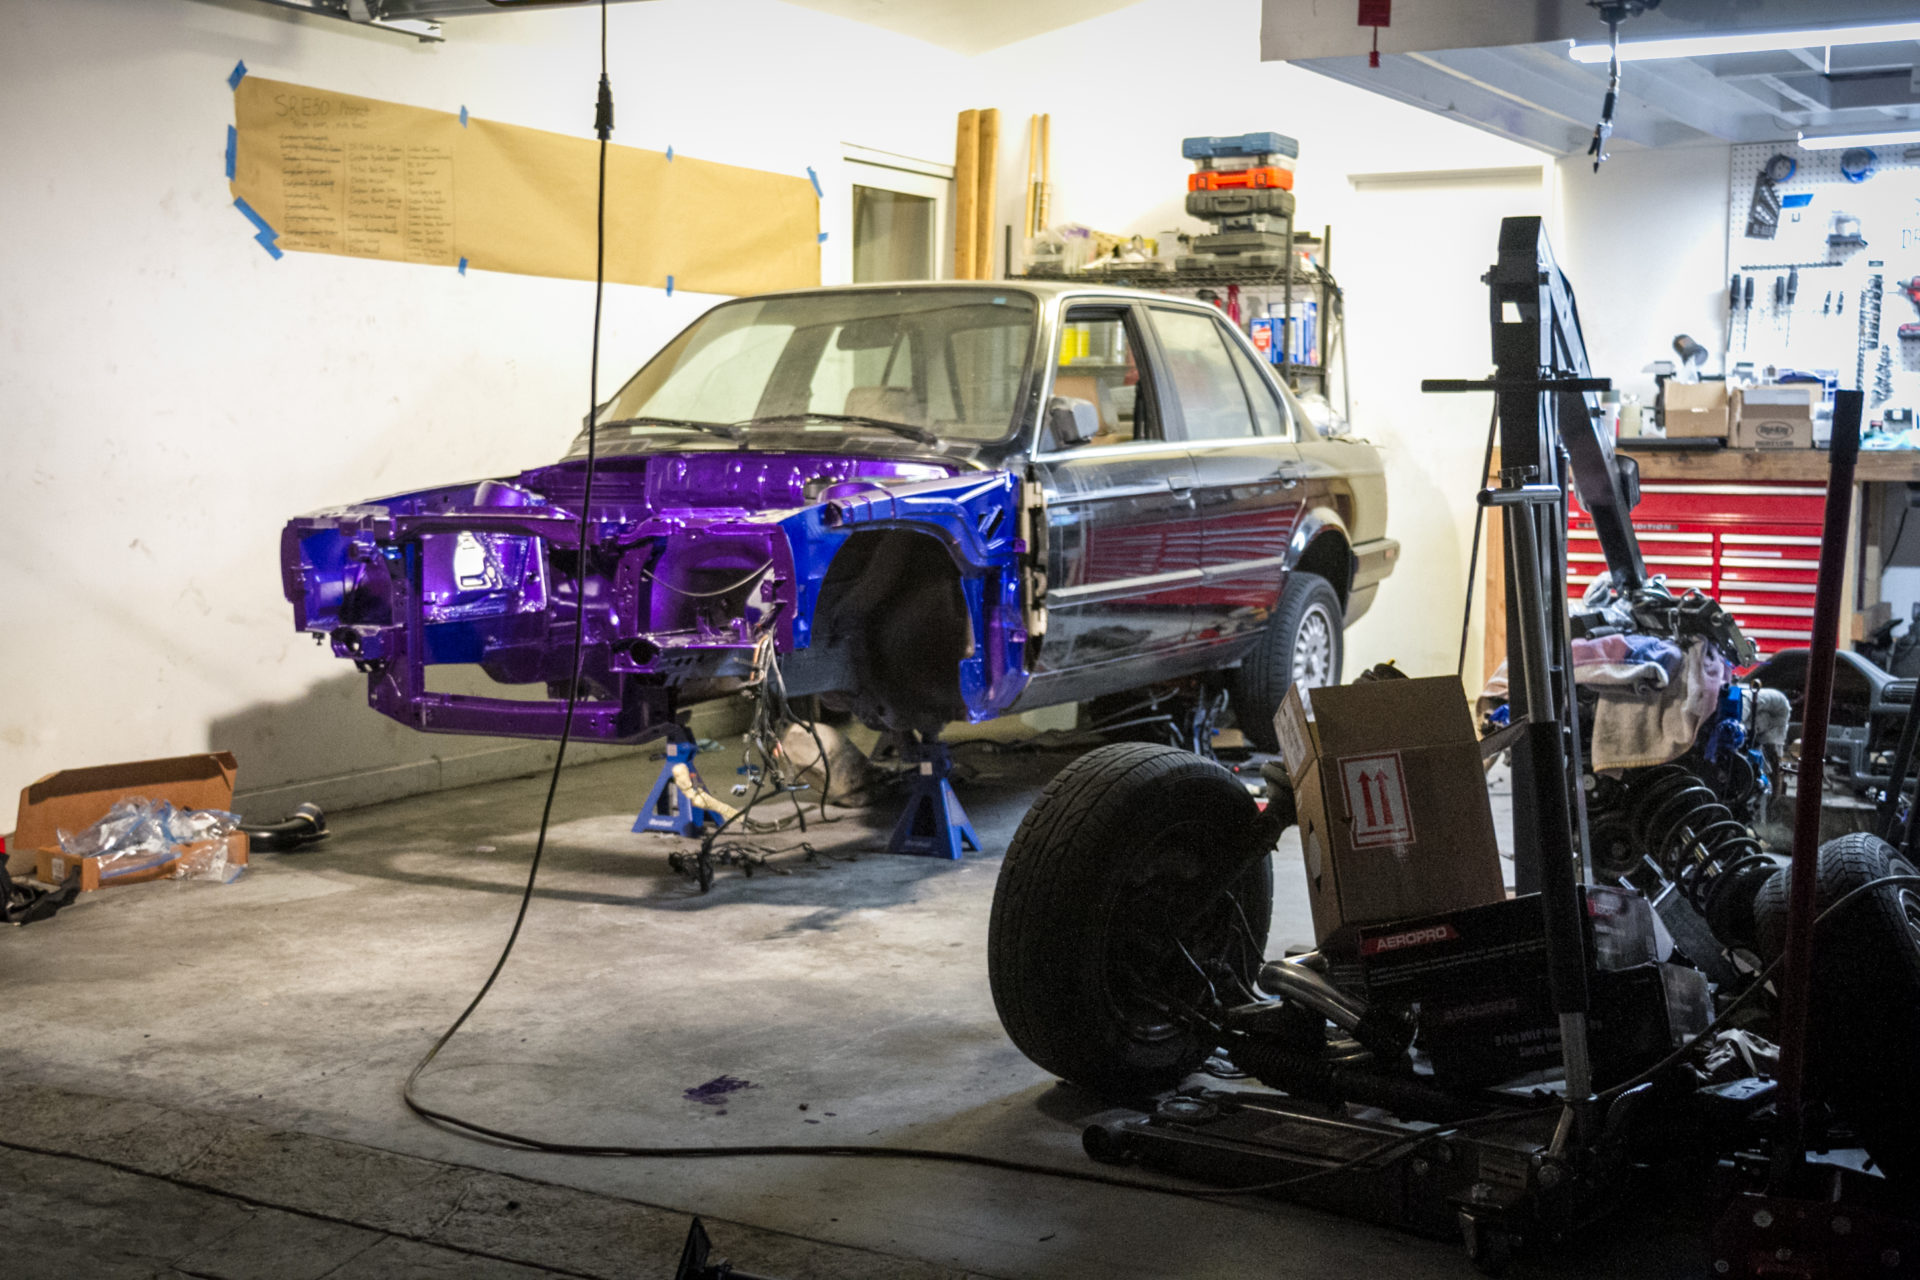
Finally, the paint booth was built. We like to use these cargo support bars from Harbor FreightAfter a deep cleaning, it was finally time to lay down the dank purple. The paint we are using is a Restoration Shop Firemist Purple Acrylic Urethane. It’s a single stage paint, and we are spraying it out of a touch-up gun to make it easier to get into all the nooks and crannies of the engine bay. I always prefer to spray single stage when painting engine bays or interiors, because I find it very hard to get even clear coat coverage over all these oddly shaped surfaces since clear coat is hard to see, but keep in mind, I am a pretty terrible painter.We moved the fuse box to the side and sprayed 3 coats underneath where the fuse box would normally sit.After waiting about an hour and a half to let the paint flash off, we carefully moved the fuse box into its normal resting position.Then we sprayed underneath where it sat before to get complete coverage.Here is the final result.The cool thing about this paint is that it has just a little bit of flake in it, but it’s sprays like a single stage.
Off-camera, we also paint matched the valve cover to the engine bay and painted the motor mounts, transmission mount and intercooler brackets black to prevent corrosion.
The driveshaft story is not over yet. After clearancing the car, we went to test fit the driveshaft again only to discover that the pinion flange on the driveshaft has the wrong bolt spacing! We had to return it to the driveshaft guy so that he could fix his mistake. However, as you will find out later, that still isn’t the end of the story.
Look forward to the next installment where we will begin the assembly of the engine bay!
Is there a reason people avoid the AN lines with nylon/fabric braid on the outside?
Why risk the damage caused by the steel braid rubbing on damaging things?
I built the 2nd e30 SR20 in North America about 10 years ago, I even still have the wiring harness I made. I also used a Laminova Liquid to air intake manifold, negating the need for an intercooler in the front.
I still have the manifold too lol. I used a radiator from a Volvo 240. The heat exchanger for the intercooler was a transmission cooler from and F550 tow truck. It all fit very neatly under the hood.
Have fun with brake booster set up, probably the suckiest part of the swap.
Amazing, I have learned lot of things from your website about every thing about cars and how to repair them, I also work at a company in Dubai and learning from your website.
Not enough. It eventually made contact during an aggressive shift (probably flexed the subframe bushings) and snapped the driveshaft.
We are currently looking into shimming the front of the diff down by machining small spacers for the front diff mount and then shimming the trans up to match the pinion angle. Hopefully that will push it a bit further away from the tank (and allow us to run a bigger driveshaft).
what size tailshaft are you aiming for? mine is a 3 inch and it just touches the tank, we have spaced the front diff mounts but we didnt massage the tank so our next step is to massage the tank a little and see how we go.
I know you’re wearing a respirator and gloves, but spraying catalyzed urethane paint is still a potentially hazardous proposition given the isocyanates they contain. All the fun carcinogens (read the MSDS for the paint) you’re atomizing with a spray gun can be absorbed via your skin and eyes, so maybe add a paint suit and DEFINITELY add eye protection next time you do it.
Sorry to be a downer, but it takes pretty minimal overexposure to go from healthy to F’d.


9 comments
Is there a reason people avoid the AN lines with nylon/fabric braid on the outside?
Why risk the damage caused by the steel braid rubbing on damaging things?
I know I don’t!
I built the 2nd e30 SR20 in North America about 10 years ago, I even still have the wiring harness I made. I also used a Laminova Liquid to air intake manifold, negating the need for an intercooler in the front.
I still have the manifold too lol. I used a radiator from a Volvo 240. The heat exchanger for the intercooler was a transmission cooler from and F550 tow truck. It all fit very neatly under the hood.
Have fun with brake booster set up, probably the suckiest part of the swap.
Amazing, I have learned lot of things from your website about every thing about cars and how to repair them, I also work at a company in Dubai and learning from your website.
How much clearence did you have between the tailshaft and the tank? as i have the same setup and im curious.
Not enough. It eventually made contact during an aggressive shift (probably flexed the subframe bushings) and snapped the driveshaft.
We are currently looking into shimming the front of the diff down by machining small spacers for the front diff mount and then shimming the trans up to match the pinion angle. Hopefully that will push it a bit further away from the tank (and allow us to run a bigger driveshaft).
what size tailshaft are you aiming for? mine is a 3 inch and it just touches the tank, we have spaced the front diff mounts but we didnt massage the tank so our next step is to massage the tank a little and see how we go.
We fit a 3″. Had to move the front AND the rear of the diff down. The rear helped the most. We used Garagistic offset diff bushings to move the rear.
I know you’re wearing a respirator and gloves, but spraying catalyzed urethane paint is still a potentially hazardous proposition given the isocyanates they contain. All the fun carcinogens (read the MSDS for the paint) you’re atomizing with a spray gun can be absorbed via your skin and eyes, so maybe add a paint suit and DEFINITELY add eye protection next time you do it.
Sorry to be a downer, but it takes pretty minimal overexposure to go from healthy to F’d.