,
 |
| Our new cooling system assembled. If you look closely you can see the surge tank mounted behind the passenger side shock tower. |
 |
| The Howe surge tank mounted as high as possible in the engine compartment helps keep our cooling system free of air bubbles. |
For cooling fans we reused the stock RX-7 fans. They didn’t cost us any more money, and they fit our Howe radiator pretty perfectly with only a little modification to the plastic shrouding. The Mazda fans were attractive to us when we did the LS1 swap years ago because they had dual speed operation that allowed us to utilize the old LS1 computer’s high and low-speed fan controls.
 |
| The RX-7’s stock fans are fairly compact and match our radiator’s dimensions well. |
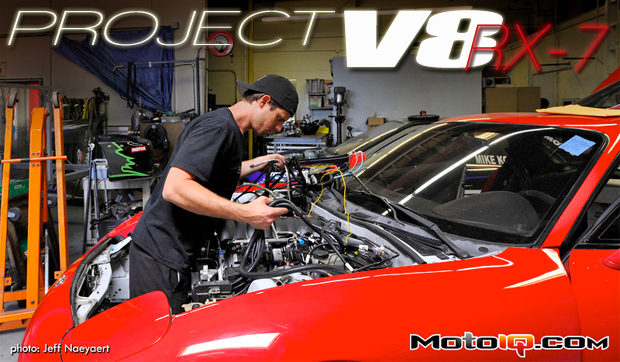
Wiring
Besides the fact that the engine is brand new and comes with a warranty, if you were to ask us what makes the E-ROD swap worth all the extra money over an engine pull its gotta be the wiring. Having wired a few swaps in the past and most notably this project’s smog legal LS1 about 5 years ago, I’ll be the first to admit that wiring a swap sucks. Pulling the dash apart, cutting up factory harnesses, interpreting wiring diagrams and getting 20 year old electrical tape goo all over you fingers are among the many reasons wiring chores are usually the last things on the To Do list to get checked off.
 |
| The LS leaves plenty of room to get in the engine bay to route our wiring harness–much easier on the lower back! |
Thankfully, the E-ROD kit makes wiring a snap. With an integrated fuse/relay box, you no longer need to hack up your stock wiring to get the basic systems of your engine to function properly. As is the case with engine pullouts such as our old LS1 swap, you get the engine harness all the way to the ECU connectors and that’s it. Wiring for the fuel, cooling and any other systems not originally attached to the engine are not included because they’re usually part of other body harnesses. For those systems it’s up to the installer to either add new wiring, fuses and relays to make everything work OR mate it to the donor car’s electrical system with those components already in place. We did the latter with our previous LS1 swap, retrofitting a Camaro ECM to play nice with the Mazda electronics. While we (I) learned all I ever wanted to know about how relays worked and subtle differences between how GM and Mazda approach wiring I can safely say I was not looking forward to doing that ever again. So when we saw how simple in comparison the E-ROD wiring was going to be we were relieved! To be sure, here’s a list of all wiring needed for our LS3 to run and for all of our factory gauges in the dash to function properly:
E-ROD harness loose ends to connect:
- Check engine light wire (wired directly to MIL light)
- Fuel pump power (wired directly to fuel pump (+) terminal)
- Cooling fan power (wired directly to cooling fan (+) terminal)
- Switched 12V (from RX-7 body harness to power to LS3 ECM)
- Continuous 12V (wired directly from battery/alternator to Fuse/Relay box)
- Engine speed (tachometer signal) (via E-ROD bulkhead connector)
- Vehicle speed (speedometer signal) (via E-ROD bulkhead connector)
The starting system is not part of the E-ROD kit, nor are any transmission considerations (except vehicle speed) or factory gauge functionality. For those, we need to build ourselves a new sub-harness that will tie into our RX-7’s chassis wiring.
Sub-harness connections needed (harness to be built):
- Starter trigger (ignition switch to starter solenoid)
- Reverse lights (T-56 transmission switch to RX-7 body harness)
- Reverse lockout (T-56 transmission to brake pedal)
- Oil pressure signal (OEM RX-7 oil pressure sender to RX-7 body harness)
- Water temperature signal (OEM RX-7 water temperature sender to RX-7 body harness)
And that’s it! (of the wiring we need to do, not the article–Read on!)