,
 … And Doug puts on his best “mad scientist” impression while Chris welds in the bar.
 The new dash and steering support is measured and welded in, connecting the pillars again through the middle, just beneath the bottom of the windshield frame.
 Again, making sure the length is correct is one of the most important steps. If a tube is cut too short, you have to start over with that piece.
 Here’s where everything gets complex. The harness bar behind where the seats will eventually go is added and connected to the main hoop. A diagonal bar is added across the “square” created by the two pillar bars, the bar that connects them on top, and the main hoop. Diagonal bars contribute to sturdiness, safety, and rigidity by preventing more open segments (like this square on top) from flexing and twisting. Also, a diagonal bar is installed from one mount of the main hoop to near the top center of the main hoop. Another one is installed from the rear right support to the top left of the main hoop and also connected to the harness bar.
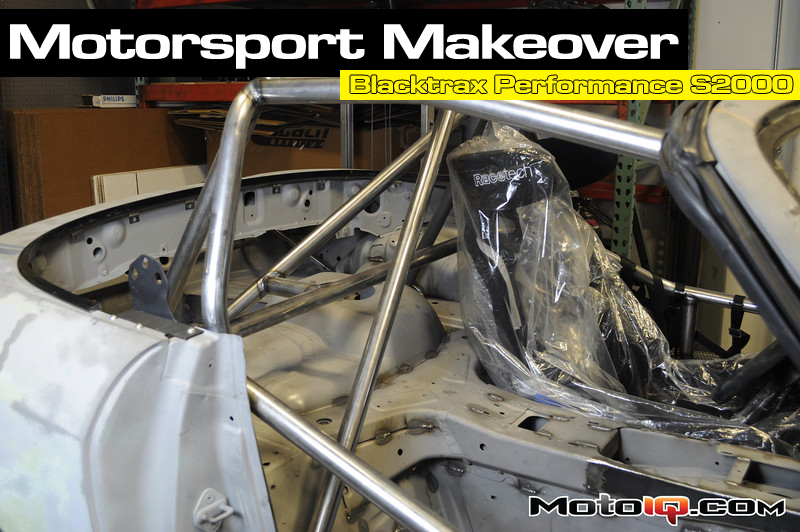
 You can see here the diagonal bar across the roof, the seat bar, and another diagonal bar from the main hoop to the pad to which it's mounted.
 Here's another view of the cage at this point from the front of the car. Notice all the diagonal bars, including one from the rear support to the opposite side on the main hoop as well.
The cage is extended to the front suspension by welding in bars that go from the bottom of the pillar bars in the footwells, through the firewall, to just before the front struts.
 You can see how the cage goes all the way from the rear to the front suspension and how it mounts to the front suspension in this photo.