,
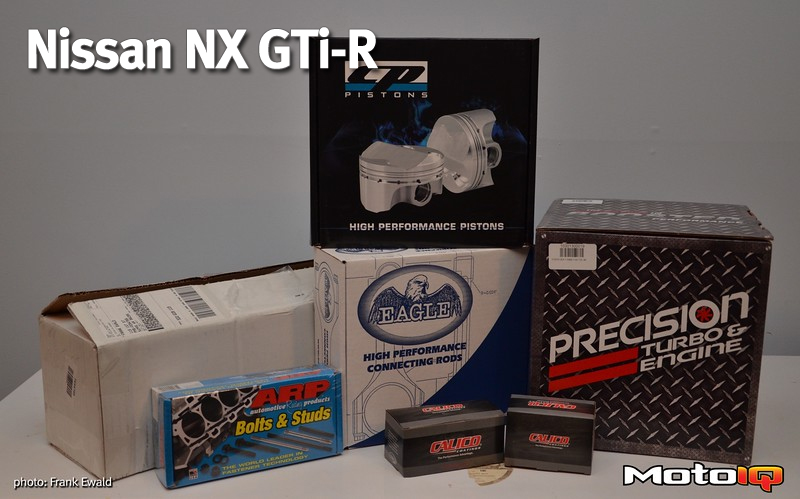
 Calico Bearings are fantastic to work with. Their rod and crank bearings are outstanding. These bearings have a CT-1 dry film lubricant coating that is engineered for motorsports use. I appreciated the customer support and follow up that they offered. Coupled with the extra oiling support that is built into the GTi-R, I am looking forward to a bullet-proof bottom end. Notice the grooves and additional holes that are standard with the GTi-R drivetrain. You can also see the oil squirters that come standard. The only challenge was that the thrust bearings got missed in being shipped with my order – thus I ended up having to pay additional shipping charges for them. Fortunately, our build was not delayed as we had many tasks to complete while we waited for the bearings to arrive the next day.
 When it came to camshafts, there was no hesitation on my part. They had to be JWT. When my car had the GA16DE engine I purchased and installed a set of JWT cams and I loved how they worked. Nostalgia combined with the knowledge that JWT was a great company and a great product led me to obtain the S3M camshafts. These billet cams have .456″ lift and 263 degrees of lift. This increased flow will be ideal for my purposes. At this point some Nissan hard core users are probably wondering why a VE head was not installed. And it was close. I actually had one sitting on my shelf for several months – but I wanted to retain the uniqueness of the GTi-R's individual throttle bodies. Or, maybe I was afraid of the work involved!
The JWT cams were a simple installation as they merely got placed into position as we were buttoning the engine back up. Where the GTi-R causes some challenge is that the age of the car means that factory valve springs are no longer available to order. I retained and reused the original springs. The keepers that provide spacing between the valves and cams are also rare – so I have a hoard of them that I have been saving over the years from other 54C engines that I have pulled apart. As a result and with a bit of ingenuity, I was able to get the valve clearances all around 8 thousandths of an inch. Just what the Service Manual requested.
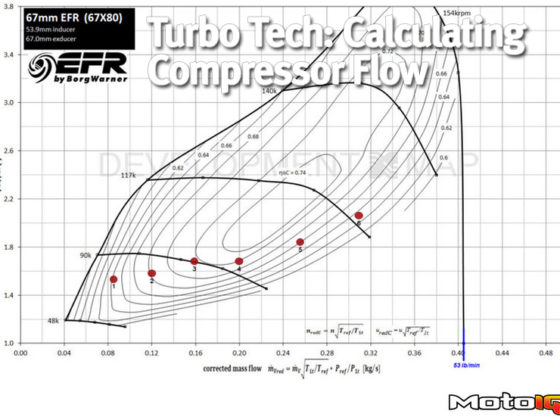
 When you have a turbo, the question in the back of your mind is almost always what turbo should I get next. Working with 25 year old turbos was simply a mechanical exercise – they're already tired and don't hold up to road course work. Thus, it was time to get a new product – thus also time to upgrade.
Next up was the challenge of the turbo. I have two or three factory turbo's lying around my garage. These systems are awesome. I love the way that they come on strong early and keep on going to the redline. What I do not love is that they are all well into their twenties – as they were built in the early nineties – and I have turned my car into an oil fogger when the turbo seals have blown. Initially I was thinking of a new and identical setup to the stock unit; that way there would be no issues with compatibility with my setup. Mike offered a few suggestions and, while they were fantastic, they would have resulted in some massive changes. I can see eventually changing the stock exhaust manifold, however, it really does a good job and has reasonable flow. My Weirtech downpipe is pure art and just last year I worked with Aaron (WeirTech now at Vibrant) and Will (PZ Tuning) to create a new uppipe to go with my new Vibrant intercooler. So I was not ready to set that aside and create it all over again. There has to be some restraint, right?
 When I pulled the Precision 5128 turbo out of the box, I thought that I was in trouble. This turbo was huge compared to the factory unit. I had to remove one of my two fans, but it is amazingly compact for it's size. I know that some of you are thinking that this is a small turbo – but it will be more than sufficient for my purposes.
This is when discussions were opened with Precision Turbo and they recommended their 5128 model. This unit is an aftermarket replacement turbo, meaning that it is ready to bolt up to the manifold. I was pleasantly surprised at how well it fit into the very cramped quarters of my NX1600's engine bay. One of my two fans had to be removed. The wastegate actuator must be designed for RWD applications, as I had to modify that to enable it to fit where it had to be rather than in the middle of the third cylinder. I flipped the bracket around, just beneath the vacuum nipple you can see where we cut/bent/welded it. Then I put the original GTi-R's actuator adjustable end arm on it. Perfect fit. The next update was that I did not even try to reuse the original factory oil and coolant lines – I had stainless flex lines built to fulfil that function. These industrial quality lines are good for over 3000 pounds of pressure and extreme heat.