,
 Our old blue Perrin intake pipe on top compared to the new black 3″ inlet pipe on bottom. We had to relocate one crankcase vent as now there is no room for it on the side of the tube due to the larger diameter.
  Removing the STI intake manifold is a bitch because the wire harness and a vacuum line tree bolt to the bottom of the manifold and it is, errr super lame to deal with. We tried to force the larger tube under the manifold but it would not go.
  We also found that the Perrin tube was slightly too large for the new turbo so we had to make this shim out of an old silicone coupler to make the diameter of the inlet a little bigger for better fit.
  Okay, we had to remove the manifold to get the intake tube on but once we did that, it fit. Bolting the manifold back down required that we had to squish the tube into place but it was not that bad. Make sure you are not pinching any hoses or wires. We reassembled everything and started the car.
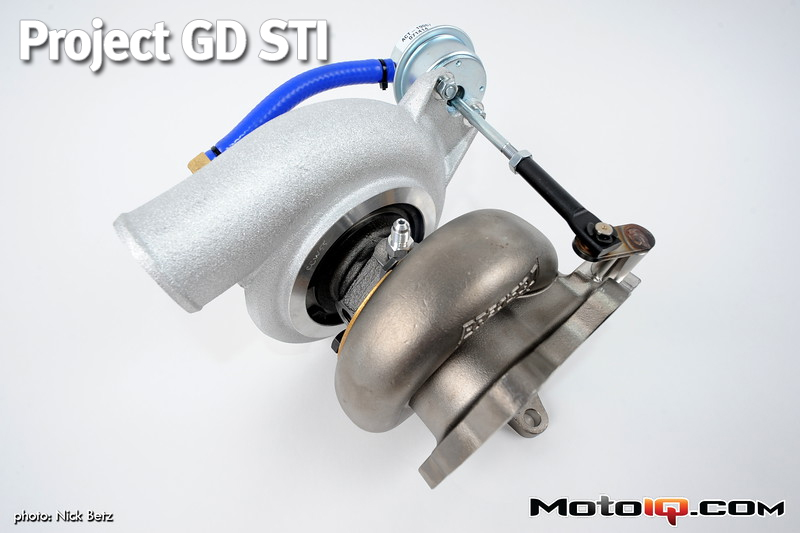
  For our test drive, we found that we could barely make any boost at all. The wastegate actuator the turbo shipped with comes with a 10 psi spring. Since the ratio of valve size to diaphragm size is low, we had to really crank the preload up to a cracking pressure of 25 psi! This would let us make a 13 psi spike that would fall to about 10, but we were afraid of boost creep because the preload was turned up so much that the valve didn't have much travel. To help fix this we asked for the optional 15 psi wastegate actuator can shown here which has a stiffer spring. When set at a 25 psi cracking pressure, the car made around 13 psi tapering to about 11.