
,

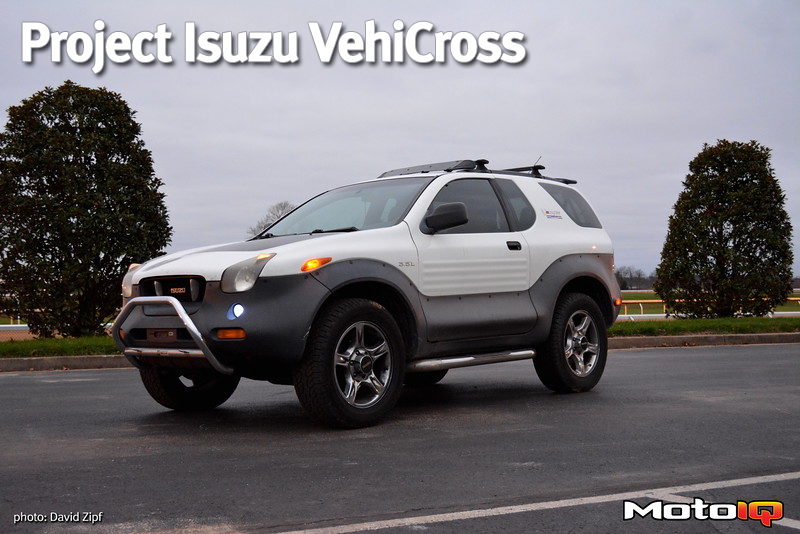
…they're hidden behind the fender flares. Of course the flares are held on with body tape and screws. We were able to loosen the rear half of the flare and bend it away enough to get a hand and tools into the gap to remove the bumper cover. The bolts are Torx heads, so keep that bit handy. It will take two people and it will suck (there are more of those stubborn poppers back here so getting access took about an hour of cussing and fussing). But once these are off, the bumper cover pops free.
 The bumper beam is quite interesting. The tubular structure is the low speed beam and also the mounts for the plastic bumper cover. The thick steel behind it is actually the back of the frame and welded in place. This tube structure is all hand-made, which fits in with the very low production volume of the VX. Apparently, this is a rust prone piece as we found when we had to cut bits of this off our new-to-us bumper cover. Ours was dirty, but rust free.
 Installation is pretty much the same as removal. Be sure to start with the side screws (loosely at first), then do up the bolts under the truck, and finally the ones in the trunk. Tighten everything down and you’re good! Then replace the corner lights and reinstall the fender trim.
  Time for the tailgate trim. >To fix the bend in the bottom of the door, we used careful application of a deadblow mallet and a
  Next, about a roll and a half of body tape is needed to prep for the new panel. We needed a bit extra to build up the areas where there was no tape. We did all of our taping on the tailgate itself, except for the vertical strip on the far right side. This ensured we didn’t miss anything or accidentally double up, the latter of which would bulge the new panel and look awful.
 Finally, just stick the new panel on. A firm whack of the hand will set the poppers into place. Then it’s just a matter of replacing all the screws and nuts and bolts (don’t forget to put back the grab handle!) and resticking the license plate cover. The new parts look great, but I’m slightly annoyed. Remember how we bought used so the whole thing would look the same? Well the seller covered everything in a heavy coat of Armor All. While they look spectacular, this means we have to do the same to the rest of the body. The very last part we installed is probably the most important so far. A certified legit MotoIQ license plate frame. We’re official now!
While all of this was labor intensive, the old Isuzu looks a lot better now too. And with all the rust prevention we did, our Isuzu should last longer as well. Next time, I swear we really do have some aftermarket goodies. Don’t believe us? Did you notice the shiny new tow hitch that magically appeared when the new bumper went on? While the bumper was off we installed that. But we’ll be digging into that in our next installment of Project VehiCross.