,
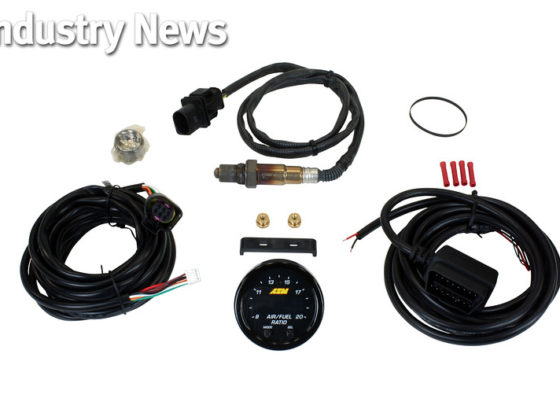
So about those brake ducts. I’ve had a good number of guys ask me about my custom control arm mounted ones I rapid prototyped out of ABS-PC material. My memory is a bit hazy, but it cost me in the ballpark of $900 to have them 3D printed. I’ve run the same model 3D printer as the company I used for the prototypes and I know the material cost was roughly half the total. Consider the 3D printing machine used (Fortus) cost over one hundred grand, I can understand the company I used trying to recoup some of the capital investment. I looked into tooling for making the ducts and it would have been in the ballpark of ten to fifteen grand. I figured I would have to sell at least 200 sets just to pay off the tooling cost and other small startup costs (packaging, labels, instructions, etc). So, yeah, I didn’t go forward with it. So that leads to an unfortunate circumstance helping to kick my ass into gear on making ghetto DIY versions.
 Someone hit my garage door a while back. Once it starts to sag in the middle, it deteriorates very quickly.
 I made some ghetto garage door struts with aluminum angle from Home Depot. My advice, go straight to the 1.5” stuff. I tried using ¾” at first and they were too weak, even with them screwed together. The 1.5” was much stiffer.
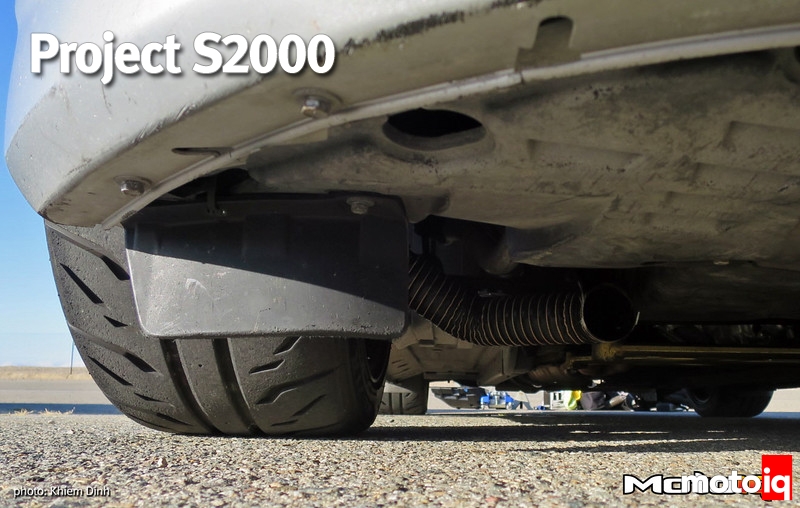
 The additional bracing only goes so far, in this case, about two months. After I got a new garage door, I had this entire aluminum angle stockpile left over. Well, I repurposed it for brake duct mounting brackets. I used my angle grinder to handle the cutting. The two blocks of wood are my budget vise.
 I used the 1.5” aluminum angle for the bracket to mount to the control arm. Then I used ½” wide aluminum strips (same as I used on the oil cooler setup) to hold the brake duct. The aluminum strips are easy to bend by hand. I used all the sheet metal screws from the garage work to screw the strips to the bracket.
 I used the angle grinder to cut the wire in the 2” neoprene brake duct and box cutters to cut the slits in it to slide the aluminum strips through. I was tempted to use zip-ties because it’s just fun to use zip ties, but this method worked perfectly fine. Notice I cut an angle in the bracket where the hose rubs up against it.
 Starting on making the other side, the piece of aluminum strip going sideways is about 7” long.
 The bracket is 5.5” long with the hole located about 1 3/8” along. The aluminum strip going forward is about 12” long.