Project SC300 Road Racer: Part 28 – Getting Safer with Sabelt
by Erik Jacobs
Earlier in the year I had gotten all new safety equipment and detailed the journey to Pegasus Auto Racing Supplies along with the nitty gritty details of choosing personal gear. Now, with the car back on track and speeds picking up, it was time to address my timed out vehicle safety gear.
That’s right. In addition to helmets going out of certification (and now driving suits, too, per new FIA regulations), your harnesses and seats also eventually time out and need to be replaced. My five point safety belts visually are in great condition, but they were manufactured in the mid-2000s and are long since expired. Additionally, almost everyone has migrated to using 6-point belts which provide better protection from you sliding under the lap belts (anti-submarine protection).
Further, the patent recently expired on the HANS device, and now there are a proliferation of similar units from every manufacturer out there. A large portion of them are designed with 2-inch-wide shoulder belts in mind. My HANS still has some life before it needs recertification, and it is designed for 2″ belts, so a belt change was warranted anyway. While you can use a 3″ belt with a 2″ neck restraint, extra care is needed to ensure the harness is pushed to the inside of the retention bump.
As for my seats, well, they had seen better days. And, somehow, most of the padding on the passenger side seat had disappeared. I had bought them well used in the mid-2000s and they were probably expired then! It was definitely time for new kit.
So I again called up the folks at Pegasus Auto Racing Supplies and got some stuff on order. I wonder if this box will fit in the Subaru wagon… (spoiler — it did).

Robinson has been in the… racing… business for quite a long time. In fact, Robinson Racing Enterprises is older than a lot of you readers are, having been founded in 1982 and quickly earning success since then. They can do everything with respect to race car chassis, including building tube-framed race cars from scratch. And, they’ve done this often, having won several SCCA GT-3 titles and having campaigned cars in everything from club racing through World Challenge and beyond.

They can probably install some seats and harnesses.

He’s performing the first logical step in our safety upgrade – removing the old harnesses and seats.

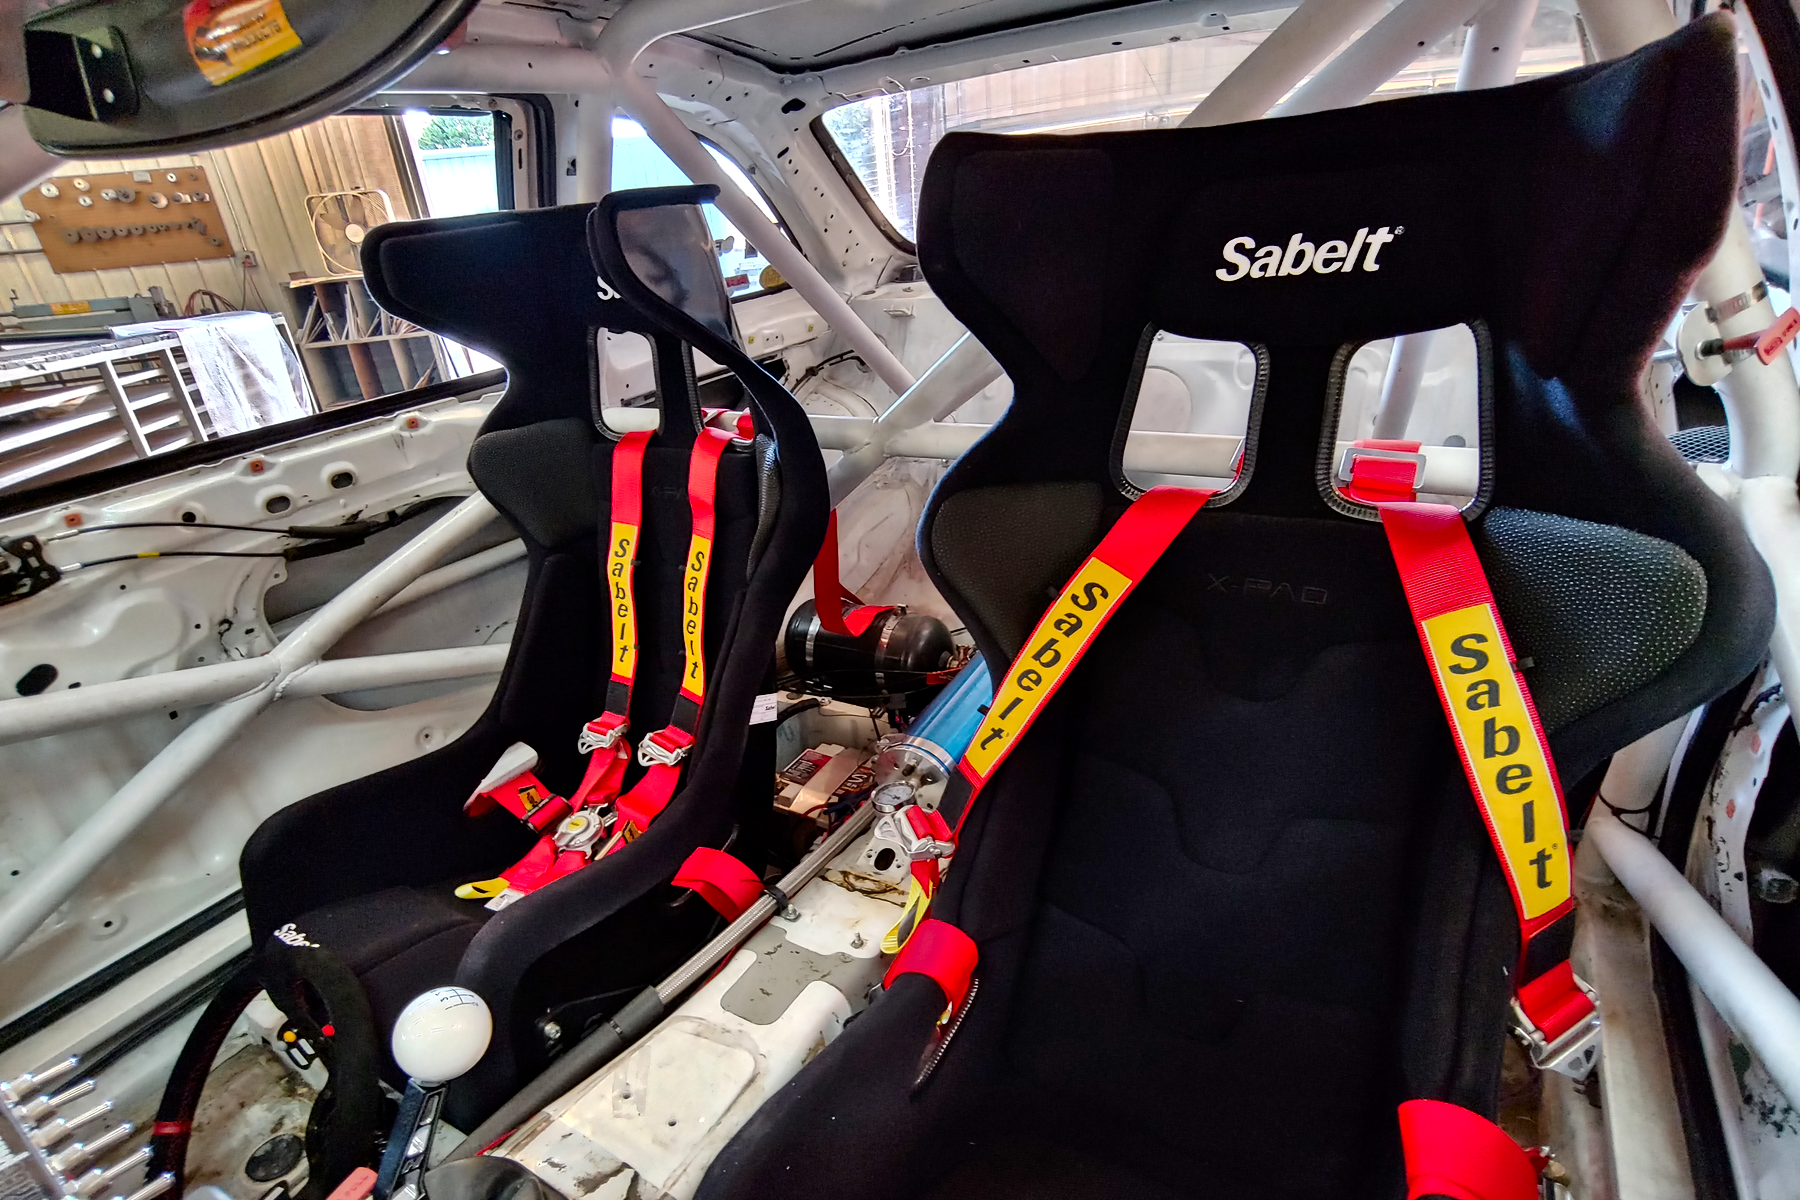
It is earmarked by Sabelt as being “the most compact seat yet” in their lineup. However don’t let its diminutive size fool you. I have a roughly 33″ waist and decently broad shoulders, weighing in at around 174lbs, and I have no problems fitting in this. Now, if you’re a little more portly or wider, it might be a little too snug, and something like their GT-PAD might be in-order.


3 comments
As usual, a very well written article. Thanks, Erik! There is a lot of good information here and I hope that your next update IS about that well-deserved track time. I do have a question, though. At the bottom of page 2, you mention that “The factory seat brackets had been cut and channeled to accommodate flat bar which then had threaded holes installed onto which the seat mount was attached.” So, was the newly installed seat and bracket attached to the old flat bar setup? If so, why didn’t you have Robinson remove the flat bar and do a full install by not using any previously fabricated components? Not to detract from the work done (which is awesome), just a curiosity. Thanks.
@BANSFTC
Yes, if you look at the last picture on page 2, those are the “original” mounts that were fabricated by the cage builder (different shop). It’s basically flat bar fabbed into the OEM seat mounts. On the middle of page 6 you can see that Barry ground the paint away to expose bare metal, and then welded his new square frame directly to the flat bar that was already there. So, the OEM seat mounts have flat bar welded to them, and then a square frame welded to that.
Barry felt that the existing flat pieces were welded well enough into the chassis that they would be a suitable mounting point for the new frame. It would’ve been extra hours to chop all that stuff out.
The other thing is that the OEM mounts are usually (!) safe enough for rollover and serious crashes in terms of being welded into the car. So, using them as a starting point can sometimes be easier because they are often flat in relation to a floor that is far from flat.
If I was starting over from a bare tub today, Barry probably would’ve opted to make two bars going from the side rail to the tunnel all nice and welded in and then build the seat frame on top of that, but that’s quite a bit of extra work. You can see from the picture on the middle of page 6 that the floor of the driver side is not flat. So to make it work you end up having to start cutting things out of the floor pan and that gets ugly quick.
I hope that clears it up!
Fat-fingered my own name. I miss the previous motoiq.com format where we would log in.
Yes, your reply does clear it up. I was thinking about the cross bars that you mentioned (side rail to tunnel), but your explanation makes it clear why it was done with the existing flat stock. Thanks for clarifying. Keep these articles coming! They’re great.