

Think Corvette or Miata. The SC300 certainly didn’t need something this small, but I’m not that big, and why not save a pound or two.

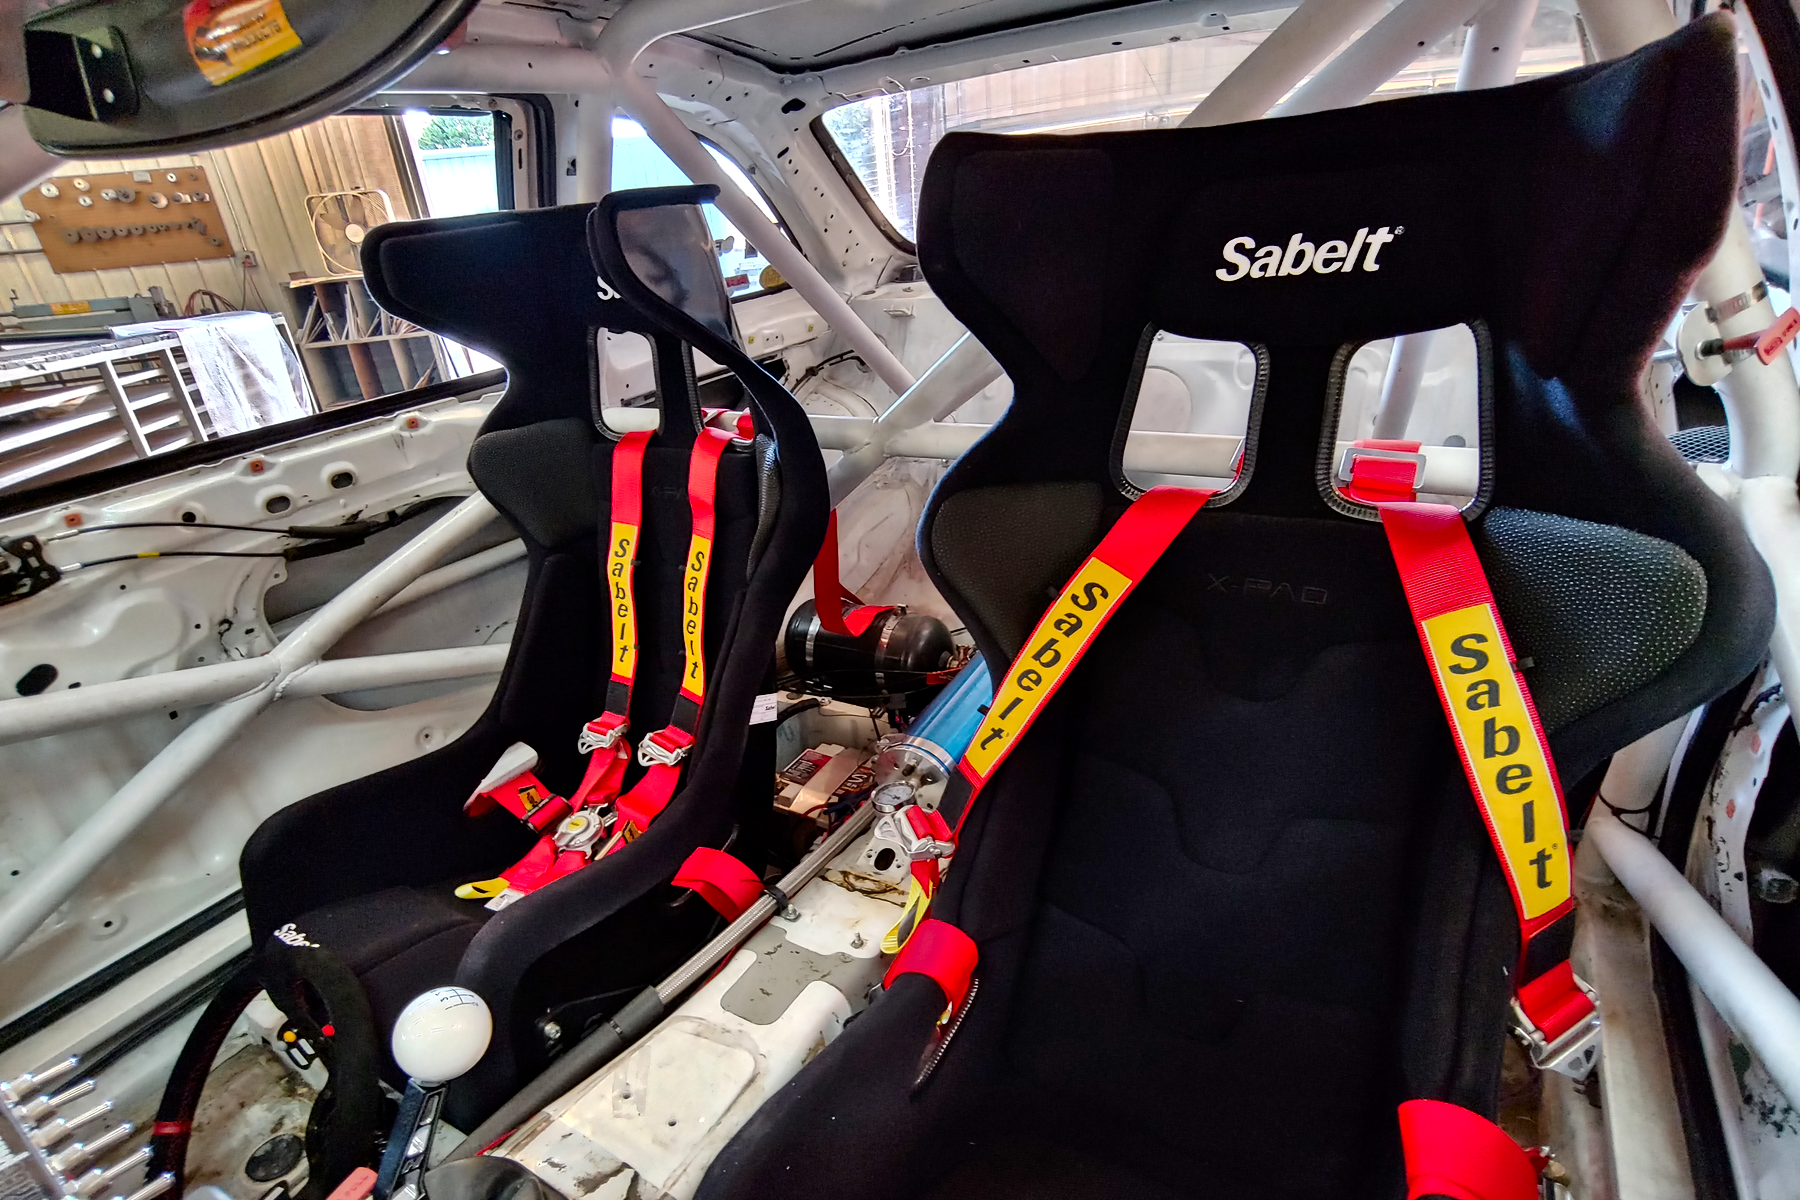
It has protrusions at the top of the seat that are designed to wrap around your helmet in a halo, and to contain your head in certain collisions, namely side impact. While a head and neck restraint device keeps your head from moving too far forward in a frontal crash, it does nothing for side impact, or during a rollover.
The halo seat, on the other hand, does an excellent job keeping your melon where it’s supposed to be. You can find lots of video examples of violent roll-overs or even tank-slappers where the driver’s noggin is flopping about, and you wonder how their head even stays attached. Don’t forget that a helmet is a device with a non-zero weight that makes your normally heavy head even heavier.
Many series and sanctioning bodies outright require a containment seat, but, even if you’re not required to run it, why not run it?
Two key points, though. Firstly, it’s much harder to get in and out of a containment seat, because you have to get your head and shoulders out and around the protrusion. Secondly, because it’s much harder, it almost guarantees that you will need a functional quick release for your steering wheel. It’s unlikely you’ll be able to contort yourself to get out quickly during an emergency with the steering wheel in place.
Some seats do offer removable halos, however you would not be able to remove them during an emergency because they have to bolt into the seat. The removable halos are designed for cars that might pull double-duty as street cars. Additionally, on the street, the halo would seriously impede your ability to look to the side to see. When belted into the race car and wearing a head and neck restraint, you can’t really turn your head enough for it to matter.


The factory seat brackets had been cut and channeled to accommodate flat bar which then had threaded holes installed onto which the seat mount was attached. I had been running a seat slider, but now that the car was really going full race car, it was time to go straight solid mounting.
This mounting as it sits is OK, but it’s not ideal for racing use. A new seat mounting assembly would be fabricated and installed.
3 comments
As usual, a very well written article. Thanks, Erik! There is a lot of good information here and I hope that your next update IS about that well-deserved track time. I do have a question, though. At the bottom of page 2, you mention that “The factory seat brackets had been cut and channeled to accommodate flat bar which then had threaded holes installed onto which the seat mount was attached.” So, was the newly installed seat and bracket attached to the old flat bar setup? If so, why didn’t you have Robinson remove the flat bar and do a full install by not using any previously fabricated components? Not to detract from the work done (which is awesome), just a curiosity. Thanks.
@BANSFTC
Yes, if you look at the last picture on page 2, those are the “original” mounts that were fabricated by the cage builder (different shop). It’s basically flat bar fabbed into the OEM seat mounts. On the middle of page 6 you can see that Barry ground the paint away to expose bare metal, and then welded his new square frame directly to the flat bar that was already there. So, the OEM seat mounts have flat bar welded to them, and then a square frame welded to that.
Barry felt that the existing flat pieces were welded well enough into the chassis that they would be a suitable mounting point for the new frame. It would’ve been extra hours to chop all that stuff out.
The other thing is that the OEM mounts are usually (!) safe enough for rollover and serious crashes in terms of being welded into the car. So, using them as a starting point can sometimes be easier because they are often flat in relation to a floor that is far from flat.
If I was starting over from a bare tub today, Barry probably would’ve opted to make two bars going from the side rail to the tunnel all nice and welded in and then build the seat frame on top of that, but that’s quite a bit of extra work. You can see from the picture on the middle of page 6 that the floor of the driver side is not flat. So to make it work you end up having to start cutting things out of the floor pan and that gets ugly quick.
I hope that clears it up!
Fat-fingered my own name. I miss the previous motoiq.com format where we would log in.
Yes, your reply does clear it up. I was thinking about the cross bars that you mentioned (side rail to tunnel), but your explanation makes it clear why it was done with the existing flat stock. Thanks for clarifying. Keep these articles coming! They’re great.