


Be very careful when adjusting the bars, as it’s very easy for them to be knocked over. I usually just lightly tap the ends with my fingers to move them left or right. After you’re done adjusting them left to right, I also recommend you recheck the front to back distance, as it may have been thrown off slightly.


I’ve had success with my alignment methods, however let’s discuss the disadvantages and advantages compared the alignment methods offered by the purpose made tools I mentioned in the beginning of the article.
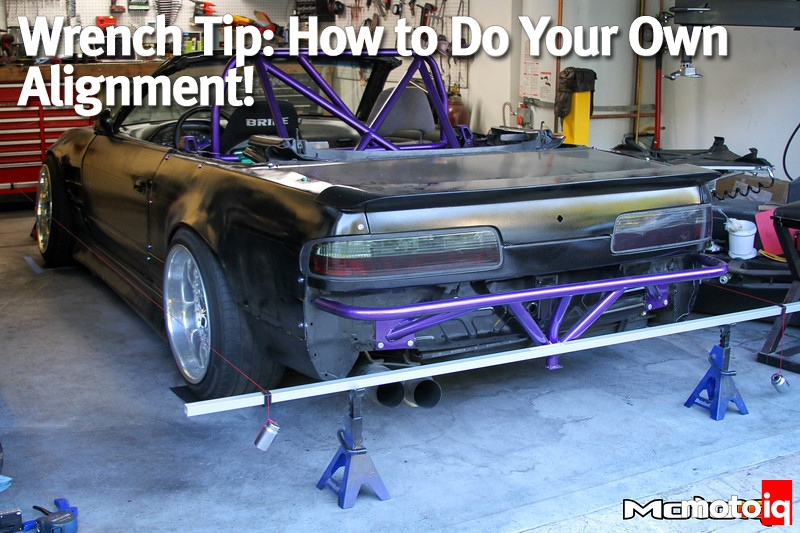
Watkins SmartStrings offer one distinct advantage over my string setup. They are mounted directly to the chassis, instead of resting on the floor like my setup. This means that you can move the car around and jack it up without throwing off your string setup. The downside of this, is that it relies on your chassis sheet metal being straight. This may cause issues, especially with drift cars where 90% of the time the core support is twisted and the trunk has been on a few drunken dates with the wall.
My camber gauge setup (the angle finder one) is on par with most camber gauges I’ve seen. The only difference is that you have to use the bubble level to ensure that the plane that you are measuring the camber in is perfectly perpendicular to the ground. Most digital camber gauges have that feature built in.
As far as the turn plates go, my turn plates have a huge advantage compared most other turn plates, simply because they double as slip plates. In fact, the only turn plates I’ve seen which also function as slip plates, are made by Longacre and cost $700, FOR TWO. Granted, these things probably have a lot less friction than my slippery tile, but I can slide my whole car sideways if I push on my bashbar, so I would consider that good enough. The one disadvantage that my tile has over most turn plates however, is that it can slip at high turn angles.
In the end, the accuracy of your alignment depends entirely on your meticulousness. If you take the time to make sure all your references are setup correctly, you can achieve extreme accuracy, even with the most basic tools. Achieving perfection can be a bit time consuming, but it’s definitely worth it. It usually takes me 4 hours to do a full front caster->camber->toe and rear camber->toe alignment. Of course there are a ton of other variables which affect your alignment, such as tension rod length, king pin inclination, lower control arm length, ride height and many more, but all them require special techniques to configure. Keep an eye out for future articles addressing some of these.

10 comments
Thanks for the guide but I have a problem.
I entered your shortened caster formula in Microsoft Excel, and got a totally different value.
=ATAN((SIN(RADIANS(B64))-SIN(RADIANS(C64)))/(2*SIN(RADIANS(B65)))
=0.05481679
Instead of 4.2
ATAN in excel returns the result in radians by default. Convert it to degrees by changing your formula to =DEGREES(ATAN((SIN(RADIANS(B64))-SIN(RADIANS(C64)))/(2*SIN(RADIANS(B65))))
This worked, thank you.
Great article and a very clear explanation of the string method for alignment but one query. You stress the importance of the bars being parallel to each other but presumably they don’t actually have to be square to the car – making a parallelogram out of the string and the bars is sufficient and they don’t have to make a rectangle. Would you agree?
This is correct, a perfect rectangle isn’t necessary. An isosceles trapezoid or parallelogram is okay. In either case, the string is spaced evenly from the hub cap on each side.
Thanks!
Thank you for the great article and explanation, you’ve inspired me to give it a try!
Is this an empirical formula? If not, could you provide the source? I’d like to know how it was derived.
You do know the average driver don’t want to change tires every 25 miles
Do you know the tires won’t wear out in anything close to 25 miles even with the most extreme racing settings?