,
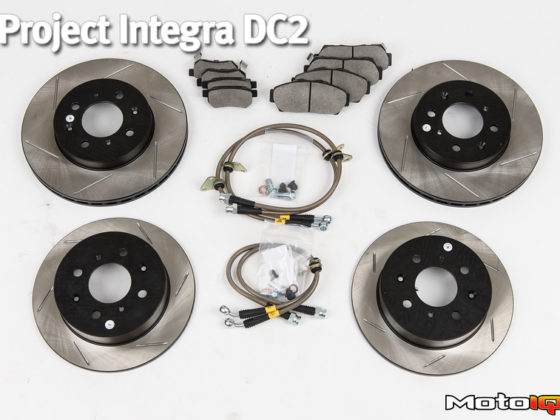
 New lines are included for the rear as well. The brass block replaces an existing fluid block in the rear that splits the brake fluid right to left.
Uprated Wilwood Hi-Temp 570 brake fluid is also included, along with DOT approved stainless steel brake lines. Brake fluid designed to work in high temperatures works perfectly fine in street applications as well and the stainless lines can greatly improve pedal feedback by reducing swelling that can occur on original, rubber lines. This is especially true if they are north of 20 years old like the ones on our Miata. Besides, 20 year old brakes lines on any track car is a bad idea. All it takes is for one to rupture leading to a very bad day, or worse, very last day. Combine these with high performance pads and oversized rotors that have excellent cooling capacity and you’ll have yourself a brake system that, in theory, works perfectly on the street and just as well on the track.
Enough with all the background, onward to the install to see how this theory works in reality!
 We start off as so many projects do, with wheels off, car on jackstands and documenting how much oil has leaked out of the car in the past few days.
 Taking the front calipers off is a matter of two bolts on the backside of the caliper bracket and then sliding it off of the rotor. Getting the rotor off of our car was a pain due to the rotor fusing to the hub by a little thing called rust. Luckily Mazda incoporates a threaded hole into the face of your rotor, right near where the lug holes are. Threading a bolt into this and then tightening with a rachet usually breaks the rotor free and then it can be removed. When the rotor is removed, you may have a rusty mess on your hands that will need to be cleaned to ensure the new rotor sits flush to the hub and doesn't wobble when it rotates.
 This is what the hub face looks like after you've thoroughly scrubbed the rust as best you can. It doesn't have to look as good as new, just smooth enough for the new rotor to sit flat against the hub surface.
 Before you get all anxious and install your fancy, new, DBA rotors, you must install the supplied Good-Win-Racing caliper brackets. These go on easily, using the existing OEM hardware you just removed from the caliper bracket and are torqued, with thread locking compound, to 40 ft-lbs. All torque specs are provided with the instructions, but may be different depending on the chassis code you have.
 Next, throw your rotor on and check for clearance with the dust shield. You can cut a lot or a little, depending on your preference. I went with just a little around the tie-rod ends and spun the rotor to make sure there would be no contact while driving. The caliper goes on next with the Good-Win supplied hardware, torqued again to 40 ft-lbs.