

I deliberated quite a bit on how to install these. I certainly couldn’t put them above the bumper because the doors would hit them. I didn’t want to drill holes in the hitch assembly itself because that seemed like really hard work. There happened to be some holes in the underside of the bumper already, and, while these are pretty widely spaced, they worked well enough. I was also concerned with heat from the exhaust on the light pod, but after driving around that turned out not to be a problem at all.
Edge provides a carriage bolt, a lock washer, and a standard nut. I added a fender washer, because I’m anal, and replaced the standard nut with a nylon lock nut. One thing to note: the carriage bolt that Edge supplies has a square shank that goes into a slot on the lamp’s mounting bracket. This square shank is held in place by the slot. But when you’re using a nylon lock nut, you put a lot of torque on the bolt in order to tighten it. Well, that slot on the lamp’s bracket is beveled just enough that you will end up spinning the square shank in the slot. So I had to pull down on the lamp while tightening the nut to keep the shank from popping out of the slot. If you were using the included standard nut you likely would not have this problem.
However, the nice thing about the slot is that it lets you move the lamp side-to-side on the bolt with only one hole being drilled. And, since it’s only one bolt hole, you can then rotate the bolt to point the light in the direction you want.

Once you have the EAS power switch plugged in, just like the backup camera, the Insight magically knows what’s up. When you enable this switch layout in the settings, you will see SW1 and SW2 available, since there is only one EAS power switch module connected.
Long pressing the switch brings up a configuration menu where you can rename the switch and change the color of the indicator. I called this simply “Back Light” since that’s exactly what it was. And, lo and behold, when you press the button, it turns on the lights. That was easy. Although maybe I should have named it “Backup Lights”…

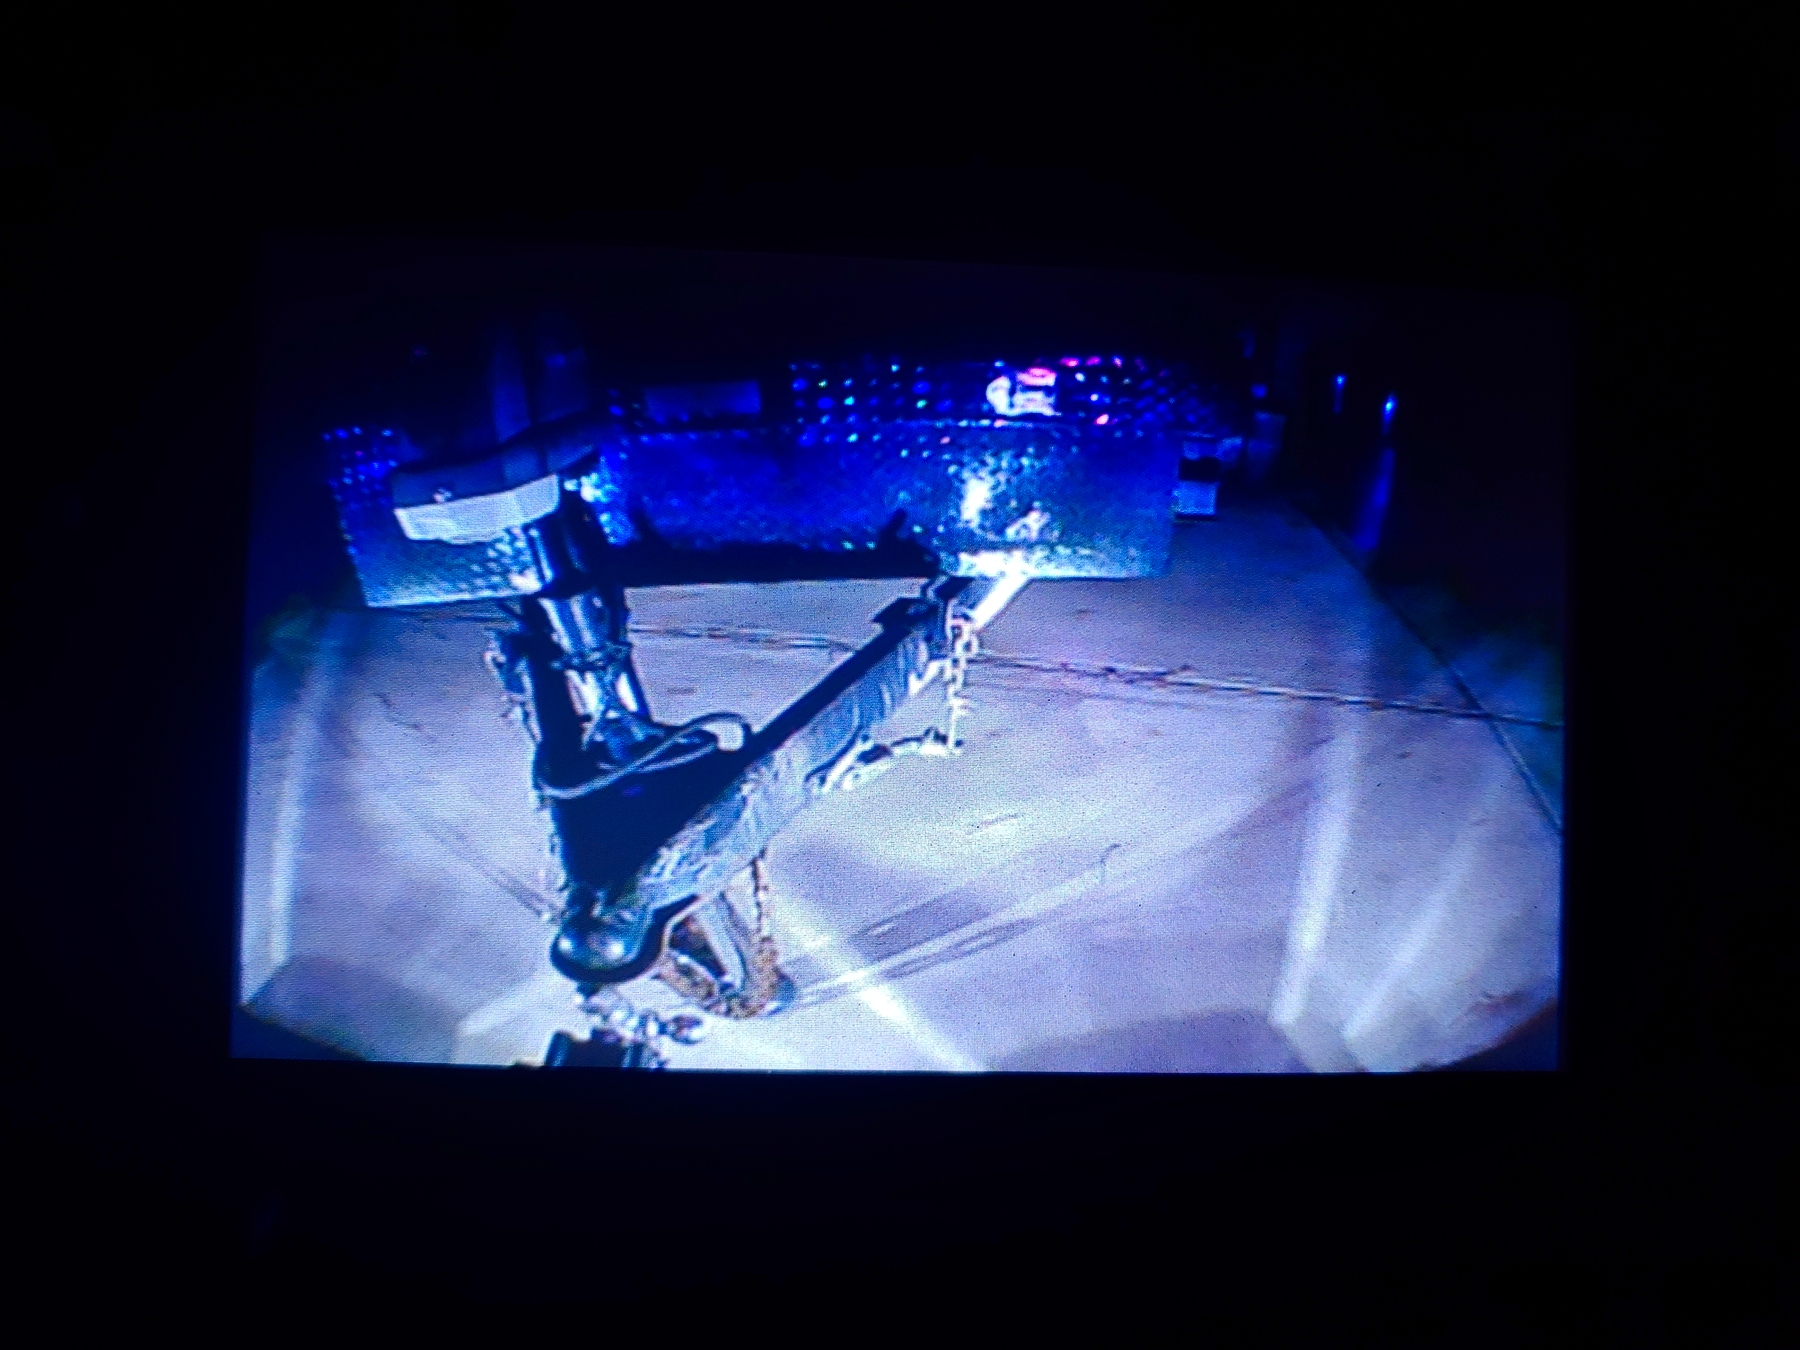
While these lights are called “wide shot flood” they do still cast a fairly spot-like pattern in their centers. I turned the two light pods inwards to make a V shape, trying to focus the most light directly in the center behind the van. This means that, if the van is lined up with the trailer, the lights will be shining directly on the trailer. This may require some adjustment to get exactly how I want it, but this first attempt worked really well.

You can see that the hitch is right underneath the trailer. This was the first time I ever backed up to the trailer after installing the backup camera, and I did it at night with the lights on. I nailed it on the first try.
I would say that this is hugely successful.
Now, we’re towtally ready.
Where’s that candy?
2 comments
you blanked out the back of the plate but then left the actual plate numbers visible on page 8
Yeah I realized I forgot to blur some of them a little bit late, and the way our photo system is set up I can’t delete photos, and it’s not hard for someone to just go to the whole photo gallery, so even if I added new blurred photos the old ones would still be there for now, so I just left them.
Thanks for noticing, though! =)