,
 Arcadia’s most important feature (for the purposes of our project) is its harness designer.
The harness designer is where you lay out connectors and wiring. This is where I spent countless hours.
If you are not a computer-savvy person, going down this path will be hard.
If you have zero experience using any kind of CAD-type software, going down this path will be really hard.
Let’s be clear for a moment. While I was an electrical engineer in college, I spent my time studying how to design microprocessors. Analog-type electronics was not something I spent a lot of time on, except for one project I did as a senior. I make no claim to being an expert in harness or electrical design, and I asked a lot of people an awful lot of questions. Ed Senf, MilSpecWiring, Cadonix, and others were immensely helpful.
Even though Cadonix provides an extensive help section in addition to YouTube videos, learning how to use complex software is challenging. There are a lot of moving parts. The process involved many firsts for me. I made many mistakes and had to do things over many times.
If you wanted to know how many hours I spent on design work alone, I couldn’t tell you. Why? Because I lost count after several days worth of time. I am pretty confident that between measuring, asking questions, thinking, drawing, re-drawing, designing and re-designing that I have 15 solid working days of time, if not more, in the harness design/planning portion of the project alone. That's 120 hours, and it's probably an underestimate.
Early on in this article series I made the following statement:
“There is a reason that harness work on mid-level race cars costs $10-$20,000 – not including the electronic devices!”
That reason is experience and time, my friends. Now that I know what I know, that dollar figure seems very reasonable. Let’s take a moment to go into what it’s like to design a harness with Arcadia before showing you the final designs.
 Designing a harness in Arcadia starts with dropping connectors onto the page.
Since all of your connectors are in your component database, it’s relatively trivial to pick and choose which ones you want. Cadonix was kind enough to pre-load almost all of Deutsch’s DT and DTM connectors into the system for me. You can also include information on the terminals that are associated with the connector, and Arcadia can even choose the right terminal (the thing at the end of the wire) for each cavity (connector hole where a terminal is inserted) based on the AWG/area of the wire that you are telling it to use. I manually added the mil-spec circular connectors that I needed for my project into the component DB.
 Next, you “connect” your connectors with a bundle.
By connecting two connectors with a bundle, Arcadia is able to figure out that the two connectors are… connected. Later, when specifying wires and connections, Arcadia can only send them through these bundles.
You can specify the length of the bundle, or Arcadia can figure out the length based on the scale of your diagram. Later on, Arcadia uses the bundles’ lengths in order to help you produce a wire cutting report.
 Once your connectors and bundles are laid out, you can start telling Arcadia about where wires go.
By editing the details of a connector, you can tell Arcadia that a specific cavity has a wire (from your component database, of course) that goes to a cavity on a different connector. Once you submit this information, Arcadia then automatically routes the wire through all the bundles to get to its destination. Think of your design like it is roads and Arcadia is Google Maps. It chooses the best route to get to the destination.
In the case where your harness is more complex (wait until you see the cabin harness!) and there may be multiple routes between the two destinations, Arcadia will ask you to tell it which is the “correct” route.
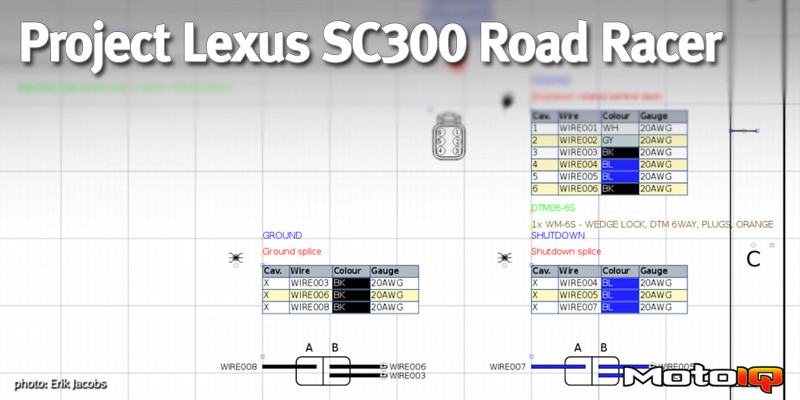
 There are four wires going between these two connectors.


