

With the pads leveled, make sure to mark the feet’s locations and then carefully move the scales out of the way so that you can bring the car back.
I made tape marks on the floor to make it easier for my helper (Ainsley) to know where the car’s wheels had to end up. I didn’t get the scale locations quite right the first time, so I X’d out the marks I shouldn’t use. Permanent marker seeps into the concrete and basically can’t be removed. I should probably use some kind of paint pen thing that would sit on the surface. Eventually, I’ll get the floors epoxied, and this will all be underneath and lost to the ages.
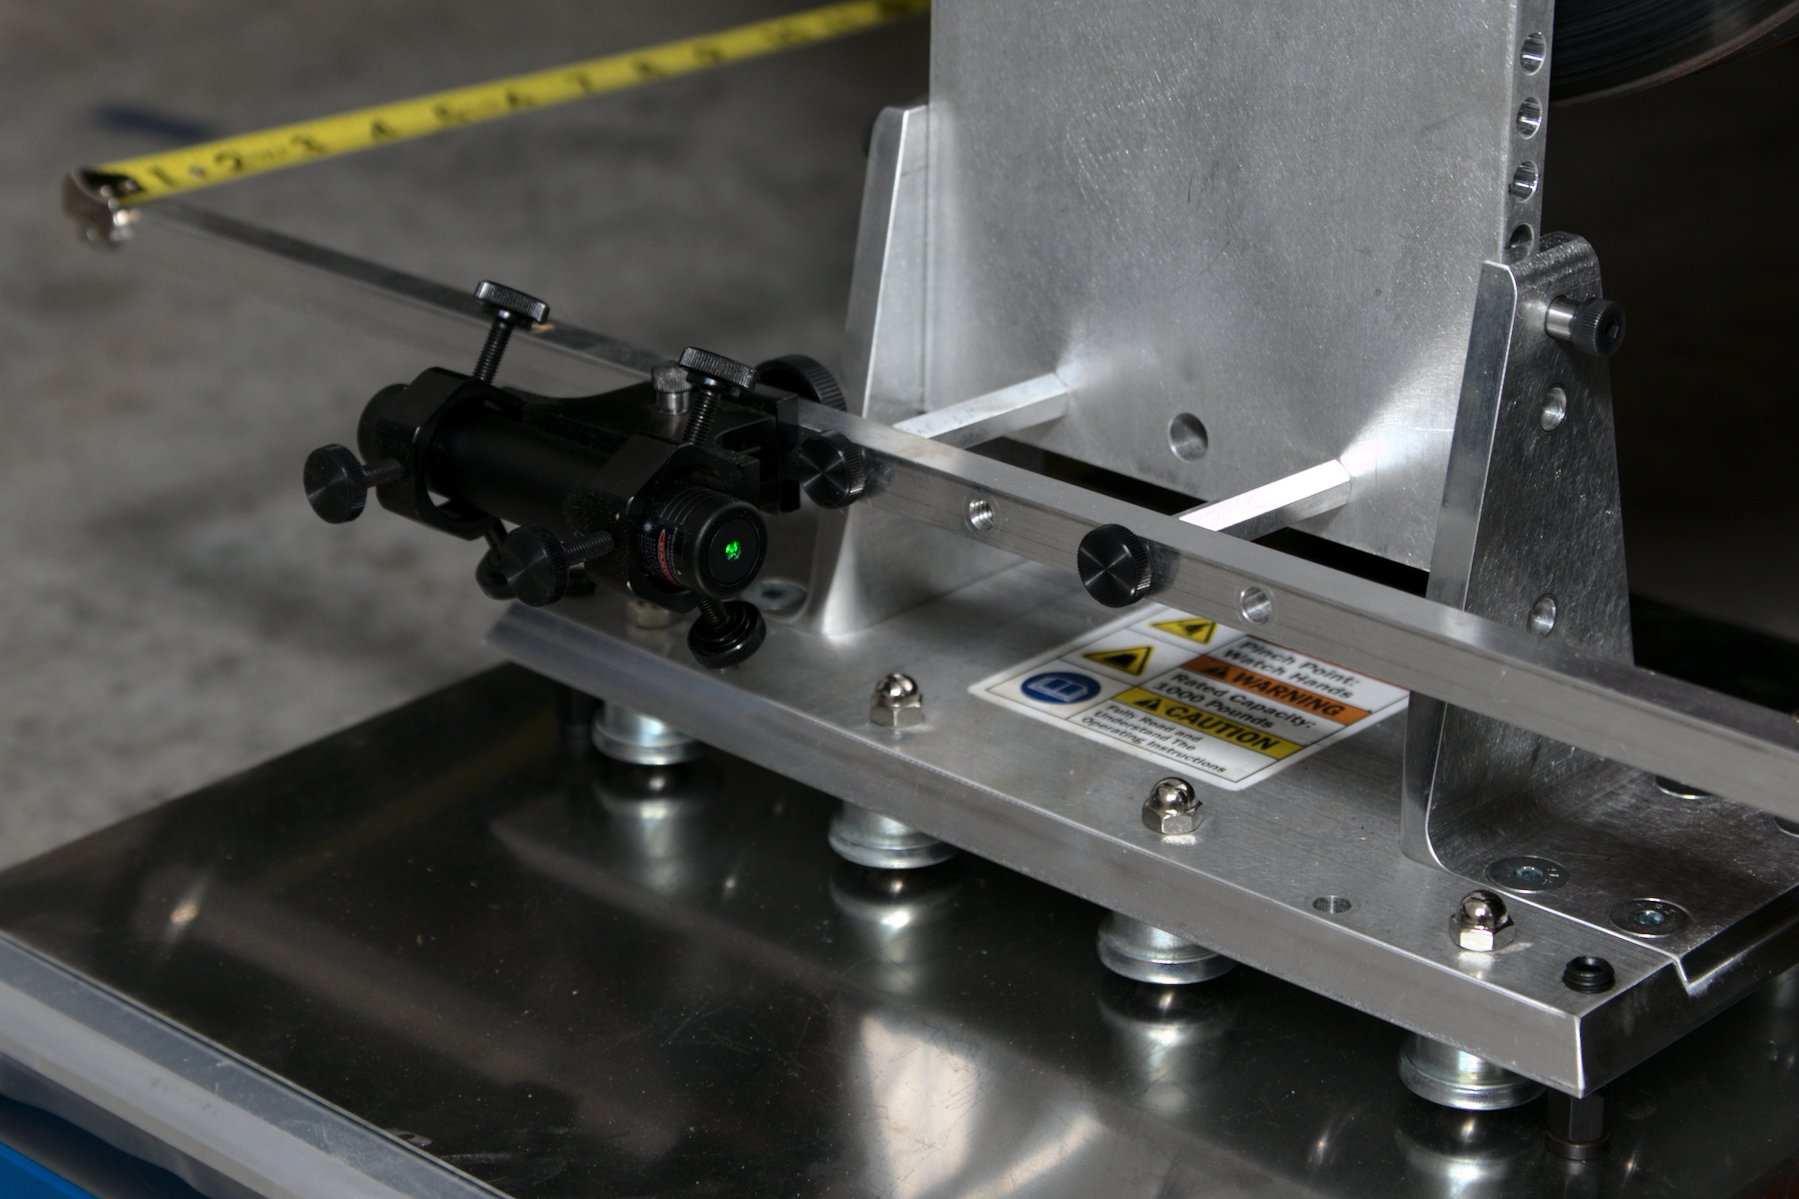
With the scale system ready to go, it was time to put together the rest of the alignment equipment before bringing the car back into place.

This is 2020, the year of all kinds of hell breaking loose. All of that aside, there is way better technology available for you to do alignments these days. This wouldn’t be an “ultimate” DIY alignment rig if we didn’t level it up a bit.

Hubstands allow you to align the car while the car is “on the ground.” They bolt to the hubs (the “hub” part of “hubstand”), and then the car rests on them (the “stand” part). Because the wheels and tires are off, you have much easier access to the various alignment adjustments. Because the car is still sitting on its weight, you correctly position the suspension at static height because the weight is compressing the suspension.
CSM Performance has been making these high-end hubstands for a little while now, and their attention to detail is outstanding. In fact, it’s so outstanding that this hubstand kit I’m assembling is already the old one, because they totally redesigned it to be even more awesome-r. First, I’ll show you how mine gets put together.

When was the last time you received a bound instruction manual with something? That’s just plain nice of them. Oh, a helpful digital PDF is available, too.
17 comments
palate / palette / pallet. Your “palate” is the roof of your mouth, and by extension, your sense of taste. A “palette” is the flat board an artist mixes paint on (or by extension, a range of colors). A “pallet” is either a bed (now rare) or a flat platform onto which goods are loaded.May 30, 2016
palate / palette / pallet | Common Errors in English Usage and …
brians.wsu.edu › 2016/05/30 › palate-palette-pallet
loaded
It’s funny – I looked at the spelling several times and was questioning it in my mind and didn’t bother to look it up. Thanks – I will go fix it 🙂
A fantastic article overall, too many years doing newspaper and yearbook edits make me notice things like that. Can’t wait to see the car driven in anger.
@DedBull I am always down for constructive/useful criticism. Good eye and thanks for catching it.
Next event is hopefully September 11th!
I really want this for Christmas!
@mike it’s frustrating at first but now that I am learning how to do everything it’s becoming more enjoyable. Especially now that it’s all dialed in. I have probably re-done the same thing three or four times, and I probably have a few more re-dos still to go.
Any chance of a full list of part numbers?
@atomic I added part numbers to the very last page just now. Good idea and thanks for asking for it.
I love this! Thanks for sharing.
Very impressive set-up. A question regarding the weight in the driver’s seat: for when you are corner weighing the vehicle, why not put some weight on the floor where your feet will be? You are clearly going to great lengths to maximize a lot of the systems on this car, so why not go this extra mile? Put a bathroom scale on the floor as far forward as the pedals/bulkhead will allow, sit in your normal driving position and read the scale to determine how much of your weight is not on your seat. Then, you can put some weight on the floor and put the rest in the seat. Necessary? No, but it’s more accurate than putting all of the weight in the seat. Just a suggestion.
@banfstc you are correct. I had sent that picture to a buddy who does drag car chassis set up (Menscer Motorsports) and he more or less immediately made the same comment. Since that photo I have been putting one of the 45# plates on the floor just in front of the seat. Ideally I need to get additional small weights to do as you suggest — “lay” my weight out more realistically where it goes. That being said, my guess is that my feet by the pedals weigh on the order of 20# at most as I sit pretty deep in the seat. I’d be curious to see what moving 20# from the seat to the pedal box area will do to the corner weights. At some point I’ll report back on that for sure!
Only half kidding. I am local and setting up my Lotus Esprit for track day fun. Adding lots of adjust ability to the suspension.
Would you let me come by and guide me while I corner weight and align the car with your awesome gear?
Happy to pay for the privilege. I realize it would probably take much of a day and it is a big ask.
If you use Facebook, send me a message. Happy to talk about it. One requirement is that your car needs to be 5-lug. If it’s not, it won’t work (I only have the 5-lug plate). If you don’t use Facebook you can email me using my full name (Erik M Jacobs) to Gmail
I’m always so confused by the enormous amount of time and money spent on this car. At this point, you’ve spent so much money on everything from overkill wiring to now pro-level alignment gear, you could have just bought a better starting point that didn’t need all this work. You’d also have more time behind the wheel where most of your lap time will come from. It’s a very thorough and impressive build, but it just doesn’t seem like the wisest route to a lap time.
@hayes
The journey is not about the destination.
I could have bought an MX5 global cup car. I could have bought a used TA2. I could’ve bought a used Porsche or sorted PCA or other race car. This is a horrifically expensive build.
Why? Why not?
I wouldn’t have learned anything about wiring, fabrication, or building cars. I wouldn’t have had any of the experiences I’ve had in the building of it.
Realizing your dream isn’t always about the end result. Sometimes it’s about the things that go into realizing the dream. Sometimes the dream itself loses its importance along the way, and it becomes all about the way and not the dream.
If I had a dollar for every time I wanted to set this car on fire and give up, I’d have lots of dollars. You don’t see the heartbreak or the misery parts on MotoIQ. You get the happy bits at the end of figuring it out. Sometimes you see the un-fun things, but it would be really quite boring.
I’m not much for the whole #builtnotbought movement, but there’s something to it. I often wish I could just send the car somewhere, stroke a check, and have it be a GT4-like end product.
But that’s not what’s happened. And I wouldn’t have it any other way.
So if I have a welded diff, this doesn’t work, right?
@nikita yeah it would be nearly impossible to get the lugs lined up so that the hub stands would both be vertical. You definitely need a diff that has SOME level of independent movement, or you would need to come up with an alternate mounting stand where you could attach something to the hub and then be able to rotate the actual stand to be in the proper orientation. It would be….. hard.