,
 All that goes in the engine bay?!
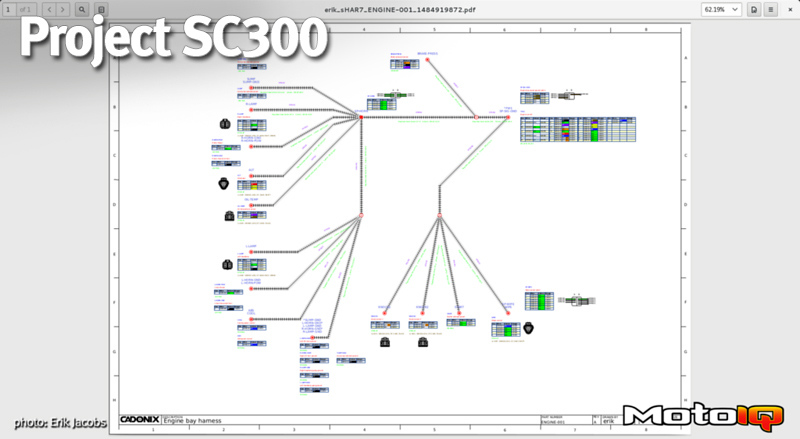
It looks like a really long harness for an engine bay, which isn’t that big. If you examine the harness design picture from earlier in this segment, you will notice that the harness is split into two main legs. Also, remember that we basically have power and signal circuits.
In the engine bay, there is a lot of electrical noise, and a lot of important signals. An alternator and an electric fan are basically two giant electrical noise generators, the fan moreso. The knock sensor signal is a really important one, so it’s not a good idea to send it near the fan. If you also remember, we have this harness entering the engine bay on the passenger side.
To make a long story short, if you imagine a wire going from the passenger side firewall by the cowl all the way around the front of the car and across the radiator support down towards the headlight, that’s actually quite a long length of wire. 9 feet, in fact.
How do you make it easy to twist a nine foot length of wire? Well, this is how.
 Filler wire costs a couple of bucks, but makes things much nicer.
Remember that whole lesson on concentric twisting? Well, you sometimes end up with not only multiple layers of wire, but sometimes you don’t have enough wires in the bundle to make a perfectly circular bundle. In these cases, you can use filler wires. These are just what they sound like — useless wires that simply fill out the bundle to make it circular and to make heat shrink work better over the bundle.
 One of the two legs coming off of the circular connector in the engine bay.
This is the main power distribution leg. If you refer to your handy dandy print copy of “Catalogue and handbook of electrical wires and cables” by American Steel & Wire Co (originally published in 1910), page 32, you will find a great chart showing exactly how many wires go in a bundle. Or you can just look on Google Books, here. This particular bundle ended up needing 6 filler wires to be nicely circular. You can also see that there are 2 layers if you look closely.
 Tie it up, and shrink it.
Once everything is nicely twisted, as before, it can then be tied/laced. Don’t forget, you want to use the smallest shrink that you can fit over a bundle so that it can recover (shrink) tightly. No one likes loose shrink. Sometimes getting the harness into the shrink can be like getting a dog in a bathtub. It takes a special finesse. You have to confuse the heat shrink and get the wires in when it isn't looking. Sometimes you have to yank and twist things. I read in one place that they solder a piece of welding wire to the loom and then that makes it easier.
However you do it, just get it done.
 Tee up the brake pressure sensor.
The brake pressure sensor is located right by the firewall, so the three wires that go to this sensor are teed out of the main harness bundle like so. Don’t accidentally shrink over all of them! That could be an expensive mistake. This three-wire bundle will get its own shrink and then we will put a nice piece of hard glueline over this small section to help keep it environmentally sealed. In a perfect (read: expensive) world we would use a special heat shrink “Y” boot here.


