
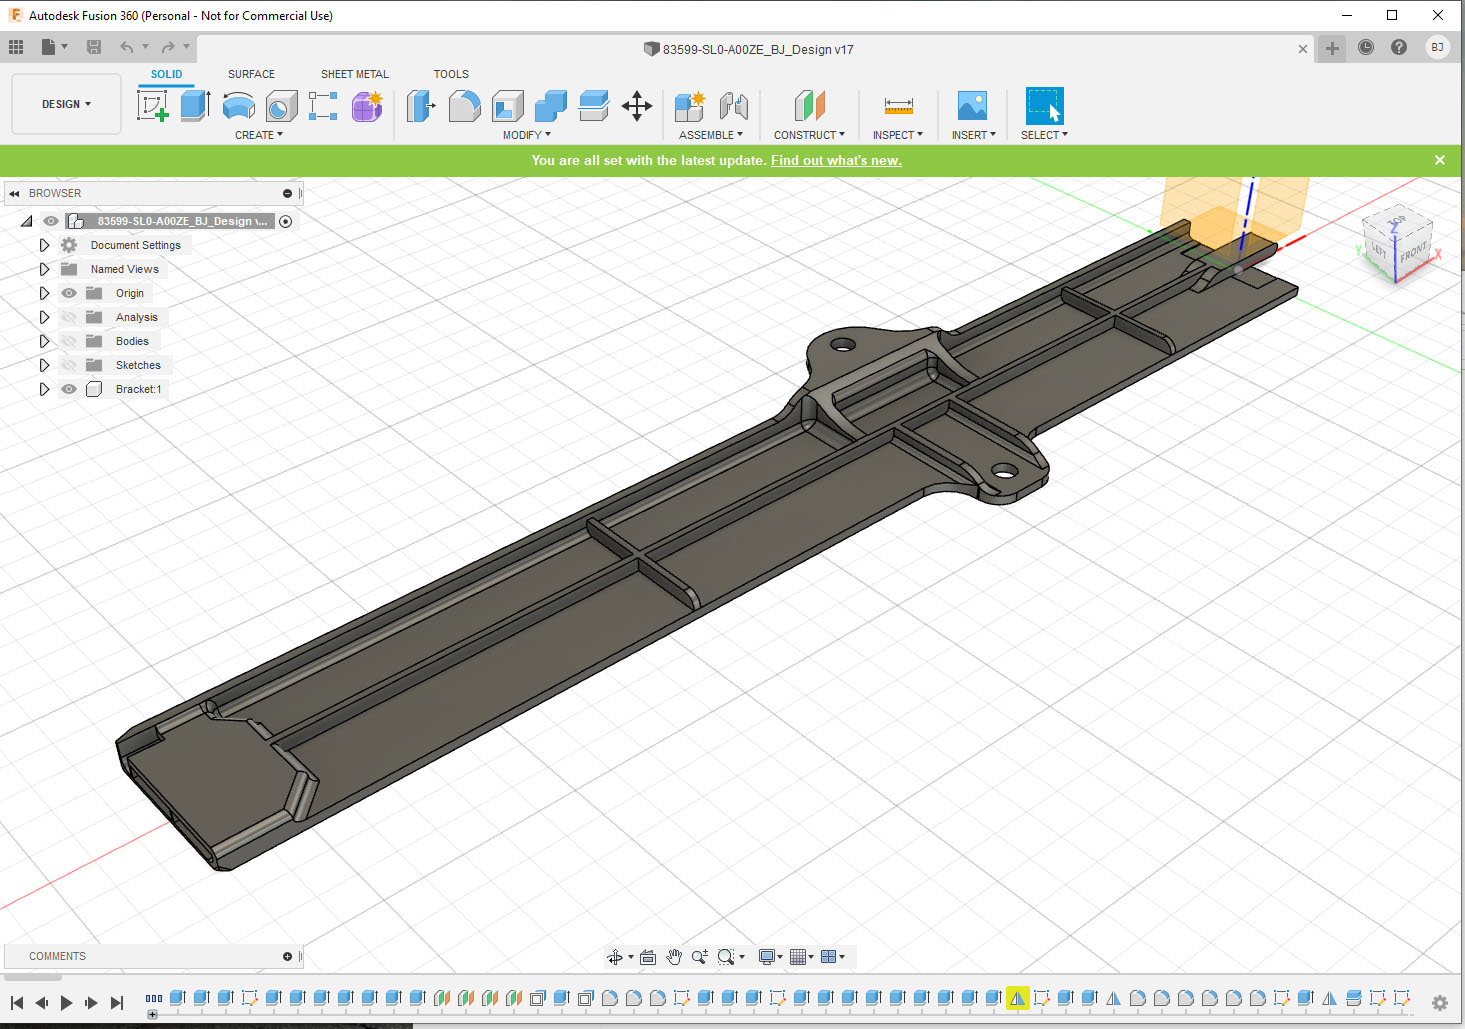

The interface where the center door frame locks into the front door frame is matched identically.

The 3d Printed piece fits perfectly.

With the design dimensions verified, the material itself had to be tested. PLA is the most common thermoplastic used today in 3D printing. However, it has a fairly low ‘glass transition’ point that was questionable to holding up to temperatures found inside cars on a hot day. Additionally, PLA does not hold up well to UV rays. Various test pieces were left outside on a 90* day, in direct sunlight for weeks on end and it was interesting to see PLA warp significantly. Carbon Fiber-infused PLA and PETG, as well as PETG itself held up great to UV rays and this heat.

Each setting from the build plate temperature, printer temperature, speed, layer height, retraction, etc.. all play a part in the finish product’s texture, dimensional accuracy, strength, and stiffness. Countless destructive tests of multiple brands of PLA and PETG were tested and compared to the strength of the OEM ABS plastic. Yes, OEM pieces were destroyed to ensure the new printed parts were stronger.

From this testing, slight changes in the design were necessary for use with the selected print material to surpass the strength and stiffness of the OEM part. The tab area was made thicker with thicker bracing, and the radiused edges were changed along with the shape of the interlocking ‘tabs’.

7 comments
So what type of material did you use for the final print
I tested a bunch of different materials, different brands, and countless print settings of each. I ended up with one of the PETG filaments.
Great article very informative!
What would you have done if you didn’t have friends at Mountune to use their FaroArm’s Prizm Laser?
Probably waited for my friend with a light scanner, or paid for one of the many places that do laser or light scanning. Or do more research looking into affordable scanning solutions.
Nice article!
I’ve been 3D printing parts for my cars for a few years now and one thing I’ve found is that ribs and walls can be made relatively stronger and stiffer for a given mass just by making them thicker but with a low infill percentage.
Obviously there are limitations with package and if you need another part of the print to have higher infill, but it can be helpful.
I have been playing with an ender 3 v2 for various projects lately and what you can do with these is really impressive. I built an enclosure for it and various upgrade parts. Still playing with PLA+, but i have some PETG to use for automotive stuff.
If you have not, remember to tape the +5V pin of the USB cable from your pi to the printer, as the printer will draw voltage from there if you cut its power. And when it tries to power 24v fans with that little 5V pin, it may burn some stuff. The 5V pin is the rightmost pin when you look at the port, placing the filled part toward the ground.
Now after going through all the R & D, do you plan to sell these pieces? Would it worth your time factoring in time and material cost?