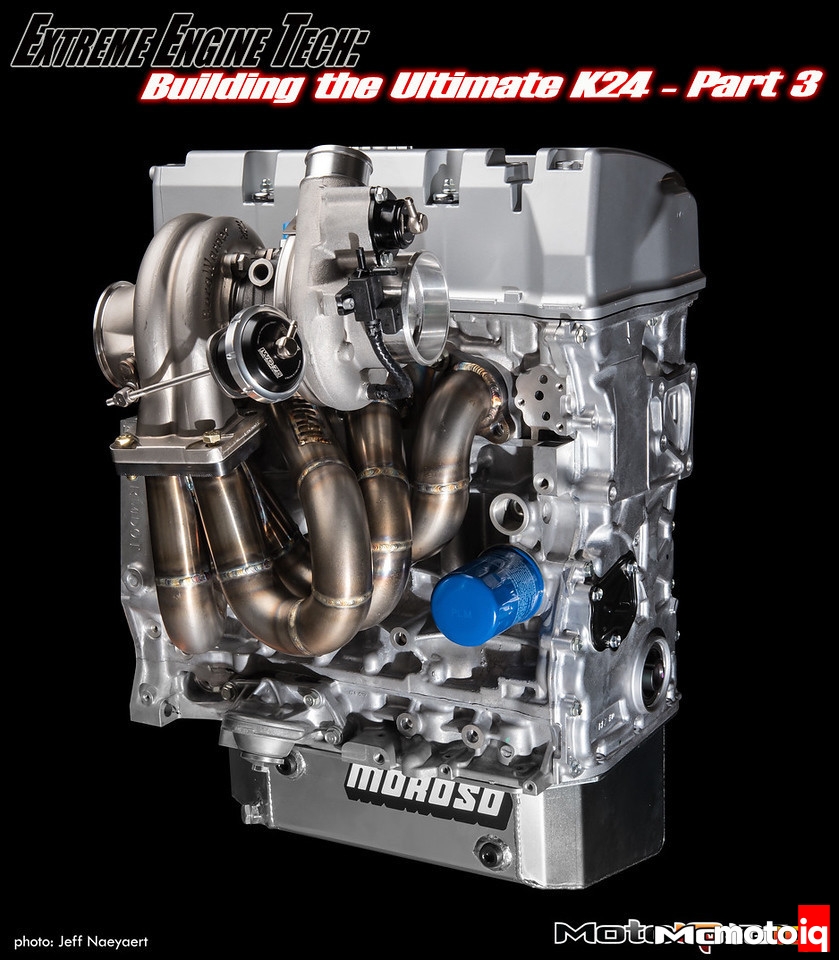
We have been working with Motovicity for the last few weeks to demonstrate the building of a potent Honda K24Z7 motor, built completely from in stock and off the shelf parts available from Motovicity themselves. We chose the K24Z7 as it is currently the OEM engine for the Civic Si and is relatively difficult to modify due to it’s emissions bound cylinder head. Our goal is not to build a dyno queen or a drag motor but to build a strong K motor all from off the shelf parts with the intention of getting the most power possible on pump gas with the widest most useable powerband.
In the last two editions of our series we focused on the cylinder head and bottom end of our K24Z7. We swapped to an earlier model K20Z3 head to get Vtec on the exhaust side and a removable exhaust manifold. Installed Skunk2 camshafts, Kelford valvesprings and Supertech valves better suited for turbocharged use. For the bottom end we added lower compression JE pistons and stronger K1 rods, removed the problematic balance shafts while we were in there.
Now it’s time to finish off our motor.
 Starting off with the good stuff, we chose a Borg Warner EFR 76/70 Turbo with a divided .94 A/R T4 flange exhaust housing. The Borg Warner EFR is a highly advanced turbo with a long list of features that a turbo geek will drool over. The turbine is super lightweight titanium aluminide that greatly reduces turbo lag. The turbine wheel is a high flowing mixed flow design which takes some of the efficiency benefits of a radial flow turbine and combines that with the high flow capacity of an axial flow turbine. The turbine spins on dual ceramic ball bearings which reduce lag and transient response. The turbine housing is made of investment cast stainless steel which is both lightweight and helps efficiency due to its low thermal conductivity (about half that of cast iron) The compressor wheel is a highly efficient forged billet extended tip design that also tends to reduce lag. To top it all off, the compressor housing is a ported design that gives the turbo a large degree of surge resistance. The Borg Warner EFR has about every trick feature you could think of or want.
 A twin scroll turbine housing uses pulse conversion to help speed spool. Cylinders 1-4 and 2-3 are paired together on ether side of a divided turbine housing. This hits the turbine with 4 discrete power pulses which helps spin it up faster, up to 20% faster. A divided housing can also have Volumetric Efficiency advantages as it separates adjacent cylinders so cross contamination of cylinders by reversion is more difficult on overlap.
 Borg Warner makes medium frame turbos with large internal wastegates. We like this because it simplifies packaging by eliminating the need for an external wastegate. This is particularly cool on a twin scroll turbo as these often have to have dual wastegates. Keeping things simple makes for greater reliability. The exhaust housing has good wastegate port placement and good diffusion on the exducer. The housing also uses a single bolt V-band to attach to the downpipe.
 You can see the extended tip billet compressor wheel here. Extended tip wheels tend to make boost at a lower shaft speed and are a little less laggy. Billet wheels are more efficient because their superior strength means that the blades and the center hub area can be made thinner for better aerodynamics, improving flow and efficiency. The annular groove just behind the compressor wheel inducer is the recirculation port for the port shroud compressor housing. When the compressor approaches surge, the air that is starting to back up in the compressor flows through the slot and recirculates out the big vents just in front of the inducer. This bleeds off the excess mass flow and mitigates surge.


13 comments
On part 3 page 5 timing chain is fitted wrong. Timing marks are not correctly aligned and timing is not set properly . Little dots on cam gears should be between gold chain rings. Dashes on intake and exhaust cam gear should point to each other!
We were just doing a dummy fit up to check the tensioner so of course, we didn’t assemble the engine that way. Good catch though!
I appreciate the time, effort and great photos in this article guys, but there are some serious holes in the story here that need to be addressed. RBB valve cover to R40 timing cover does not seal. PRB non balance shafted oil pump conversion requires blocking the old feed port on the block beneath the oilpan. Youve used the incorrect chain tensioner for the r40 block as the old steel bodied tensioners have a slightly different oil port location. Moroso pan doesnt have provisions for the lower torque mount. Although you used aftermarket pistons maybe some measurements on a stock piston compression height and how that clears with these heads. Maybe spotlighting some of these details maybe help to better guide your reader base in tackling some of the hurtles of the R40 4-port conversion. Either way, great content and thanks for your contribution to our industry.
Its been a long time since we wrote the article but I am pretty sure we covered how to do that stuff in the other parts of the series. I know we did the balance shaft and cover stuff. Pretty sure we did the tensioner in other parts. I remember getting the new tensioner.
If there is a revised article beyond this “part 3” that covers these issues, I wasnt able to find it. Is it under this engine build article or something different?
I think there was up to a part 5. You know what, I think I covered this stuff more in our NA build. I am getting things confused. It’s been years!
Were you able to provide the link to the other two parts 4 and 5?
I was wondering why the z3 head gasket was used vs the k24z7 head gasket?
I think either will work.
No, the k24 bore size is larger, must use k24 hasket
It is 87mm
Great article, Im wondering what engine wiring harness would be used for this build to go back in a 2012 civic si coupe?
TIA
Steve
Hasport or Rywire make conversion harnesses.